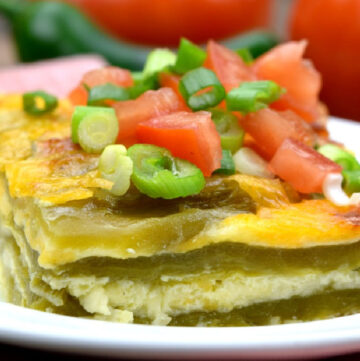
Chiles Rellenos Casserole
If you like chiles Rellenos, this easy-to-make chile relleno casserole is for you! This dish has all the flavor of a chile relleno without all the mess!
Servings 4 -6 servings
Calories 803kcal
Ingredients
- 4 (7 ounce) cans whole green chiles, drained
- 8 ounces Monterey jack cheese, shredded
- 8 ounces cheddar cheese, shredded
- 5 large eggs
- 1 1/4 cups whole milk
- 1/4 cup all-purpose flour
- 1/4 teaspoon salt
- 1/4 teaspoon black pepper
- 1/2 teaspoon baking powder
Toppings:
- 1 cup enchilada sauce, warmed
- 1 cup sour cream
- 1 cup cilantro roughly chopped
- 1/2 cup green onions thinly sliced
- 2 medium tomatoes, diced
Instructions
- Preheat the oven to 350°F. Spray a 9 X 13-inch baking dish with nonstick cooking spray.
- Remove chiles from the can (4 cans), split in half lengthwise, remove seeds, and rinse. Lay on paper towels and pat to dry.
- Add eggs (5), milk (1 1/4 cups), flour (1/4 cup), salt (1/4 teaspoon), pepper (1/4 teaspoon), and baking powder (1/2 teaspoon) to a medium bowl and beat until smooth.
- Arrange a single layer of chiles in the prepared baking dish, cover the bottom completely. Sprinkle 1/3 of each cheese evenly over peppers. Repeat with two more layers. Pour egg mixture over chiles.
- Bake, uncovered, 30-40 minutes, or until center is set. Let stand 10 minutes before cutting.
Notes
- Chiles: Authentic chiles rellenos are made with either Anaheim or Poblano chiles. This recipe uses whole, canned Ortega chilies—those are Anaheim chilies. Conveniently, they come already charred and peeled in a can. Peeling and charring is one of the most time-consuming parts of a chile relleno dish, so having it pre-done is a real-time saver.
- Anaheim chilies are the mildest of the chilies; they have a wonderful, slightly sweet taste. All you need to do is remove them from the can, pat them dry with a paper towel, and split them in half lengthwise to remove the seeds. Then… enjoy!
- If you like things on the spicy side, feel free the leave the seeds in. My family likes sweet chiles without seeds, so that’s what I serve.
- Fresh vs. Canned: If you want to try this recipe with fresh chilies you absolutely can! You’ll just need to do that charring and peeling on your own. Traditionalists will insist on using fresh chilies in this recipe. But I just think using the Ortega chilies from a can yields just as delicious as a casserole as fresh chilies—and the canned chilies are way easier.
- If you want to go for the fresh route, here’s the basic process:
-
- Place the chiles directly on an open flame, like a gas burner or a barbecue. You really need that open flame to correctly charr the chile. Turn the pepper every minute or so, never letting it sit too long on one side. The skin on the chile will begin to blacken and blister—you might occasionally hear a popping sound.
- When most of the skin is covered with black areas or blisters, place the chile in a plastic bag and seal it. As the peppers sit in the bag, the skin will steam and, after a few minutes, you can easily peel them. Using this method, you should generally only need your fingers for the peeling process.
- Once peeled, rinse the peppers under running water and pat them dry.
- Split the chilies in half lengthwise and remove the seeds (or leave them in for a spicier dish!)
Nutrition
Serving: 1serving | Calories: 803kcal | Carbohydrates: 32g | Protein: 43g | Fat: 57g | Saturated Fat: 31g | Polyunsaturated Fat: 3g | Monounsaturated Fat: 15g | Trans Fat: 0.02g | Cholesterol: 383mg | Sodium: 2307mg | Potassium: 848mg | Fiber: 6g | Sugar: 12g | Vitamin A: 3381IU | Vitamin C: 81mg | Calcium: 1123mg | Iron: 5mg