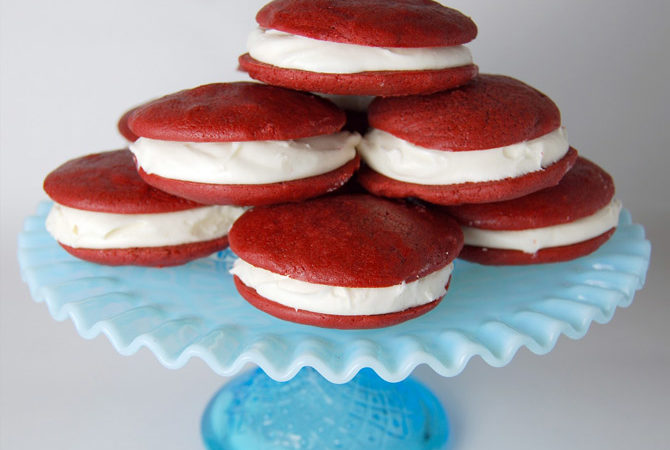
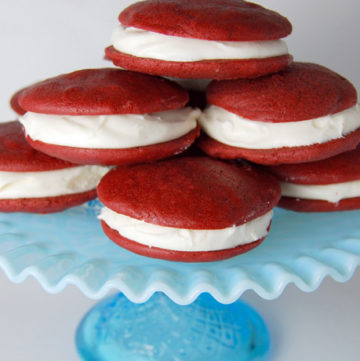
These Red Velvet Whoopie Pies are a red velvet dream come true! Two cookies with fabulous red velvet flavor and the perfect cream filling!
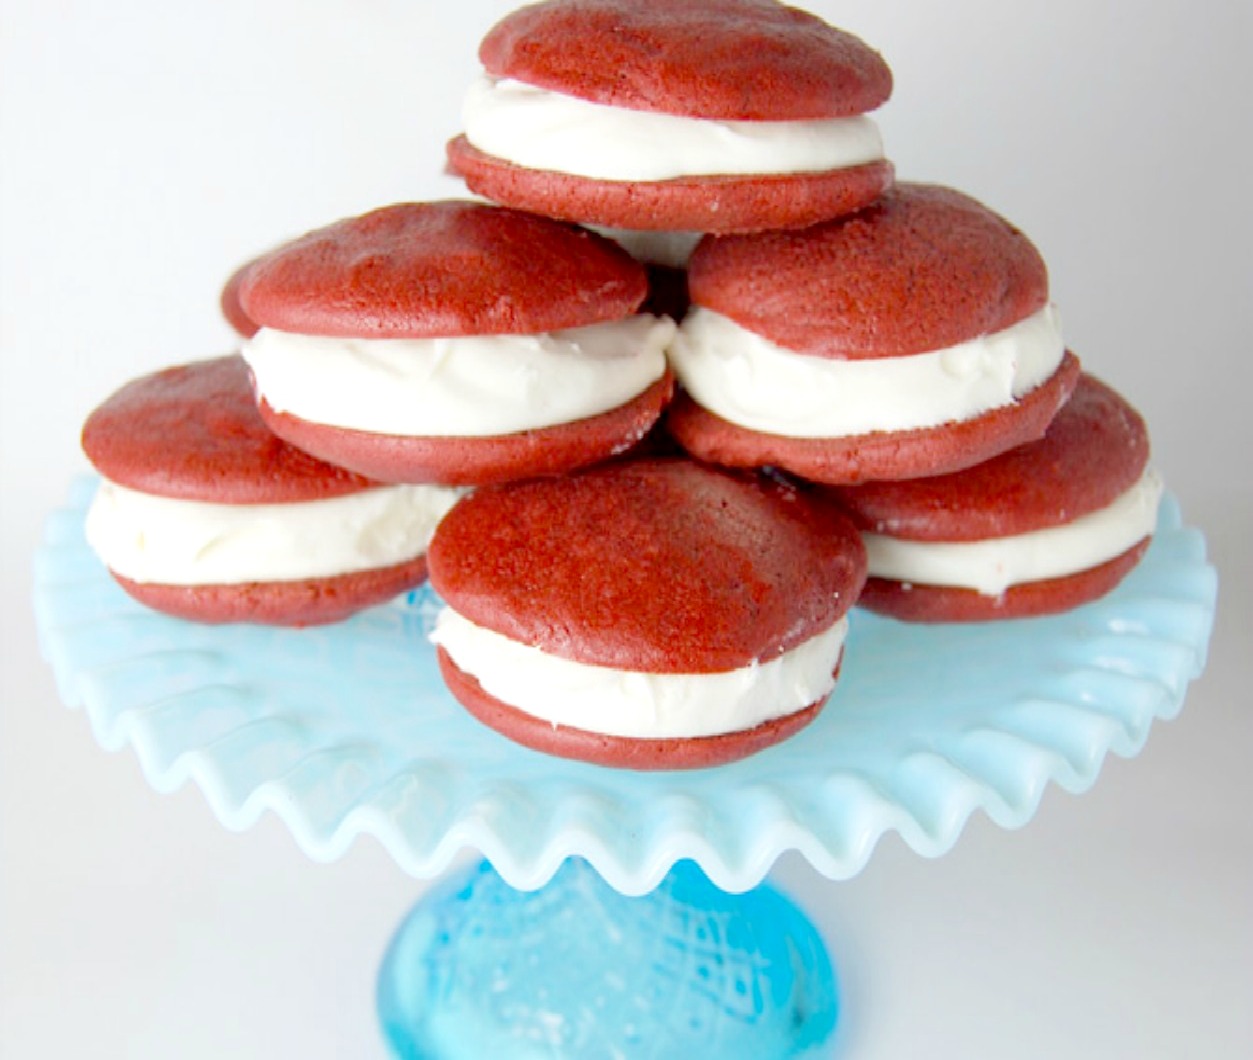
Red Velvet Whoopie Pies! Does it get any better than that? Not for me baby.
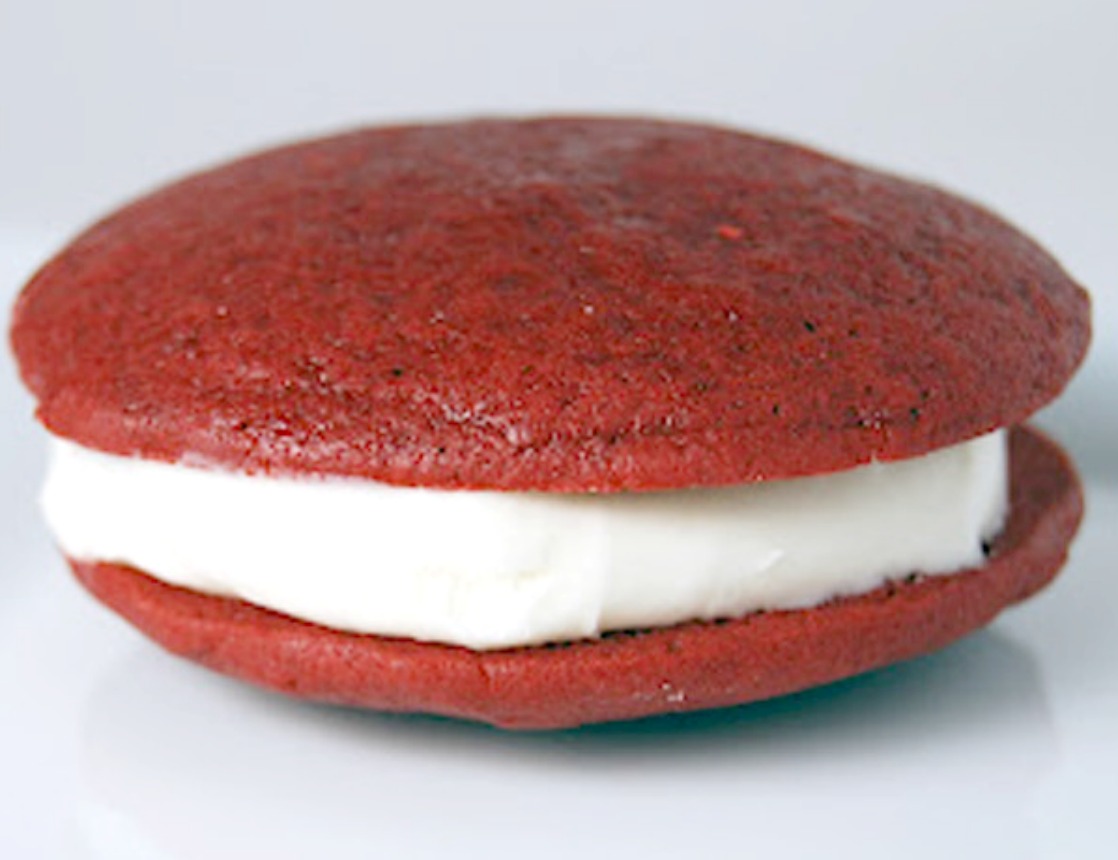
The cookie portion of this whoopie pie has a lovely soft and tender texture. It also had more chocolate than a lot of Red Velvet treats which make me love this recipe even more. It has three types of chocolate in it. I mean, which other Red Velvet Whoopie Pie recipe can say that? It has a little milk chocolate, semisweet chocolate and cocoa all mixed together to create the perfect chocolate flavor. The cookie batter is very thick so I suggest you use a stand-up mixer.

The cream cheese filling was perfect. I used one teaspoon of vanilla extract instead of the vanilla bean. These where AMAZING!
They’re perfect to make for a special Christmas treat or for your special Valentine.
Red Velvet Whoopie Pies
Ingredients
Cookies:
- 1 Ounce Semi-Sweet Chocolate Chopped
- 1/2 Ounce Milk Chocolate Chopped
- 12 Ounces Unsalted Butter Melted
- 1/2 Cup Sour Cream
- 2 Large Eggs
- 1 1/2 Teaspoons Apple Cider Vinegar
- 1/2 Teaspoon Vanilla Extract
- 1 Tablespoon Red Food Coloring
- 2 1/4 Cups All Purpose Flour
- 1 Cup Sugar
- 1/4 Cup Unsweetened Cocoa Powder
- 2 Teaspoons Baking Powder
- 1/4 Teaspoons Baking Soda
- 1/2 Teaspoons Salt
Filling:
- 4 ounces Cream Cheese, at Room Temperature
- 3 Tablespoons Unsalted Butter at Room Temperature
- 2 1/2 Cups Powdered Sugar Sifted
- 1 Teaspoon Vanilla Extract
Instructions
- Make the cookies: Preheat the oven to 375 degrees F. Line 2 large baking sheets with parchment paper or Silpats.
- Combine the semisweet and milk chocolate in a microwave-safe bowl and microwave at 50 percent power until melted, about 2 minutes. Whisk until smooth.
- In the bowl of a stand-up mixer mix the melted butter, sour cream, eggs, vinegar, vanilla and food coloring just until combined.
- In another bowl, whisk the flour, sugar, cocoa powder, baking powder, baking soda, and salt.
- Add the flour mixture to the butter mixture in four equal batches, mixing each batch completely before adding the next. Stir in the melted chocolate.
- Scoop batter, using a medium cookie scoop (I leveled the scoop off), onto the prepared baking sheets. Bake until the cookies spring back when lightly pressed, 8 to 10 minutes. Let cool 10 minutes on the baking sheets, then transfer to racks to cool completely.
- Meanwhile, make the filling: Beat the cream cheese and butter with a mixer until smooth. Beat in the confectioners' sugar and vanilla extract.
- Sandwich a heaping tablespoonful of filling between 2 cookies; repeat with the remaining cookies and filling. Refrigerate 30 minutes before serving.
- Note: These obviously need to be stored in the fridge because of the cream cheese. I thought they tasted significantly better as they came to room temp.
Fans Also Made:
None found
Nutrition
Source: Food Network
Reader Interactions
Comments
Trackbacks
-
[…] is totally optional. While testing this sweet oopsie bread recipe, all I could think about was my Mom’s red velvet whoopie pies! Hence the cream cheese frosting — although not the same, this oopsie […]

I’m not sure if I’m missing something but in your directions you say to mix cream cheese with the butter but where you have the recipe it only lists butter and not the cream cheese so can you tell me up how much cream cheese? Thank you.
Hey Christina. It’s 4 ounces of softened cream cheese. <3
These look wonderful. I just tried red velvet tonight and it was wonderful. Can’t wait to make these!
These look so delicious. And I love your cookie to filling ratio. I can never get enough filling in whoopie pies.
Thanks for stopping by my blog! I haven't gotten the chance to make whoopie pie but yours look so delicious. Great picture!
i made some of these last week! they were phenomenal!
Looks amazing!! All of that filling is incredible!
i love some whoopie pies! i haven't made them myself yet but, this seems like a good reason to try it out! thanks for sharing 😀
-meg
@ http://www.clutzycooking.blogspot.com
@ http://www.myscribblednotebook.blogspot.com