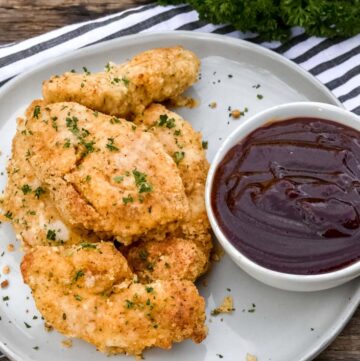
Bisquick Chicken Fingers
These delicious Bisquick chicken fingers can be ready and on your dinner table in just 20 minutes! Wonderful flavor, crispy texture, and tender chicken!
Servings 9 pieces
Calories 233kcal
Ingredients
- 2/3 cup Bisquick
- 1/2 cup grated Parmesan
- 1/2 teaspoon garlic salt
- 1/2 teaspoon paprika
- 1/4 teaspoon black pepper
- 3 boneless skinless chicken breast halves cut crosswise into 1/2-inch strips
- 1 large egg, lightly beaten
- 3 tablespoons butter melted
Instructions
- Preheat oven to 450°F (232°C). Line a baking sheet with foil or parchment then spray with cooking spray.
- In a 1-gallon resealable plastic bag, combine Bisquick (2/3 cup), Parmesan (1/2 cup), garlic salt (1/2 teaspoon), paprika (1/2 teaspoon), and black pepper (1/4 teaspoon). Close the bag and shake to combine the ingredients.

- Dip half the chicken strips in the egg mixture, shaking off the excess egg. Place chicken in Bisquick mixture, seal the bag, and shake to evenly coat. Place coated chicken on the prepared baking sheet.

- Repeat with remaining half of the chicken.

- Drizzle melted butter (3 tablespoons) over chicken strips.

- Bake for 12 to 14 minutes, carefully turning after 6 minutes with a spatula, or until there is no longer pink in the center of the chicken.
Notes
- Don’t overcrowd the pan. If the chicken strips are too close together, they’ll steam instead of crisp. Use two pans if needed!
- Want a little spice? Add a pinch of cayenne or a dash of hot sauce to the egg mixture for a subtle kick.
- Make it ahead: You can prep and bread the chicken a few hours in advance, store in the fridge, and bake right before serving.
- Crispier finish: After baking, pop them under the broiler for 1–2 minutes for extra crunch — just keep a close eye so they don’t burn.
Nutrition
Serving: 1piece | Calories: 233kcal | Carbohydrates: 6g | Protein: 19g | Fat: 14g | Saturated Fat: 6g | Polyunsaturated Fat: 2g | Monounsaturated Fat: 5g | Cholesterol: 84mg | Sodium: 425mg | Potassium: 203mg | Vitamin A: 313IU | Calcium: 78mg