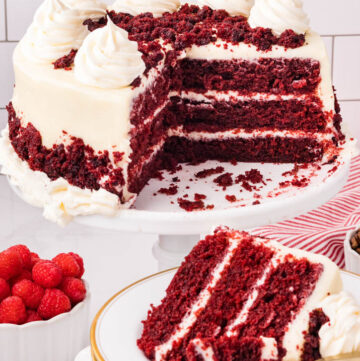
Red Velvet Cake
Red velvet cake is ultra moist, cocoa-kissed, and topped with tangy cream cheese frosting—an easy, bakery-style classic your family will crave.
Servings 8 - 12 servings
Calories 1093kcal
Ingredients
Dry Ingredients
- 2 1/2 cups all-purpose flour
- 1 1/2 cups granulated sugar
- 1 teaspoon baking soda
- 1 teaspoon fine salt
- 3 tablespoons unsweetened cocoa powder, (bloomed — not added to the dry bowl)
- 1/2 teaspoon espresso powder, (bloomed — not added to the dry bowl)
- 1 tablespoon hot water
Wet Ingredients
- 1 1/4 cups vegetable oil
- 1/4 cup unsalted butter melted and cooled
- 1 cup buttermilk well shaken + at room temperature
- 2 large eggs at room temperature
- 1 tablespoon seedless raspberry or strawberry jam
- 2 tablespoons (1 ounce) red food coloring
- 2 teaspoons apple cider vinegar
- 1 tablespoon vanilla extract
Frosting
- 2 (8-ounce) boxes cream cheese, softened
- 1 cup unsalted butter, softened
- 4 cups sifted confectionsers' sugar
- 1 teaspoon vanilla extract
Garnish
- pecans
Instructions
- Oven: Preheat the oven to 350°F (177ºC). Place a rack in the center of the oven.
- Mix the dry ingredients: In a large bowl, whisk together the flour (2 1/2 cups), sugar (1 1/2 cups), baking soda (1 teaspoon), and salt (1 teaspoon) until well combined. (The cocoa powder and espresso powder are bloomed separately in the next step).
- Bloom the cocoa: Stir the cocoa powder (3 tablespoons) and espresso powder (1/2 teaspoon) with 1 tablespoon hot water and mix until smooth and paste-like. Set aside.(You will add this below to the wet ingredients before adding the dry).
- Combine the wet ingredients: In a separate large bowl, whisk together the oil (1 1/4 cups), melted butter (1/4 cup), buttermilk (1 cup), eggs (2), jam (1 tablespoon), red food coloring (2 tablespoons), apple cider vinegar (2 teaspoons), and vanilla (1 tablespoon) until completely smooth.
- Add the bloomed cocoa paste. Whisk the cocoa-espresso paste into the wet mixture until fully incorporated.
- Combine dry and wet ingredients: Add the dry mixture to the wet mixture. Mix on low speed (or whisk gently by hand) just until the batter is smooth. Do not overmix.
- Prep the cake pans (right before filling): Coat the sides and bottom of three 9-inch round cake pans with a flour-based baking spray (such as Baker’s Joy).Line each pan with a parchment round, pressing it flat. Lightly spray the parchment as well to ensure the layers release cleanly.
- Pan Management (Critical for 3 Even Layers)Bake on the CENTER rack only. Red velvet browns fast; top-third baking causes doming and dark edges.Do NOT crowd the pans. Keep 2 inches of space between pans and oven walls for proper airflow.Rotate pans only once.Turn front-to-back halfway through baking (around 10–12 minutes) IF your oven has hot spots.If using dark nonstick pans: Reduce oven temp to 335°F to prevent over-browning.
- Evenly divide the batter among the three prepared cake pans. Bake for 18–22 minutes, or until the centers spring back lightly when touched and a toothpick comes out with a few moist crumbs (not fully clean).Do not overbake — red velvet dries quickly!
- Cool the cake layers: Run a thin knife around the edges to loosen. Invert each cake onto a plate, then flip again onto a cooling rack so the rounded tops face up. Cool completely before frosting.
- Make Frosting: In a medium mixing bowl, using an electric mixer beat together cream cheese (2 boxes) and butter (1 cup) until smooth. Gradually add powdered sugar (4 cups), beating on low speed, until combined. Add vanilla (1 teaspoons) and stir to combine.
- Assemble the cake: Place the first layer upside-down on a cake stand. Spread a generous, even layer of cream cheese frosting on top. Repeat with the second layer.Place the third layer on top and frost the entire cake.
Notes
- Center-rack baking is key. Red velvet cakes brown quickly. Baking on the center rack (not the upper third) helps prevent domed tops and overly dark edges. If your oven has bad hot spots, you can gently rotate the pans front-to-back once halfway through baking, but avoid opening the door repeatedly — big temperature drops can cause cakes to fall.
- Don’t overbake — follow the visual cues. Start by looking through the oven door: when the shine has disappeared from the very center, gently tap the center with a fingertip. If it springs back, do the toothpick test. You’re looking for a few moist crumbs, not a totally clean stick. If it feels liquid under the surface, close the oven door quickly and give it more time.
- Let the cakes cool in the pan. Because red velvet tends to dry out, leaving the layers in their pans until they’re completely cool helps lock in moisture. The combo of non-stick spray + parchment rounds makes them release cleanly later, even with basic generic spray — no fancy can required.
- Make-ahead layers work beautifully. Once the cakes are fully cool, remove them from the pans with the parchment, wrap each layer in a double layer of plastic wrap, and freeze flat (stacking no more than three high). Decorating is actually easier with cold or slightly frozen layers because they’re less fragile and shed fewer crumbs.
- Scale up frosting for big decorations. For a simple smooth-sided cake, a single batch of frosting is enough. If you want piped borders and big swirls on top, plan on 1½ batches of frosting. After you’ve frosted the cake, you can beat in an extra ½ cup or so of confectioners’ sugar to the remaining frosting to make it a bit firmer for piping.
- Crumb coat like a pro. A crumb coat is really just a sacrificial layer — it will be full of crumbs and scraped quite thin. Don’t pile it on; use a small amount of frosting, spread it thinly over the sides and top, then scrape most of it off. Chill to set, then add your final smoother layer for that crisp, clean look.
- Tools make the finish easier. Use a flat icing spatula or bench scraper for the sides and an offset spatula for the top. Frost the sides first using a generous scoop of frosting from the top, then finish by pulling the frosting in from the edges toward the center to get a neat top edge. A 1M tip is perfect for simple shell borders and pretty swirls.
- For crumb garnish, let the cake dry slightly. If you want those classic red velvet crumbs on the sides and top, crumble a bit of cake and let it air-dry briefly so it’s less sticky. Press the crumbs on with a cupped hand while the frosting is still fresh, then lightly press them in so they adhere.
Nutrition
Serving: 1serving | Calories: 1093kcal | Carbohydrates: 137g | Protein: 11g | Fat: 85g | Saturated Fat: 36g | Polyunsaturated Fat: 22g | Monounsaturated Fat: 21g | Cholesterol: 178mg | Sodium: 659mg | Potassium: 218mg | Fiber: 2g | Sugar: 43g | Vitamin A: 1757IU | Vitamin C: 0.2mg | Calcium: 114mg | Iron: 2mg