This post may contain affiliate links. Please read our disclosure policy.
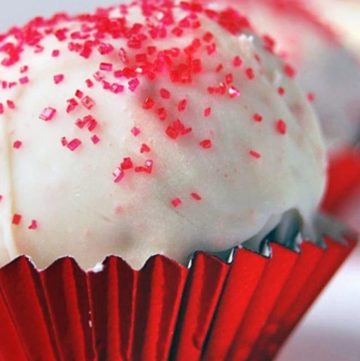
Red velvet cake balls are one of my very favorite “little bites of joy” — all the classic red velvet flavor you love, tucked inside a cute, poppable treat that’s perfect for holiday cookie trays, gifting, or late-night fridge raids. Think moist, tangy red velvet cake, creamy cream cheese frosting, and a crisp candy shell that’s just begging for sprinkles.
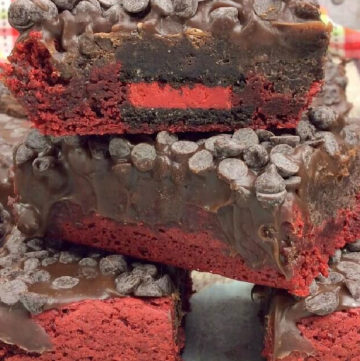
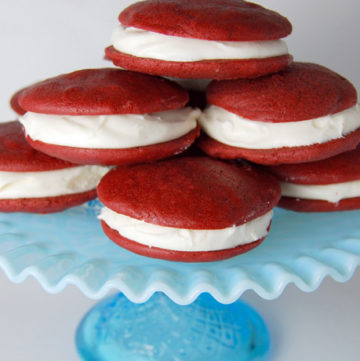
If you’re as red-velvet-obsessed as I am, be sure to check out my Red Velvet Cake, Red Velvet Cupcakes, Red Velvet Brownies, and Red Velvet Crinkle Cookies next — they’re all fun ways to enjoy that same smooth, tangy, chocolatey goodness. These cake balls are wonderfully tender and tangy from the buttermilk and vinegar, rich from the cocoa and cream cheese frosting, and totally customizable with whatever sprinkles or drizzle your heart desires.
These cuties shine all year, but they really steal the show at Christmas, Valentine’s Day, and even 4th of July when you add in red, white, and blue sprinkles. Let’s bake! 🎉

Before You Begin
✨ Decide: box mix or from-scratch cake.
This recipe gives you both options. If you’re short on time, use a box of red velvet cake mix. If you want the full homemade experience, use the scratch red velvet cake recipe below — it has all the classic tang and cocoa notes.
✨ Cool the cake completely.
Warm cake + frosting = greasy, mushy cake balls. Make sure your cake is completely cool before crumbling so you get a soft, truffle-like texture that still holds its shape.
✨ Use room-temperature cream cheese and butter.
Soft cream cheese and butter make a smooth, luscious frosting that blends evenly into the cake crumbs. In a hurry? Cut cream cheese into cubes and let it sit out, and place the wrapped butter in a bowl of warm (not hot) water for a few minutes.
✨ Don’t fear the vinegar!
That little bit of vinegar in the scratch cake isn’t there to make it “taste vinegary” — it reacts with the baking soda and buttermilk to give you a fluffy, tender crumb and that signature red velvet tang.
✨ Chill the cake balls well before dipping.
Freezing or chilling the rolled cake balls helps them hold together and makes coating them in melted candy bark so much easier. If they’re too soft, they’ll fall apart in the coating.
✨ Decorate while the coating is still wet.
Have sprinkles ready to go and add them immediately after dipping each ball so they stick beautifully to the still-melty shell.
Red Velvet Cake Balls Ingredients + Key Notes
This is just a quick glance at what you’ll need. For exact measurements and the full ingredient list, head down to the recipe card below.
For the Cake Balls
- Red velvet cake – You’ll need 1 box of red velvet cake, baked and cooled. You can bake it in a 9×13 pan or follow package directions for pan size. If you’re making the scratch red velvet cake below instead of a mix, you’ll use that once it’s completely cooled.
- Cream cheese frosting – You’ll use 1 3/4–2 cups of homemade cream cheese frosting to bind the cake crumbs into a soft, rollable dough. Start with less and add more until the mixture holds together like playdough.
- Candy bark coating – This is the candy coating you’ll melt and dip the cake balls in. Almond bark, candy melts, or melting wafers all work here. They set firm at room temperature and are easier to work with than regular chocolate.
For the Red Velvet Cake (From Scratch)
- All-purpose flour, sugar, baking soda, salt, cocoa powder – The dry base of your cake. Cocoa powder adds subtle chocolate flavor; it’s not a chocolate cake but has just enough cocoa to taste rich.
- Vegetable oil – Keeps the cake incredibly moist and tender, even after baking, crumbling, and mixing with frosting. Oil-based cakes are especially forgiving when repurposed into cake balls.
- Buttermilk (room temperature) – Adds moisture and tang, and reacts with baking soda to help the cake rise. If you’re out, you can make a quick substitute (see FAQs).
- Eggs (room temperature) – Add richness and structure so the cake bakes up fluffy but still moist.
- Red food coloring – Gives that classic vibrant red hue. Use a good-quality liquid food coloring for the most dramatic color.
- White distilled vinegar – Reacts with baking soda and buttermilk to help with rise and tender crumb, and adds a little “red velvet tang.”
- Vanilla extract – Rounds out the cocoa and tang so the cake tastes rich and balanced, not harsh.
For the Cream Cheese Frosting
- Cream cheese (room temperature) – The star of the frosting. It brings that classic tangy richness that pairs perfectly with red velvet.
- Powdered sugar (sifted) – Sweetens and thickens the frosting while keeping it smooth and lump-free.
- Unsalted butter (room temperature) – Adds creaminess and structure so the frosting is stable enough to mix into the cake without being runny.
- Vanilla extract – Adds warmth and depth to the frosting flavor.
How to Make Red Velvet Cake Balls

Pro Tips
⭐ Go easy on the frosting at first.
It’s always easier to add more frosting than to fix cake balls that are too soft and sticky. Start with about half the frosting, then add more a spoonful at a time until the mixture holds together like playdough and you can roll smooth balls without cracks.
⭐ Chill the dough before rolling if it’s sticky.
If your mixture feels too soft or warm (especially on a busy baking day), pop the bowl in the fridge for 15–20 minutes before rolling. Slightly chilled dough is much easier to shape and will give you prettier, more uniform cake balls.
⭐ Freeze just until firm for the cleanest dips.
You want the cake balls cold and firm on the outside, but not rock-hard all the way through. If they’re frozen solid, the coating can crack as they thaw. Freeze them just until the surface feels set, then work in small batches so they stay chilled while you dip.
⭐ Use a “dipping fork” for a smoother finish.
A regular fork with the two middle tines snapped off (or a candy-dipping fork) makes it easy for the excess coating to drip off. Gently tap the fork on the side of the bowl and scrape the bottom of the fork on the bowl’s edge before sliding each cake ball onto waxed paper.
⭐ Decorate one at a time.
Candy bark sets quickly, so don’t wait to add sprinkles. Dip one cake ball, tap off the excess, transfer it to the tray, and sprinkle immediately. If you want to drizzle with a contrasting color, wait until the first layer is fully set so the lines stay crisp.
⭐ Play with holiday themes.
Keep the base recipe the same and just change the coatings and sprinkles: red and green for Christmas, pink and red for Valentine’s Day, red/white/blue for 4th of July. It’s an easy way to turn one recipe into a go-to treat for every celebration.
🔬 The Baking Science Behind Red Velvet Cake Balls
Red velvet is all about balance: a hint of cocoa, gentle sweetness, and that signature tang.
-
The vinegar + baking soda + buttermilk trio is the classic red velvet backbone. The acid (vinegar and buttermilk) reacts with baking soda to create tiny bubbles of carbon dioxide, which help the cake rise and stay tender.
-
Cocoa powder adds subtle chocolate flavor, but in a smaller amount than a traditional chocolate cake. The acid in the batter also softens cocoa’s bitterness so the taste stays smooth instead of harsh.
-
Using oil instead of butter in the cake keeps it extra moist — a big advantage when you’re crumbling and mixing it with frosting. The cake stays soft instead of drying out.
-
The cream cheese frosting brings both fat and water, which hydrate the crumbs. When you mix them together, you’re essentially creating a rich, cohesive dough that can be rolled, chilled, and dipped without falling apart.
All of that science adds up to a cake that’s moist, tender, tangy, and strong enough to hold its shape once it’s dipped in candy coating.
Storing + Freezing + Make-Ahead Tips
Storing
- Store red velvet cake balls in an airtight container in the refrigerator for up to 5–7 days. Because they contain cream cheese, they must be refrigerated, but they taste best served slightly cool or at room temperature. Layer them between sheets of parchment or waxed paper so the coatings don’t stick together.
Reheating
- These don’t really need reheating, but if they’re very cold from the fridge, just set them out at room temperature for 15–20 minutes before serving so the centers soften and the flavors bloom.
Freezing
- Red velvet cake balls freeze beautifully:
-
Freeze undecorated or coated cake balls on a baking sheet until solid.
-
Transfer to a freezer bag or airtight container and freeze for up to 2 months.
-
Thaw in the refrigerator overnight, then bring to room temperature before serving.
-
If you know you’ll freeze them, it’s often best to dip and decorate after thawing for the most pristine finish, but fully finished cake balls also freeze well.
Make-Ahead
-
Up to 2 days ahead: Bake the cake, cool completely, wrap well, and store at room temperature, or bake and crumble the cake, then refrigerate the crumbs.
-
1 day ahead: Make the frosting and refrigerate, then let it soften slightly before mixing with crumbs.
-
Full assemble ahead: Roll, dip, and decorate the cake balls up to 2 days before serving and keep them chilled. They’re perfect for getting a head start on holiday baking.

Frequently Asked Questions
✦ Do I have to make the cake from scratch?
Not at all! You can absolutely use a red velvet cake mix — just bake it according to the package directions and let it cool completely. The from-scratch red velvet cake gives you that classic homemade flavor and texture, but the cake balls turn out delicious both ways.
✦ What if I don’t have buttermilk?
You can make a quick buttermilk substitute: add 1 tablespoon of white vinegar or lemon juice to a measuring cup, then fill to the 1-cup line with milk. Stir and let it sit for 5–10 minutes until slightly thickened, then use as directed. It won’t be quite as rich as real buttermilk, but it works well in a pinch.
✦ Why is there vinegar in the red velvet cake?
The vinegar might sound strange, but it’s classic red velvet. It reacts with the baking soda and buttermilk to help the cake rise and gives a gentle tang that balances the sweetness. You won’t taste “vinegar” — just a smooth, slightly tangy flavor that keeps the cake from being one-note sweet.
✦ How do I keep the coating smooth and neat?
Make sure the cake balls are well-chilled or slightly frozen before dipping, and melt the candy bark slowly so it stays fluid but not scorching hot. Use a fork, tap off the excess coating gently, then slide the ball onto waxed paper with a toothpick. Add sprinkles right away so they adhere while the coating is still wet.
✦ Can I use regular chocolate instead of candy bark?
You can, but it’s a bit fussier. Real chocolate needs to be tempered if you want it to stay shiny and firm at room temperature. Candy bark, almond bark, and melting wafers are designed to melt and set easily, so they’re much more forgiving — especially if you’re making these with kids or in big batches for the holidays.
✦ Can I freeze red velvet cake balls?
Yes! These freeze beautifully. Freeze in a single layer until firm, then store in an airtight container for up to 2 months. Thaw in the fridge overnight, then bring to room temperature before serving. They’re great to make ahead for Christmas cookie trays or parties.
✦ How can I decorate them for different holidays?
For Christmas, use red, green, and white sprinkles or drizzle with green-tinted candy coating. For Valentine’s Day, go with heart sprinkles, pink and red drizzle, or crushed freeze-dried raspberries. For 4th of July, dip them in white coating and add red, white, and blue sprinkles — instant firework vibes on your dessert table.
Still have questions? Drop them in the comments — I love helping you bake + cook with confidence! 💗
More Red Velvet + Decadent Treats You’ll Love
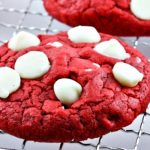
- Red Velvet White Chocolate Chip Cookies – keeps the red velvet pillar going without repeating the intro links.
- Brownie Bites – same “one-bite” vibe, perfect for cookie trays alongside the cake balls.
- Rocky Road Candy – easy, crowd-pleasing candy with that chocolate–marshmallow nostalgia.
- Crockpot Candy – super simple, set-and-forget candy that’s fantastic for holiday gifting.
- Polar Bear Paws – fun, festive, and very on-theme for Christmas treat plates.
- Almond Joy Cookies – coconut, chocolate, and almond in a cute cookie bite; great variety on a dessert spread.
- Microwave Fudge (or Easy Fudge (See’s Candy Copycat) if you want to push fudge harder) – ultra-easy chocolate candy that pairs well with cake balls on a candy tray.
Tried This Recipe?
💌 And while you’re here, don’t miss the next cozy recipe — subscribe to my totally FREE newsletter so you’ll always have comfort food favorites at your fingertips. 💌
If you enjoyed this recipe, please take a moment to leave ⭐️⭐️⭐️⭐️⭐️ star rating and a quick comment — I love hearing from you and it helps our community of bakers and cooks!
📸 And if you Gram… don’t forget to share your photo on Instagram — tag me @gonnawantseconds so I can cheer you on and share your creations!
Thanks for stopping by my kitchen today — happy cooking, friends! 💗 Kathleen
Red Velvet Cake Balls
Ingredients
- 1 box red velvet cake Baked and Cooled
- 1 3/4-2 cups cream cheese frosting
- 1 package candy bark coating
Red Velvet Cake
- nonstick vegetable spray
- 2 1/2 cups all-purpose flour
- 1 1/2 cups sugar
- 1 teaspoon baking soda
- 1 teaspoon salt
- 1/4 cup unsweetened cocoa powder
- 1 1/2 cups vegetable oil
- 1 cup buttermilk at room temperature
- 2 large eggs at room temperature
- 2 tablespoons red food coloring
- 1 teaspoon white distilled vinegar
- 1 teaspoon vanilla extract
Cream Cheese Frosting:
- 8 ounces cream cheese at room temperature
- 2 cups powdered sugar sifted
- 1/2 cup unsalted butter at room temperature
- 1 teaspoon vanilla extract
Instructions
Red Velvet Cake
- Prep the pans and oven. Preheat the oven to 350°F. Lightly grease and flour two 9-inch round cake pans (or spray with nonstick baking spray).
- Mix the dry ingredients. In a large bowl, sift together the flour, sugar, baking soda, salt, and cocoa powder.
- Mix the wet ingredients. In a separate large bowl, whisk together the oil, buttermilk, eggs, red food coloring, vinegar, and vanilla until smooth.
- Combine and bake. Add the dry ingredients to the wet ingredients and mix just until a smooth batter forms. Divide the batter evenly between the prepared pans. Bake for about 30 minutes, or until the cakes pull slightly from the sides and a toothpick inserted in the center comes out clean.
- Cool completely. Cool the cakes in the pans for 10 minutes. Run a knife around the edges, invert onto plates, then re-invert onto a cooling rack, rounded-sides up. Let cool completely before crumbling for cake balls.
Cream Cheese Frosting
- Beat the frosting. In the bowl of a stand mixer, beat the cream cheese, powdered sugar, and butter on low speed until combined. Increase the speed to high and beat until light and fluffy, about 5 minutes, scraping down the bowl as needed.
- Add vanilla and chill.Reduce the speed to low, mix in the vanilla, then beat briefly on high until smooth. Refrigerate until slightly stiff before using to mix into the cake crumbs.
Cake Ball Assembly
- Crumble the cake and add frosting. Crumble the cooled red velvet cake into a large bowl. Add about half of the cream cheese frosting and mix with a hand mixer or spatula until completely smooth with no white streaks. If you like a moister center, add more frosting a little at a time until the mixture holds together like soft dough.
- Shape the cake balls. Roll the mixture into small balls about the size of a quarter and place them on a baking sheet lined with parchment paper or a Silpat.
- Chill until firm. Freeze the cake balls until the exteriors are firm, about 20–30 minutes.
- Coat and decorate. Melt the candy bark according to the package directions. Working with a few at a time, dip each chilled cake ball in the melted coating, letting the excess drip off, then place on waxed or parchment paper. Immediately add sprinkles, if using, while the coating is still wet.
- Let set and refrigerate. Allow the coating to firm up completely, then transfer the cake balls to an airtight container and refrigerate until serving.


I’m excited to try these. Forgive my ignorance but I’m making cake balls for the first time…What is candy bark?
Hi Sofia, it’s a candy wafer that is easy to melt without all the issues you can have with say, white chocolate. It also dries a bit softer than a lot of chocolates so it’s a nice texture to bite into. You can generally find it at the market and Michaels craft store. 🙂
AMAZING!!! The family gave them a 10.5 out of 10! This was definitely a project and took about three hours but sooo worth it!
WOW!! This made my day! <3 So happy to hear your fam LOVE IT!
Can you use cream cheese instead of frosting to mix the cake stumps with?
Hi Laura, not really. 🙂
Hi.
I was looking to make these but need a substitute for the cream cheese, especially for adding to the cake mix.
What would you advise please?
Thanks
Hi J. I’m sorry but I always use cream cheese. I’ve never experimented with substituting any other ingredient. Sorry 🙁