
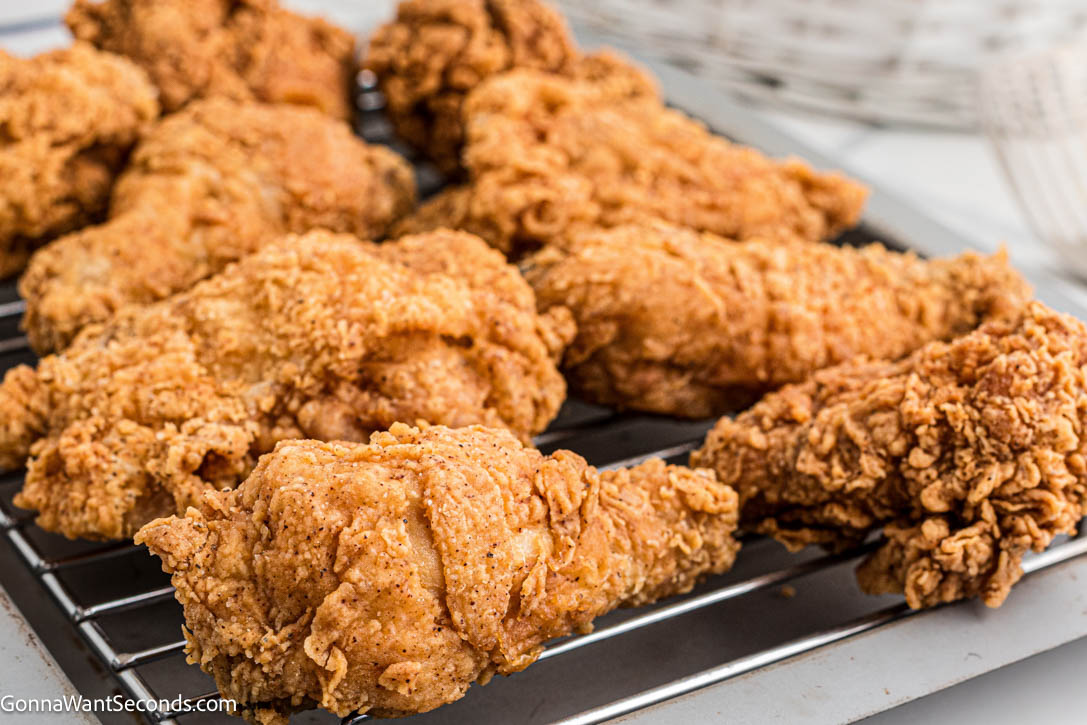
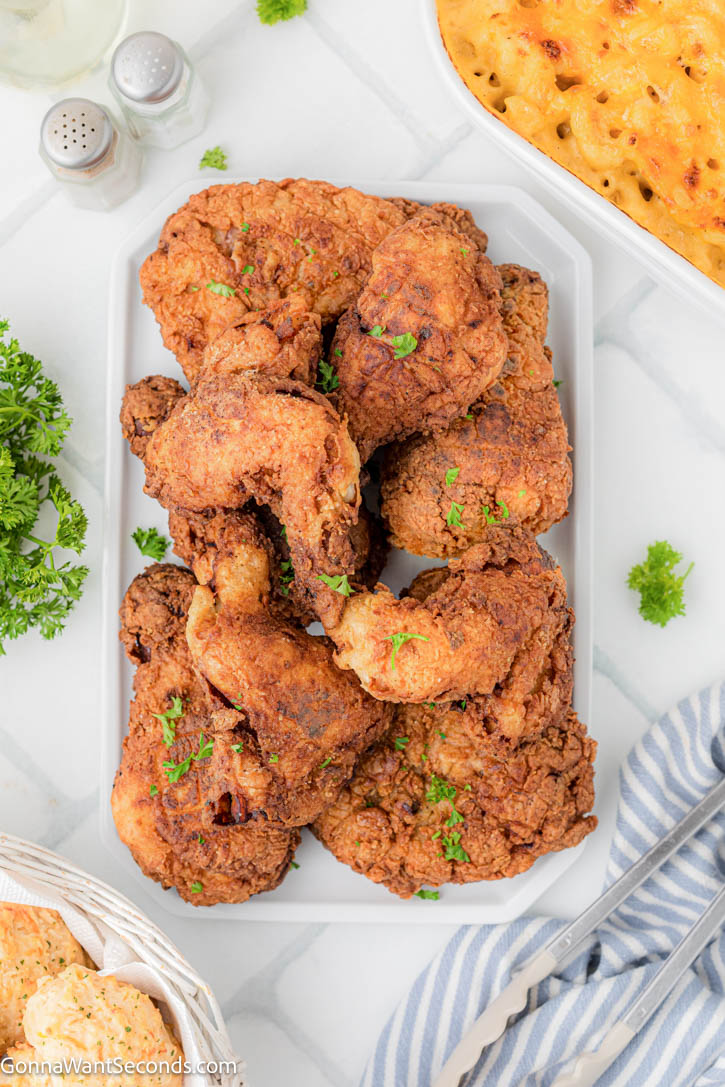
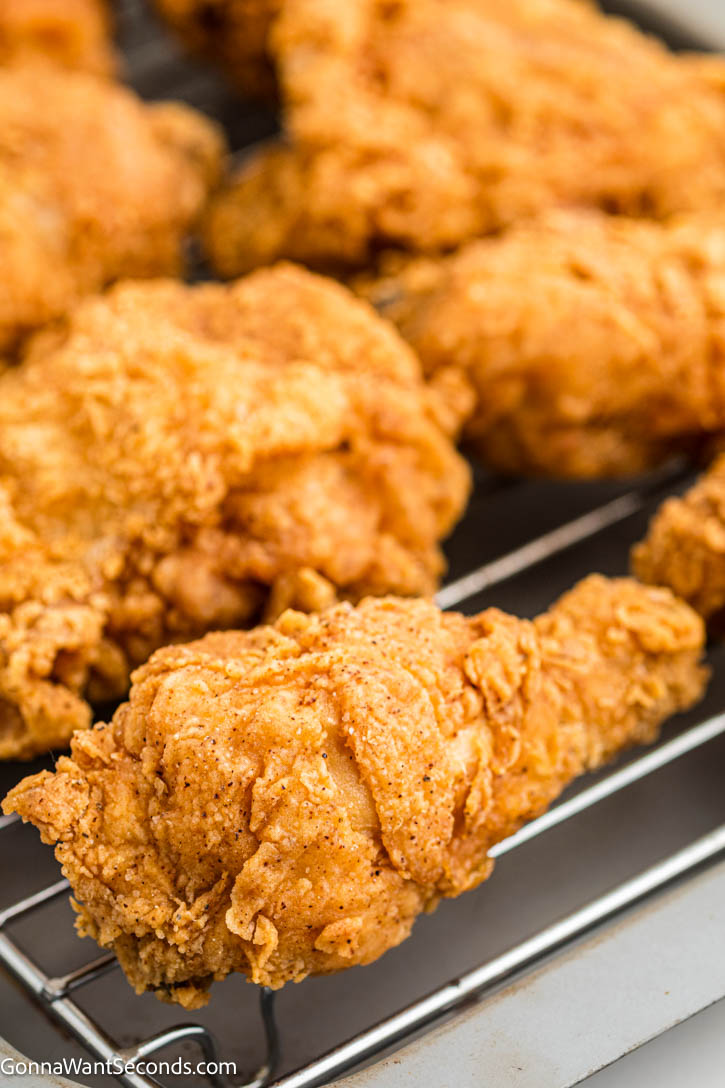
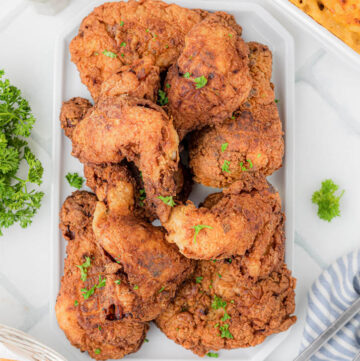
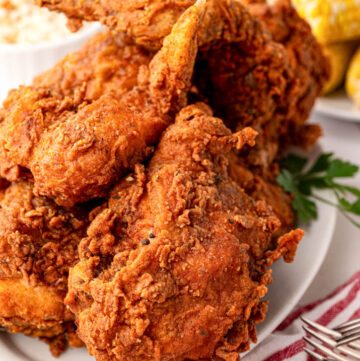
This Fried Chicken Recipe delivers everything homemade fried chicken should be—perfectly crispy on the outside, incredibly juicy on the inside, and packed with classic Southern flavor. A simple buttermilk marinade keeps the chicken tender, while a seasoned double coating fries up into a thick, crunchy crust that’s crisp in every bite. Whether it’s your first time making fried chicken or it’s already a family favorite, this recipe walks you through every step so you can fry with confidence.
There’s nothing quite like homemade fried chicken with its crispy, golden crust and juicy, tender meat. If you love crispy chicken dinners, try my KFC Fried Chicken, Air Fryer Fried Chicken, or Buttermilk Marinated Chicken next. Be sure to browse all of my Chicken Dinner Recipes for even more family favorites.
✨ Before You Begin
✨ Marinate the chicken for at least 3 hours. The buttermilk tenderizes the meat while the pickle juice adds subtle tanginess. If you have time, an overnight marinade develops even more flavor.
✨ Let the chicken sit at room temperature for 30 to 45 minutes before frying. Taking the chill off helps the chicken cook more evenly and reduces the chances of the crust browning before the inside is fully cooked.
✨ Don’t skip the second dredge. Dipping the chicken back into buttermilk and coating it again creates the thick, craggy crust that’s wonderfully crispy and full of texture.
✨ Rest the breaded chicken before frying. Letting the coated chicken sit for 15 to 20 minutes helps the breading hydrate and cling to the chicken, so it stays put instead of falling off in the oil.
✨ Use a thermometer. An instant-read thermometer takes the guesswork out of frying. Keep the oil between 325°F and 350°F (163ºC – 177ºC), and cook the chicken until the thickest part reaches 165°F (74ºC).
✨ Fry in small batches. Overcrowding the skillet lowers the oil temperature, which can lead to greasy chicken instead of a crisp, golden crust.
Fried Chicken Ingredients + Key Notes
Chicken: Bone-in, skin-on chicken pieces, such as thighs and drumsticks, produce the juiciest fried chicken with the most flavorful, crispy skin. You can also use breasts or wings—just keep in mind they’ll cook at different rates.
Buttermilk: Buttermilk gently tenderizes the chicken while adding rich flavor and helping the coating stick for an extra-crispy crust.
Pickle Juice: Just a little pickle juice adds brightness and helps tenderize the chicken even more. Don’t worry—the finished chicken won’t taste like pickles.
Flour: All-purpose flour forms the foundation of the crispy coating and fries up beautifully golden brown.
Cornstarch: Mixing cornstarch with the flour creates a lighter, crispier crust that stays crunchy longer than flour alone.
Baking Powder: This simple pantry ingredient creates tiny bubbles in the coating as it fries, giving the crust its signature craggy, restaurant-style texture.
Seasonings: Paprika, garlic powder, onion powder, black pepper, cayenne, and kosher salt create a classic Southern-inspired seasoning blend that’s flavorful without overpowering the chicken.
Oil: Peanut oil is an excellent choice because of its high smoke point and clean flavor, but vegetable or canola oil work just as well for frying.
🥣 How to Make Fried Chicken
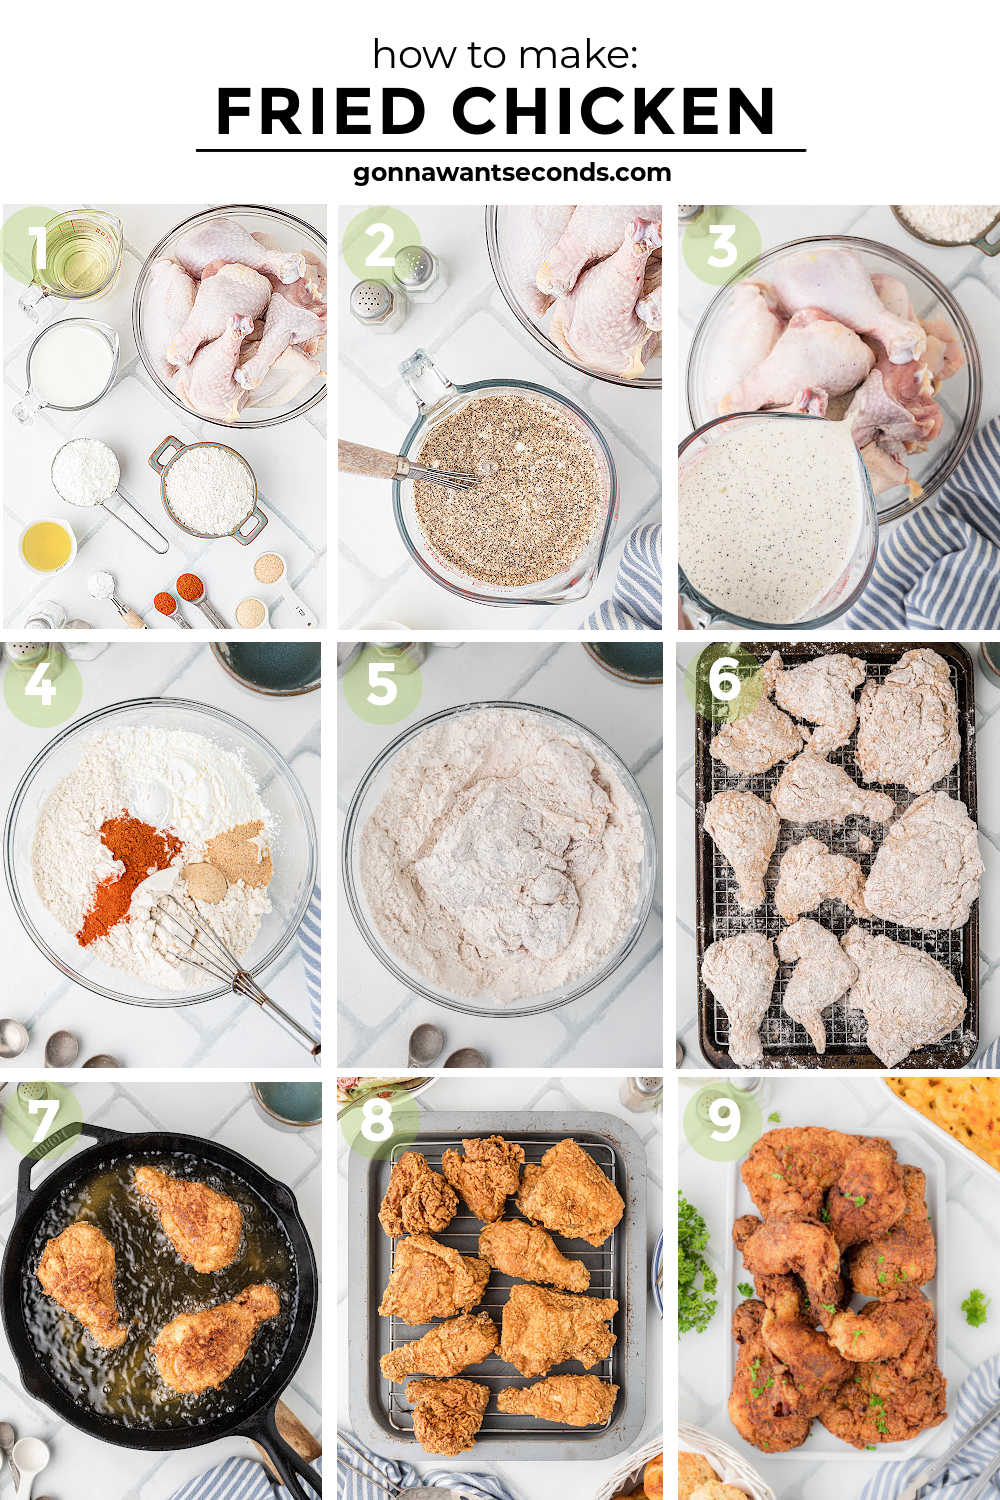
Marinate the Chicken: Place the chicken pieces in a large resealable bag or bowl. Whisk together the buttermilk, pickle juice, kosher salt, and black pepper, then pour the mixture over the chicken, making sure every piece is well coated. Cover and refrigerate for at least 3 hours or up to overnight. About 30 to 45 minutes before frying, remove the chicken from the refrigerator so it can lose some of its chill and cook more evenly.
Prepare the Coating: In a large shallow bowl, whisk together the flour, cornstarch, baking powder, kosher salt, paprika, black pepper, garlic powder, onion powder, cayenne, and white pepper, if using. Set a wire rack over a baking sheet nearby for the coated and cooked chicken.
Dredge the Chicken: Remove one piece of chicken from the marinade, allowing the excess buttermilk to drip off. Coat it thoroughly in the seasoned flour mixture, pressing the coating into every crevice. Repeat with the remaining pieces. Pour a small amount of the buttermilk marinade into a separate bowl, then quickly dip each piece back into the buttermilk and coat it a second time in the flour mixture. Return the chicken to the wire rack and let it rest for 15 to 20 minutes. This important step helps the coating adhere so it fries up crisp and stays on the chicken.
Heat the Oil: Pour enough oil into a large cast-iron skillet to come about halfway up the chicken pieces, usually 1 to 1½ inches deep. Heat the oil over medium to medium-high heat until it reaches 350°F (177ºC). As you fry, try to keep the temperature between 325°F and 350°F (163ºC – 177ºC) for the crispiest results.
Fry the Chicken: Carefully place a few pieces of chicken into the hot oil, skin-side down, leaving plenty of space between them. Fry until the coating is deep golden brown and crisp, turning occasionally so the chicken cooks evenly. Drumsticks generally take about 12 to 14 minutes, while larger thighs usually need 16 to 18 minutes. If the coating is browning too quickly before the chicken reaches 165°F (74ºC), reduce the heat slightly and continue cooking until the thickest part is fully cooked.
Rest and Serve: Transfer the fried chicken to the clean wire rack and let it rest for about 5 minutes before serving. Resting allows the juices to redistribute while keeping the crust crisp. Serve hot and enjoy every crunchy, juicy bite.
⭐ Pro Tips
⭐ Let the breaded chicken rest before frying. This is one of the biggest secrets to a thick, crunchy crust that stays attached to the chicken instead of slipping off in the oil.
⭐ Use a thermometer for both the oil and the chicken. Keep the oil between 325°F and 350°F (163ºC – 177ºC), and cook the chicken until the thickest part reaches 165°F (74ºC). It removes the guesswork and helps you avoid burnt crust or undercooked chicken.
⭐ Fry in small batches. Crowding the skillet causes the oil temperature to drop, which can leave you with greasy chicken instead of a crisp, golden crust.
⭐ Adjust the heat as you fry. The oil temperature naturally changes as you add each batch of chicken. Don’t be afraid to raise or lower the burner slightly to keep the oil in the ideal temperature range.
⭐ Use a wire rack instead of paper towels. Draining the chicken on a wire rack allows air to circulate, keeping the crust crisp all the way around instead of trapping steam underneath.
⭐ Give the chicken a few minutes to rest before serving. A short 5-minute rest lets the juices redistribute while the crust stays wonderfully crisp, giving you the best texture in every bite.
Serving Suggestions
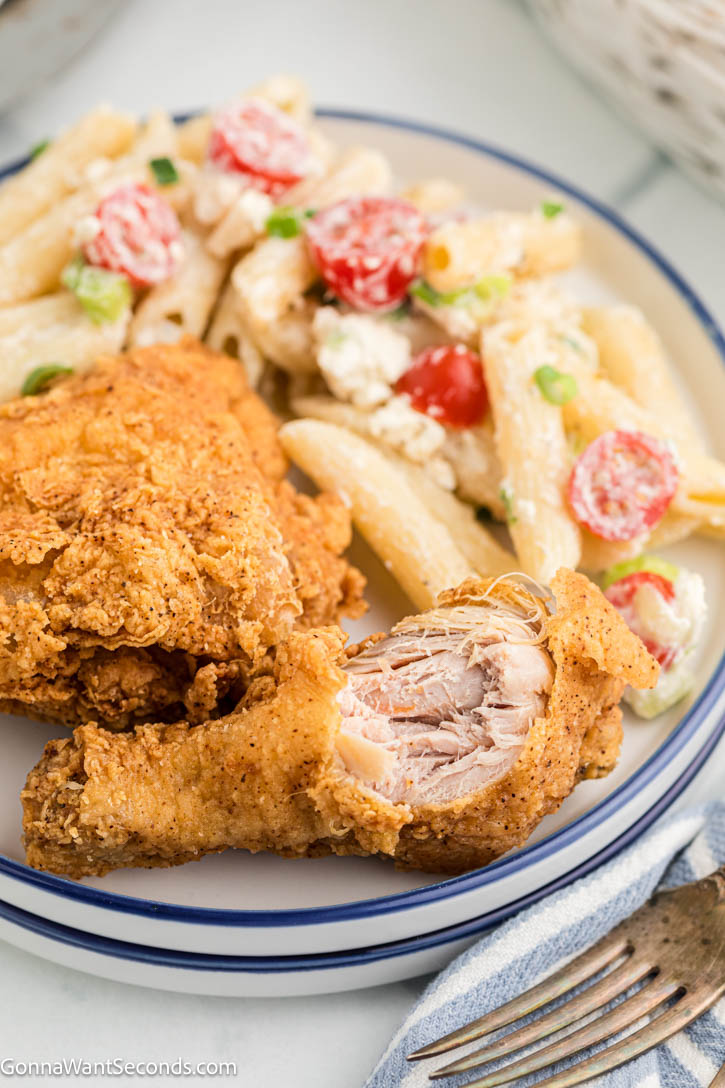
Fried chicken is delicious straight from the skillet, but the right side dishes turn it into a meal everyone will remember. Whether you’re planning a Sunday supper, backyard picnic, or weeknight family dinner, these recipes pair perfectly with crispy homemade fried chicken.
- KFC Coleslaw – Cool, creamy, and slightly sweet, it’s the perfect contrast to hot, crispy fried chicken.
- Creamy Mashed Potatoes – Rich, buttery mashed potatoes are a classic pairing that never goes out of style.
- Mac and Cheese – Creamy, cheesy comfort food that belongs on every Southern-inspired dinner table.
- Buttermilk Biscuits – Warm, flaky biscuits are perfect for soaking up every delicious bite.
- Southern Green Beans – Tender green beans make an easy vegetable side that rounds out the meal beautifully.
- Peach Iced Tea – Sweet, refreshing Southern peach tea is the perfect way to cool down alongside a plate of crispy fried chicken.
Storing + Freezing + Reheating
Storing: Allow the fried chicken to cool completely before transferring it to an airtight container. Refrigerate for up to 4 days.
Freezing: Once cooled, place the chicken in a freezer-safe container or zip-top freezer bag and freeze for up to 3 months. For best results, thaw overnight in the refrigerator before reheating.
Reheating: For the crispiest results, reheat fried chicken in a 375°F (190ºC) oven on a wire rack set over a baking sheet for 15 to 20 minutes, or until heated through. An air fryer also works beautifully—reheat at 375°F (190ºC) for 5 to 8 minutes, depending on the size of the pieces. While the microwave is convenient, it will soften the crispy coating.
Frequently Asked Questions
◆ Can I use boneless chicken?
Yes! Boneless chicken breasts or thighs work well, but they’ll cook much faster than bone-in pieces. Keep a close eye on the internal temperature and remove them from the oil as soon as they reach 165°F (74ºC).
◆ Why do you marinate the chicken in buttermilk?
Buttermilk gently tenderizes the chicken while adding rich flavor and helping the breading stick. The result is juicy chicken with an extra-crispy crust.
◆ Why add pickle juice?
A little pickle juice adds subtle tanginess and helps tenderize the chicken even more. Don’t worry—the finished chicken won’t taste like pickles.
◆ What oil is best for frying chicken?
Peanut oil is an excellent choice because of its high smoke point and clean flavor, but vegetable oil and canola oil are also great options for frying.
◆ Why is my fried chicken greasy?
Greasy fried chicken usually means the oil wasn’t hot enough. Try to keep the oil between 325°F and 350°F (163ºC – 177ºC) while frying, and avoid overcrowding the skillet, which causes the temperature to drop.
◆ Why did my breading fall off?
This usually happens when the breaded chicken doesn’t have time to rest before frying or when it’s turned too soon in the oil. Letting the coated chicken rest for 15 to 20 minutes helps the breading adhere so it stays crisp and intact.
◆ Can I reuse the frying oil?
Yes. Let the oil cool completely, then strain it through a fine-mesh sieve or cheesecloth to remove any crumbs. Store it in a sealed container and reuse it a few times, as long as it still looks clear and smells fresh.
◆ Can I freeze fried chicken?
Absolutely. Cool the chicken completely, then freeze it in an airtight container for up to 3 months. Reheat it in the oven or air fryer to help restore the crispy coating.
Still have questions? Leave them in the comments below! I’m always happy to help, and your question may help another reader too.
More Chicken Dinner Recipes You’ll Love
If you enjoyed this Fried Chicken Recipe, here are a few more comforting chicken dinners to add to your menu.
- Million Dollar Chicken – Tender, juicy roasted chicken with a rich, buttery finish that’s perfect for Sunday dinner.
- Smothered Chicken – Pan-seared chicken simmered in a rich, savory onion gravy for the ultimate comfort food meal.
- Chicken and Dumplings – A classic family favorite with tender chicken, fluffy dumplings, and a creamy, comforting broth.
- Southern Chicken and Dumplings – Old-fashioned flat dumplings cooked the Southern way for a timeless comfort food classic.
- Chicken Scarpariello – A bold Italian-American favorite made with chicken, sausage, peppers, and a tangy pan sauce.
Tried This Recipe?
Nothing makes me happier than seeing this Fried Chicken Recipe on your table! If you made it and loved it, I’d be so grateful if you came back and left a ⭐⭐⭐⭐⭐ rating and review below. Your feedback helps other readers and means so much to me.
Be sure to snap a photo and share it on Instagram by tagging @gonna_want_seconds—I absolutely love seeing your creations!
Want more easy, family-friendly recipes delivered straight to your inbox? Subscribe to my free newsletter and never miss a new recipe.
Thanks for stopping by my kitchen today—happy cooking, friends! ❤️ Kathleen
Fried Chicken
Ingredients
Chicken + Buttermilk Marinade
- 3 cups buttermilk
- 4 tablespoons pickle juice
- 2 teaspoons kosher salt
- 1 teaspoon black pepper
- 6-8 bone-in skin-on chicken pieces (thighs and drumsticks work best)
Crispy Coating
- 1 1/2 cups all-purpose flour
- 1/2 cup cornstarch
- 1 1/2 teaspoons baking powder
- 2 teaspoons kosher salt
- 2 teaspoons paprika
- 1 1/2 teaspoons black pepper
- 1 teaspoon garlic powder
- 1 teaspoon onion powder
- 1/2 teaspoon cayenne pepper
- 1/2 teaspoon white pepper optional, but highly recommended
For Frying
- peanut oil vegetable oil, or canola oil, for frying
Instructions
- Marinate the Chicken: Add the chicken pieces (6-8) to a large resealable bag or large bowl.
- In a mixing bowl, whisk together the buttermilk (3 cups), pickle juice (4 tablespoons), kosher salt (2 teaspoons), and black pepper (1 teaspoon). Pour over the chicken, making sure all pieces are fully coated.
- Refrigerate for at least 3 hours or up to overnight.
- Remove the chicken from the refrigerator 30-45 minutes before frying to take the chill off. This helps the chicken cook more evenly.
- Prepare the Coating: In a large shallow bowl, whisk together the flour (1 1/2 cups), cornstarch (1/2 cup), baking powder (1 1/2 teaspoons), salt (2 teaspoons), paprika (2 teaspoons), black pepper (1 1/2 teaspoons), garlic powder (1 teaspoon), onion powder (1 teaspoon), cayenne (1/2 teaspoon), and white pepper (1/2 teaspoon).
- Place a wire rack over a baking sheet nearby.
- Dredge the Chicken: Remove one piece of chicken from the marinade, allowing the excess to drip off slightly.
- Coat thoroughly in the flour mixture, pressing the flour into every crevice for lots of crispy texture.
- Place the coated chicken on the wire rack and repeat with the remaining pieces.
- Pour a little of the reserved buttermilk marinade into a separate bowl.
- Working one piece at a time, dip the chicken lightly back into the buttermilk, then dredge again in the flour mixture for a second coating.
- Return the chicken to the wire rack.
- Let the chicken rest for 15-20 minutes before frying. Dont skip this step!
- Heat the Oil: Add enough oil to a large cast-iron skillet to come about halfway up the chicken pieces, usually about 1 to 1½ inches deep.
- Heat the oil over medium-medium high heat until it reaches 350°F (177ºC).
- Try to maintain the oil temperature between 325°F and 350°F (163ºC - 177ºC) while frying.
- Fry the Chicken: Carefully place a few pieces of chicken into the hot oil, skin-side down first. Do not overcrowd the skillet.
- Fry until deeply golden brown and crispy, turning occasionally for even browning. Smaller drumsticks may take around 12-14 minutes total, while larger thighs can take 16-18 minutes.
- The chicken is done when the thickest part reaches 165°F on an instant-read thermometer.
- If the crust is browning too quickly before the chicken is cooked through, lower the heat slightly.
- Transfer the fried chicken to a clean wire rack and allow it to rest for 5 minutes before serving. Resting keeps the crust crispier than draining on paper towels.
- Serve hot.
Fans Also Made:
Notes
- Let the breaded chicken rest before frying. This is one of the biggest secrets to a thick, crunchy crust that stays attached to the chicken instead of slipping off in the oil.
- Use a thermometer for both the oil and the chicken. Keep the oil between 325°F and 350°F (163ºC – 177ºC), and cook the chicken until the thickest part reaches 165°F (74ºC). It removes the guesswork and helps you avoid burnt crust or undercooked chicken.
- Fry in small batches. Crowding the skillet causes the oil temperature to drop, which can leave you with greasy chicken instead of a crisp, golden crust.
- Adjust the heat as you fry. The oil temperature naturally changes as you add each batch of chicken. Don’t be afraid to raise or lower the burner slightly to keep the oil in the ideal temperature range.
- Use a wire rack instead of paper towels. Draining the chicken on a wire rack allows air to circulate, keeping the crust crisp all the way around instead of trapping steam underneath.
- Give the chicken a few minutes to rest before serving. A short 5-minute rest lets the juices redistribute while the crust stays wonderfully crisp, giving you the best texture in every bite.



Leave a Reply