
This post may contain affiliate links. Please read our disclosure policy.
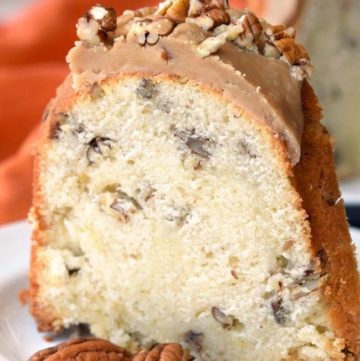
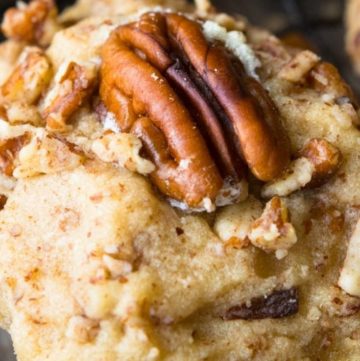
These tender, buttery Maple Pecan Scones are topped with a luscious drizzle of molasses glaze and toasted pecans! They’re easy to put together and better than any store-bought versions!!

Maple Pecan Scones
The last time I was visiting my sister Christine, she made these delicious scones (and about 20 other wonderful baked goods). It was love at first bite with these babies I loved how buttery and flaky they were.
They had just the right amount of maple flavor shining through without it being overpowering. The toasted pecans gave them just the right amount of nutty crunch.
I couldn’t wait to get home and make them and share them with you guys. ♥ Let me know if you bake them.
If you love scones as much as I do, try my double-glazed pumpkin scones and strawberry scones next. If you want more delicious pecan treats, you’ll love my pecan pie bars, pecan shortbread cookies (my all-time favorite shortbread recipe), and pecan pie recipes.
Let’s bake some scones!

Maple Pecan Scones Recipe Video Tutorial
On your phone? Check the web story here.
How to Toast Pecans
- Preheat oven to 350 degrees. Spread pecans on a rimmed baking sheet in a single layer.
- Place baking sheet in the heated oven for 5 minutes.
- Shake a baking sheet or use a spoon to stir and turn pecans.
- Place baking sheet bake in the oven for another 5 minutes or until pecans begin to become fragrant.
Be very careful not to overbake because pecans have a high quantity of natural oil and can burn very easily.

Ingredient Notes, & Tips
- Butter: I generally use unsalted butter in my recipes. I like that I can control the amount of salt. It’s very important to use very cold or frozen butter. This will create tender flaking in your scones and help them get a gorgeous rise. What I do is cut the butter into 1/4 inch cubes, lay the cubes in a single layer on a plate, and stick the plate in the freezer for about 10 minutes.
- Mixing: Don’t over-mix! Lumps in the batter are okay! The best tool to use is a pastry blender.
Storing + Freezing Tips + Make-Ahead Tips
- How Long Can You Keep This In The Fridge? This can be stored in the fridge for up to a week. Just wrap it with aluminum foil and saran wrap, or store it in an airtight container.
- Can You Freeze This? Yes, store the maple pecan scones like how you’ll store it in the fridge and it will last for 2-3 months in the freezer.
- Make-Ahead Tips: Since this can be stored in the fridge, bake this without adding the glaze. Store in the fridge and make the glaze when it’s ready to serve.
Serving Recommendations
These are perfect to serve with a cup of coffee or tea and make a marvelous breakfast or snack!
Step By Step How To Make Maple Pecan Scones

- Dry ingredients. In a large mixing bowl, add flour, brown sugar, baking powder, baking soda, and salt; whisk to combine.
- Add 6 tablespoons of butter and cut in with a pastry blender or 2 knives until the butter is the size of peas.
- Stir in pecans.
- Wet ingredients. In a medium bowl, whisk together buttermilk, eggs, and maple extract.
- Combine. Add to flour mixture and toss with a fork until dough comes together in moist clumps.
- Shape + bake. Gather dough into a ball.
- Press into out onto a lightly floured surface to an 8 inch round
- cut into 6 triangles.
- Arrange triangles on an ungreased baking sheet, about 2 inches apart. Bake in preheated oven for about 14-16 minutes.
- Glaze. In a small saucepan, whisk together the remaining brown sugar, butter, and heavy cream over low heat until sugar dissolves.
- Remove from heat and whisk in powdered sugar and molasses.
- Spread glaze over warm scones.
More Fall Dessert Recipes
- Cranberry Bliss Bars
- Pumpkin Bars with Cream Cheese Frosting
- Pumpkin Bundt Cake
- Apple Bars
- Pumpkin Lasagna
TRIED THIS RECIPE?
Remember, we have new recipes every week! Have you subscribed to our free, no-strings-attached email?
If you’ve tried this or any other recipe on my website, please leave a review. I love hearing your feedback! ⭐⭐⭐⭐⭐

Maple Pecan Scones with Molasses Glaze
Ingredients
Scones:
- 2 cups all-purpose flour
- 3/4 cup light brown sugar divided
- 1 teaspoon baking powder
- 1/2 teaspoon baking soda
- 1/2 teaspoon salt
- 10 tablespoons very cold or frozen unsalted butter, cut into 1/4 inch cubes. divided
- 3/4 cup toasted pecans, coarsely chopped
- 2/3 cup buttermilk, well shaken
- 2 large egg yolks
- 1 teaspoon maple extract
Glaze:
- 2 tablespoons whipping cream
- 2/3 cup confectioners' sugar
- 1/2 teaspoon mild-flavored molasses
Instructions
- Prep. Set oven rack to middle position. Preheat oven to 400 degrees.
- Dry ingredients. In a large mixing bowl, add flour, 1/4 cup brown sugar, baking powder, baking soda, and salt; whisk to combine. Add 6 tablespoons of butter and cut in with a pastry blender or 2 knives until the butter is the size of peas. Stir in pecans.
- Wet ingredients + combine. In a medium bowl, whisk together buttermilk, eggs, and maple extract. Add to flour mixture and toss with a fork until dough comes together in moist clumps.
- Shape + bake. Gather dough into a ball. Press into out onto a lightly floured surface to an 8 inch round cut into 6 triangles. Arrange triangles on an ungreased baking sheet, about 2 inches apart. Bake in preheated oven until a toothpick inserted in the center comes out clean, about 14-16 minutes.
- Glaze. In a small saucepan, whisk together the remaining 1/2 cup brown sugar, 4 tablespoons butter, and heavy cream over low heat until sugar dissolves. Remove from heat and whisk in powdered sugar and molasses. Spread glaze over warm scones.
Fans Also Made:
Notes
- Butter: I generally use unsalted butter in my recipes. I like that I can control the amount of salt. It’s very important to use very cold or frozen butter. This will create tender flaking in your scones and help them get a gorgeous rise. What I do is cut the butter into 1/4 inch cubes, lay the cubes in a single layer on a plate, and stick the plate in the freezer for about 10 minutes.
- Mixing: Don’t over-mix! Lumps in the batter are okay! The best tool to use is a pastry blender.

Made these for Christmas breakfast and they were the bomb!
Hi, Kathy! Thank you so much for your positive review. Merry Christmas 🙂
I’m so happy you liked these. I love them sooo much!!
I ate 3 servings! Oops! This is sooo good. I gotta bake this again on Christmas
That’s great, Lara! Advance Merry Christmas. I’m happy you loved this. Thank you for sharing your positive review. 🙂