This post may contain affiliate links. Please read our disclosure policy.
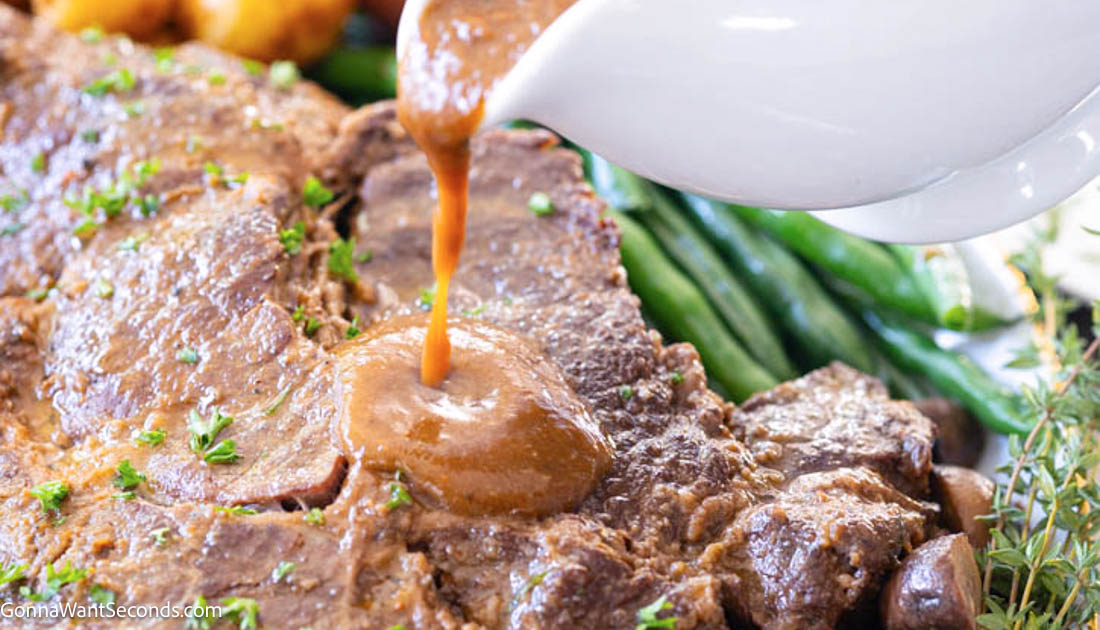
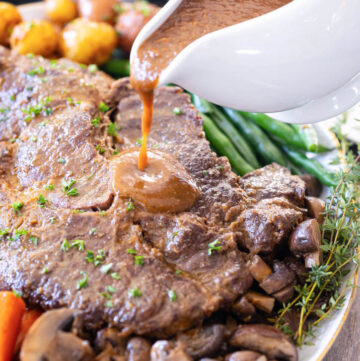
This Braised Chuck Roast is fall-apart tender, deeply savory, and slowly cooked in a Dutch oven with red wine, beef stock, herbs, and vegetables until the meat practically melts under your fork. It’s the kind of cozy, old-fashioned beef dinner that feels special enough for Sunday supper but simple enough to make at home.
The secret is classic braising: sear the chuck roast first for rich flavor, then cook it low and slow in just enough liquid until the connective tissue breaks down and the beef turns tender and juicy. The carrots, onions, potatoes, and mushrooms are added later so they stay beautiful instead of turning mushy.
What makes this version extra special is the gravy. Instead of adding a slurry or making a separate sauce, the softened onion, carrot, celery, garlic, and braising liquid are blended together into a silky, naturally thickened gravy with deep beefy flavor.
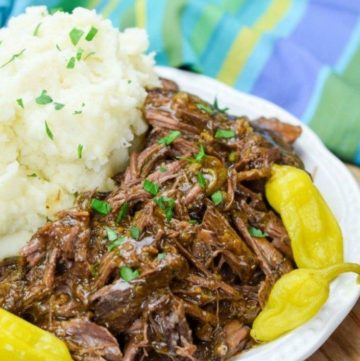
If you love slow-cooked beef dinners, be sure to try my Mississippi Pot Roast, French Onion Pot Roast, and Boneless Short Ribs, too. They’re all rich, comforting recipes that transform inexpensive cuts of beef into tender, flavor-packed family dinners.

✨ Before You Start
✨ Chuck roast needs low, slow cooking. This cut is full of connective tissue that turns tender only after a long braise.
✨ Sear the roast well. Deep browning builds the rich, savory flavor that carries through the whole dish.
✨ Use the right amount of liquid. The braising liquid should come about halfway up the sides of the roast — not completely cover it.
✨ Add the vegetables later. Potatoes, carrots, onions, and mushrooms go in after the roast has cooked for a while so they stay intact and beautiful.
✨ Tenderness matters more than time. The roast is done when it shreds easily with a fork, usually around 195°F–205°F.
What Does It Mean to Braise a Chuck Roast?
Braising is a cooking method that combines dry heat and moist heat to transform tough cuts of meat into something incredibly tender. First, the chuck roast is seared to develop deep flavor and a rich brown crust. Then it’s slowly cooked in a covered Dutch oven with a small amount of liquid until the connective tissue breaks down and the beef becomes fork-tender.
Unlike boiling, braising doesn’t completely submerge the meat. The liquid should come about halfway up the sides of the roast, allowing the meat to cook gently while concentrating flavor in the braising liquid.
Chuck roast is one of the best cuts for braising because it contains plenty of marbling and collagen. As it cooks low and slow, that collagen melts into the cooking liquid, creating rich flavor and the melt-in-your-mouth texture that makes braised chuck roast so irresistible.
Ingredients + Key Notes
Beef & Seasoning
-
Chuck roast: Well-marbled cuts work best for braising
-
Kosher salt & black pepper: Season in layers for deep flavor
-
Garlic powder: Adds background savoriness
-
All-purpose flour: Helps with browning and gravy body
Flavor Base (Mirepoix + Aromatics)
-
Onion, carrot, celery: These melt into the gravy when blended
-
Garlic + tomato paste: Boost depth and richness
Braising Liquid & Herbs
-
Dry red wine: Adds structure and complexity
-
Beef stock + Better Than Bouillon: Big beefy flavor
-
Fresh rosemary, thyme, bay: Classic pot roast herbs
Showpiece Vegetables
-
Potatoes, carrots, onions, mushrooms: Added later so they stay intact and beautiful.
⭐ Pro Tips
⭐ Don’t rush the sear
A deeply browned roast means deeper flavor later. Let it release naturally from the pot before turning.
⭐ Add vegetables later on purpose
Keeping the potatoes and carrots intact gives you that beautiful “Sunday dinner” presentation instead of mushy veggies.
⭐ Blend the gravy while it’s hot
Warm aromatics blend smoothly into the liquid, creating a glossy, restaurant-style gravy with no extra thickeners.
⭐ Aim for nappe consistency
The gravy should coat the back of a spoon and hold a clean line when you swipe a finger through it — thick, but still pourable.

🥣 How to Make Braised Chuck Roast

Season and lightly flour the roast, then sear it until deeply browned on all sides — this step builds the foundation of flavor. In the same pot, sauté the onion, carrot, and celery until softened and lightly golden, then stir in the garlic and tomato paste just until fragrant.
Deglaze with red wine, scraping up every browned bit, then add the beef stock mixture, herbs, and garlic. Return the roast to the pot, bring everything to a gentle simmer, cover, and braise in a 325°F oven until the meat is nearly tender.
Add the vegetables around the roast and continue braising until the beef is fork-tender and the vegetables are just cooked through. Transfer the roast and vegetables to a platter and let them rest while you finish the gravy.
Make the Blended Gravy
After removing the roast and vegetables, discard the herb stems and bay leaf. Skim excess fat from the surface of the liquid. Use an immersion blender to puree the softened aromatics directly into the braising liquid until smooth.
Bring the gravy to a gentle simmer, uncovered, and cook for 5–10 minutes until it thickens enough to coat the back of a spoon. Adjust with a splash of stock if needed, season to taste, and spoon generously over the roast.
🔬 Kitchen Science: Why This Gravy Works
As the onion, carrot, and celery slowly cook, their natural starches and fibers soften and release into the braising liquid. When blended, those vegetables act as a built-in thickener, creating body and richness without flour paste or slurry. Gentle simmering afterward reduces excess moisture and concentrates flavor — it’s simple food science doing the heavy lifting.
Why Blend the Braising Liquid?
Most braised chuck roast recipes thicken the gravy with flour, cornstarch, or a beurre manié. This recipe takes a different approach. As the onion, carrot, celery, and garlic slowly cook, they soften and practically melt into the braising liquid.
Blending those vegetables directly into the cooking liquid creates a naturally thick, velvety gravy with incredible depth of flavor. Not only does it eliminate the need for additional thickeners, but it also turns every bit of the flavor base into part of the finished sauce.
The result is a rich, silky gravy that coats the beef beautifully while letting the flavor of the chuck roast remain the star of the dish.
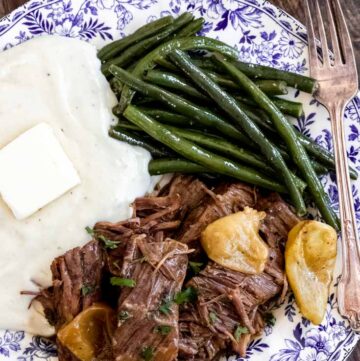
What to Serve With Braised Chuck Roast
Fresh + Crisp Sides
A simple House Salad with Buttermilk Dressing is always a win, and KFC Coleslaw brings that crisp, creamy crunch everyone loves with pot roast. If you want something a little more “special,” your Harvest Salad is perfect for balancing all that rich, beefy gravy.
Comforting Sides
You really can’t beat creamy Mashed Potatoes here — they’re basically gravy’s best friend. Buttered Noodles are another cozy option (especially if you want something easy that still feels classic and comforting).
Cozy Breads
These are non-negotiable… you need something to swipe through that gravy. Homemade Quick Dinner Rolls, easy Crescent Rolls, Cat Head Biscuits, or crusty Practically No Knead Bread all fit the vibe — soft, warm, and made for mopping the plate clean.
Sweet Finishes
Finish the meal with something cozy and classic: Apple Cobbler is always a crowd-pleaser, Butterscotch Pie keeps it old-school and extra comforting, and if you want something easy-to-grab, Soft Chocolate Chip Cookies are perfect. For a cake option that still feels homey, Oatmeal Cake is such a good fit.

Frequently Asked Questions
✦ Can I make this ahead of time?
Yes! Braised chuck roast actually tastes even better the next day. Let it cool completely, refrigerate overnight, then gently reheat on the stovetop or in a 325°F oven until warmed through.
✦ Can I skip the red wine?
You can substitute additional beef stock if needed, but the wine adds depth and balance that really enhances the gravy. If you’re skipping it, add a small splash of Worcestershire sauce or red wine vinegar to help round things out.
✦ How much liquid do you need to braise a chuck roast?
The braising liquid should come about halfway up the sides of the roast. You want enough liquid to create steam and keep the meat moist, but not so much that the roast is completely submerged. Braising relies on a combination of moist and dry heat for the best texture and flavor.
✦ How do I know when braised chuck roast is done?
Braised chuck roast is done when it easily shreds with a fork. While the internal temperature is usually around 195°F–205°F, tenderness is the best indicator. If the roast still feels tough, it simply needs more time.
✦ Why is my braised chuck roast tough?
Chuck roast contains a lot of connective tissue that needs time to break down. If your roast is tough, it usually hasn’t cooked long enough. Continue braising until the meat becomes fork-tender.
✦ Can you overcook a braised chuck roast?
It’s difficult to overcook a chuck roast when it’s braising in liquid, but it can eventually become dry if cooked for too long. The ideal texture is fork-tender and juicy, where the meat easily pulls apart without becoming stringy.
Still have questions? Drop them in the comments — I love helping you cook with confidence! 💗
More Beef Comfort Food Recipes You’ll Love
- Swiss Steak — Fork-tender beef simmered in a rich tomato gravy until cozy, saucy, and perfect over mashed potatoes.
- Beef Stew — Tender chunks of beef, potatoes, carrots, and savory broth make this a cold-weather classic.
- Beef and Noodles — Slow-cooked beef and tender noodles in a rich, gravy-style sauce for the ultimate comfort dinner.
- Salisbury Steak — Juicy seasoned beef patties smothered in savory onion gravy for an easy family favorite.
- Traditional Meatloaf — A classic ground beef dinner with tender texture, rich flavor, and that nostalgic Sunday-supper feel.
Tried This Recipe?
💌 And while you’re here, don’t miss the next cozy recipe — subscribe to my totally FREE newsletter so you’ll always have comfort food favorites at your fingertips. 💌
If you enjoyed this recipe, please take a moment to leave ⭐️⭐️⭐️⭐️⭐️ star rating and a quick comment — I love hearing from you and it helps our community of bakers and cooks!
📸 And if you Gram… don’t forget to share your photo on Instagram — tag me @gonnawantseconds so I can cheer you on and share your creations!
Thanks for stopping by my kitchen today — happy cooking, friends! 💗 Kathleen
Braised Chuck Roast
Ingredients
Beef & Seasoning
- 1 (3 1/2–4 pounds) chuck roast
- 5 teaspoons kosher salt divided
- 2 1/2 teaspoons freshly ground black pepper divided
- 2 teaspoons garlic powder
- ½ cup all-purpose flour
For Searing
- 2-3 tablespoons olive oil divided
- 2 tablespoons butter
Flavor Base (Mirepoix + Aromatics)
- 1 medium yellow onion chopped
- 1 medium carrot chopped
- 1-2 ribs celery chopped
- 2 teaspoons minced garlic up to 1 tablespoon for stronger garlic flavor
- 1 tablespoon tomato paste
Braising Liquid & Herbs
- 1 cup dry red wine
- 2 cups beef stock
- 1/2 cup water
- 1 tablespoon Better Than Bouillon beef base
- 1 head garlic halved crosswise
- 2 sprigs fresh rosemary
- 3 sprigs fresh thyme
- 1 bay leaf
- 2 teaspoons Worcestershire sauce
Showpiece Vegetables
- 1 medium yellow onion cut into wedges
- 3 medium carrots peeled and cut into 2–3 inch pieces
- 1 pound baby gold or red potatoes halved
- 1 pound cremini mushrooms halved
Instructions
- Prep and season the roast. Preheat the oven to 325°F (163ºC). Pat the chuck roast (1`) very dry with paper towels. Season all over with 4 teaspoons kosher salt, 2 teaspoons black pepper, and the garlic powder (2 teaspoons). Lightly dredge the roast in the 1/2 cup of flour, shaking off any excess.
- Sear the beef. Heat 2 tablespoons olive oil in a large Dutch oven over medium-high heat until shimmering. Add the roast and sear on all sides until deeply browned, 3–4 minutes per side. Transfer the roast to a plate and set aside.
- Build the flavor base. Reduce the heat to medium. Add the butter (2 tablespoons) to the pot (and the remaining 1 tablespoon oil if the pot looks dry). Once melted, add the chopped onion (1), chopped carrot (1), and chopped celery (1-2 ribs). Cook, stirring occasionally, until softened and lightly golden, about 5–7 minutes. Stir in the minced garlic (2 teaspoons) and tomato paste (1 tablespoon) and cook for 1 minute, stirring constantly, until fragrant and the tomato paste darkens slightly.
- Deglaze and add liquids. Pour in the red wine (1 cup) and stir, scraping up any browned bits from the bottom of the pot. Let the wine simmer for 2–3 minutes. Whisk the beef base (1 tablespoon) into the beef stock (2 cups) and water (1/2 cup), then pour into the pot along with the Worcestershire sauce (2 teaspoons). Nestle in the halved head of garlic (cut side down), rosemary (2 sprigs), thyme (3 sprigs), and bay leaf (1).
- Return the roast and start the braise. Return the seared roast and any accumulated juices to the pot. The liquid should come about halfway up the sides of the roast; if needed, add a splash more stock or water. Bring to a gentle simmer on the stovetop, then cover tightly and transfer to the oven. Braise for 2 hours.
- Add the showpiece vegetables. After 2 hours, carefully remove the pot from the oven. Tuck the onion wedges, carrot chunks (3), potatoes (1 pound), and mushroom halves (1 pound) around the roast, spooning some of the braising liquid over the vegetables. Cover again and return to the oven. Continue braising for 60–75 minutes, or until the roast is very tender and shreds easily with a fork (an internal temperature of about 195–205°F) and the vegetables are just tender but still holding their shape.
- Remove the roast + veggies. Transfer the roast and showpiece vegetables to a warm platter and tent loosely with foil. Fish out and discard the rosemary + thyme stems and bay leaf. Pull out the garlic head—squeeze the soft cloves into the pot and discard the peel.Blend the gravy base. With the pot still on the stove, use an immersion (stick) blender to puree the softened onion/carrot/celery right into the braising liquid until smooth and creamy. This turns all that cooked-down flavor into natural body and thickness.Simmer to thicken. Bring the blended gravy to a gentle simmer over medium heat and let it bubble uncovered for 5–10 minutes, stirring occasionally, until it reduces slightly and thickens to a gravy that coats the back of a spoon.Adjust consistency (easy fixes). - If it’s too thick, whisk in a splash of beef stock or water until it pours the way you like.- If it’s too thin, keep simmering uncovered a few minutes longer (reduction is your thickener here).Taste + finish. Taste and adjust with the remaining salt/pepper as needed, and add an extra dash of Worcestershire if you want more savory punch.Serve. Slice or shred the roast, arrange with the vegetables, and spoon that blended gravy over everything (serve extra at the table).
- Skim the fat. Let the braising liquid sit for a minute, then skim off excess fat from the surface with a spoon (this keeps the gravy from tasting greasy and helps it emulsify).
Fans Also Made:


Notes
- Don’t rush the sear. A deeply browned roast means deeper flavor later. Let it release naturally from the pot before turning.
- Add vegetables later on purpose. Keeping the potatoes and carrots intact gives you that beautiful “Sunday dinner” presentation instead of mushy veggies.
- Blend the gravy while it’s hot. Warm aromatics blend smoothly into the liquid, creating a glossy, restaurant-style gravy with no extra thickeners.
- Aim for nappe consistency. The gravy should coat the back of a spoon and hold a clean line when you swipe a finger through it — thick, but still pourable.
Nutrition

Leave a Reply