
This post may contain affiliate links. Please read our disclosure policy.
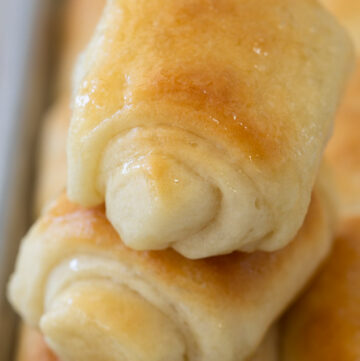
This quick dinner rolls recipe makes soft, fluffy rolls in under an hour—perfect for busy weeknights, holiday dinners, or anytime you want homemade bread fast. With a single short rise and simple pantry ingredients, they deliver that classic buttery flavor and pillowy texture without the long wait.
What makes these truly quick is the streamlined method: instant yeast, one rise, and a rich dough made with milk, butter, and egg for extra softness. The dough is easy to handle (even for beginners), and the rolls bake up beautifully golden with a light, tender interior that practically melts in your mouth.
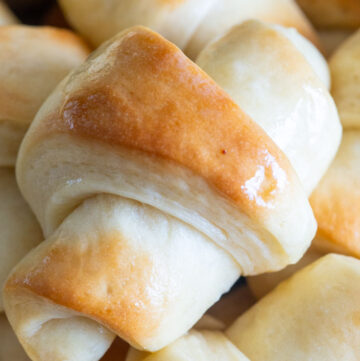
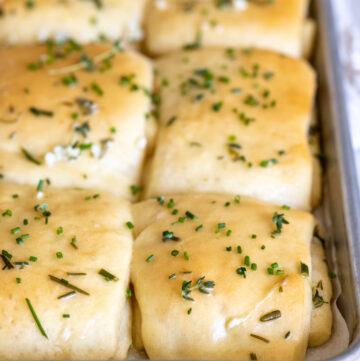
If you love cozy homemade breads, be sure to try my homemade Crescent Rolls, Quick Dinner Rolls, or Lion House Rolls, too.

How to Make Quick Dinner Rolls (Quick Answer)
To make quick dinner rolls, mix a soft yeast dough, knead briefly, shape into rolls, and let them rise for just 20–25 minutes before baking until golden brown. This recipe is ready in about 1 hour from start to finish.
How Long Do Quick Dinner Rolls Take?
These quick dinner rolls come together faster than traditional yeast rolls thanks to a streamlined process and a single short rise.
- Prep time: 25 minutes
- Rise time: 20–25 minutes
- Bake time: 12–15 minutes
👉 Total time: About 1 hour
Before You Begin
✨ Use fresh yeast: Old yeast is one of the biggest reasons rolls don’t rise. Always check the expiration date before you start.
✨ Weigh your dough: For perfectly even rolls, weigh your total dough and divide by 18. (Each roll should be around 56–57 grams.)
✨ Create a warm rise environment: Place the pan near a warm oven or in a closed space with a bowl of hot water to help the dough puff up quickly — just don’t let it get too hot or dry out.
✨ Choose your pan wisely: Metal pans give a crisp bottom; glass or porcelain bake softer, prettier rolls — perfect for serving at the table.
✨ Brush for shine: For that bakery-style golden top, brush with a light egg wash before baking and melted butter after they come out of the oven.

Ingredients for Quick Dinner Rolls
This is just a quick glance at what you’ll need. For exact measurements and the full ingredient list, head down to the recipe card below.
- All-purpose or bread flour: Either works beautifully; bread flour yields slightly chewier rolls.
- Instant yeast: Saves time — no need to proof first!
- Warm milk (110–115°F): Activates the yeast for that quick, fluffy rise.
- Butter: Melted and slightly cooled for richness in the dough, plus a little extra for brushing on top.
- Egg: Adds tenderness and a beautiful golden color.
- Sugar + salt: The perfect balance for flavor and browning.
🔬 The Bread Science
Quick dinner rolls may be simple, but there’s a lot of quiet science working behind the scenes to make them soft, fluffy, and beautifully risen. Instant yeast gets to work faster because it doesn’t need to be dissolved first — the tiny granules hydrate quickly and begin producing carbon dioxide almost immediately, giving these rolls their speedy rise. Warm milk helps activate that yeast and adds richness, while melted butter tenderizes the crumb by coating some of the flour proteins, keeping gluten from getting too tough. And that egg? It adds structure, color, and even more softness. Every ingredient plays a role in getting that bakery-style lift in under an hour.
Pro Tips for Perfect Rolls
⭐ Don’t rush the rise: Even though these are quick, give the dough enough time to get noticeably puffy. You’ll get lighter, taller rolls.
⭐ The poke test: Gently press your fingertip into a roll — if it springs back slowly and leaves a slight dent, it’s ready to bake!
⭐ Avoid overbaking: Rolls should be golden brown on top and sound hollow when tapped. Overbaking will dry them out.
⭐ Make ahead magic: Fully baked rolls can be rewarmed in a 300°F oven for 5–10 minutes — perfect for holiday prep.
⭐ Freezer-friendly: Bake, cool completely, and freeze up to one month. Reheat in a low oven until warm and soft again.
🥣 How to Make Quick Dinner Rolls

Mix the dry ingredients: In a large mixing bowl, whisk together the flour, instant yeast, sugar, and salt.
Combine the wet ingredients: In a separate bowl, whisk the warm milk, melted butter, and egg until smooth.
Make the dough: Pour the wet ingredients into the dry and stir until a shaggy dough forms.
Knead until smooth: Knead the dough until it becomes soft and elastic.
Shape the rolls: Turn the dough out onto a lightly floured surface, divide it into 18 equal portions, and roll each one into a smooth ball.
Let them rise: Arrange the rolls in a greased 9×13 pan, cover loosely, and let them rise until noticeably puffy.
Bake: Brush the risen rolls with beaten egg, then bake until golden brown.
Finish and serve: Brush the warm rolls with melted butter, then serve and enjoy.
Storing + Reheating + Freezing + Make-Ahead Tips
Storing
Store fully baked rolls in an airtight container or resealable bag at room temperature for up to 2 days. For the best texture, keep them loosely covered so they stay soft without getting soggy.
Reheating
Warm rolls in a 300°F oven for 5–10 minutes, covered loosely with foil to keep them soft. For smaller portions, microwave gently for 10–15 seconds.
Freezing
Freeze baked rolls for up to 1 month. Let them cool completely first, then store in an airtight container or freezer bag. Thaw at room temperature and warm in the oven until soft and fragrant.
Make-Ahead Plan
If you want these soft, fluffy rolls ready with zero stress the day you serve them, you can prep the dough in advance and let it rise slowly in the refrigerator.
Make the dough: Follow the recipe through mixing and kneading until the dough is smooth, elastic, and slightly tacky. Stop before dividing and shaping.
Refrigerate: Lightly coat the dough with cooking spray, cover tightly, and refrigerate for up to 48 hours. The dough will rise slightly as it rests—this is normal and helps develop flavor.
Bring to room temperature: Remove the dough from the fridge and let it sit at room temperature for about 30 minutes so it’s easier to work with. Shape the rolls: Divide into 18 equal portions, shape into smooth balls, and place in a greased 9×13 baking dish.
Second rise: Because the dough is cold, this rise will take longer—about 45–75 minutes. The rolls should look noticeably puffy. Use the poke test: they should spring back slowly and leave a slight dent.
Bake as directed: Brush with egg wash and bake at 400°F for 12–15 minutes. If needed, tent with foil near the end to prevent overbrowning. Brush with melted butter while still warm.
What to Serve Quick Dinner Rolls With
Fresh + Crisp Sides
Pair these fluffy rolls with KFC coleslaw, 1905 salad, or cucumber tomato salad for a bright contrast to all that cozy bread goodness.
Hearty Mains
They’re a perfect side for hearty dishes like creamy chicken and potato casserole, Johnny Marzetti casserole,or Chicken Tetrazzini.
Sweet Finishes
End your meal on a sweet note with pineapple sunshine cake, peach cobbler, or sugar cream pie — all cozy GWS classics.

Frequently Asked Questions
◆ How long should quick dinner rolls rise?
Quick dinner rolls typically need about 20–25 minutes to rise. You’re looking for dough that’s noticeably puffy and slightly increased in size—not necessarily doubled like traditional rolls.
◆ How do I know when the rolls are ready to bake?
Use the poke test: gently press your fingertip into a roll. If it springs back slowly and leaves a slight indentation, it’s ready to go into the oven.
◆ Why are my dinner rolls dense instead of fluffy?
Dense rolls are usually caused by adding too much flour or not allowing enough rise time. The dough should be soft and slightly tacky, and the rolls should feel light and puffy before baking.
◆ Why didn’t my rolls rise?
This is usually caused by inactive yeast or a rise environment that’s too cold. Make sure your yeast is fresh and your dough is resting in a warm, draft-free spot.
◆ Can I use active dry yeast instead of instant yeast?
Yes, but you’ll need to dissolve it in the warm milk first and allow a few extra minutes for it to activate. Instant yeast works faster, which is why it’s ideal for quick dinner rolls.
◆ Can I make quick dinner rolls ahead of time?
Yes! You can bake the rolls ahead of time and reheat them in a 300°F oven for 5–10 minutes before serving. They’ll taste freshly baked and stay soft.
◆ Can you freeze dinner rolls?
Absolutely. Let the rolls cool completely, then store them in an airtight container or freezer bag for up to 1 month. Reheat in a low oven until warm and soft.
◆ Can I freeze the dough instead of baking right away?
Yes! Shape the rolls and freeze them before the rise. When ready to bake, thaw overnight in the refrigerator, bring to room temperature, let them rise until puffy, then bake as directed.
◆ Can I double the recipe?
Definitely. Double all ingredients and divide the dough between two 9×13 pans. For best results, bake one pan at a time so the rolls cook evenly.
◆ Can I make these dairy-free?
Yes, you can substitute non-dairy milk and plant-based butter. The rolls will still be soft and fluffy, though the flavor may be slightly different.
💗 Still have questions? Drop them in the comments—I’m always happy to help!
💗 Tried This Recipe?
If you enjoyed this recipe, please take a moment to leave a ⭐⭐⭐⭐⭐ star rating and a quick comment — I love hearing from you!
💌 Hungry for more cozy recipes? Subscribe to my FREE newsletter so you never miss a new family favorite. 💌
Thanks for stopping by my kitchen today — happy cooking, friends! ❤️ Kathleen

Quick Dinner Rolls
Ingredients
Rolls
- 3 3/4 cups (490 grams) all-purpose or bread flour
- 2 1/2 teaspoons (one-1/4 ounces packet) instant yeast
- 3 tablespoons + 1 teaspoon (45 grams) granulated sugar
- 2 teaspoons (11 grams) fine salt
- 1 cup + 1 tablespoon (240-250 milliliters) whole milk, warmed to 110–115°F
- 5 tablespoons + 2 teaspoons (75 grams) unsalted butter, melted and slightly cooled
- 1 large egg at room temperature
Topping
- 1 large egg, basting the tops before baking
- Additional butter for brushing after baking (about 1 tablespoon)
Instructions
- Start preheating the oven to 400ºF (204ºC). Lightly butter a 9x13 baking pan.
- In a large mixing bowl, whisk together the flour (3 3/4 cups), instant yeast (2 1/2 teaspoons), sugar (3 tablespoons + 1 teaspoon), and salt (2 teaspoons).
- In a separate bowl or large liquid measuring cup, whisk the warm milk (1 cup + 1 tablespoon), melted butter (5 tablespoons + 2 teaspoons), and egg (1) until smooth.
- Pour the wet ingredients into the dry and mix until a shaggy dough forms. Knead by hand or with a dough hook for 5–7 minutes, until the dough is soft and elastic. It may still be slightly tacky, but should pull away from the sides of the bowl cleanly.
- Remove the dough onto a lightly floured surface. Divide the dough into 18 equal portions and roll each into a smooth ball. Arrange the rolls in the greased 9x13 pan.
- Cover the pan loosely with plastic wrap or a clean kitchen towel and let rise in a warm, draft-free spot (about 75-80) for 20–25 minutes, or until noticeably puffy.
- Preheat the oven to 400°F (204ºC) while the rolls are rising if you oven heats quickly.
- Once the rolls have risen, remove the covering, brush with beaten egg, and bake for 12-15 minutes, or until golden brown and baked through. If needed, tent loosely with foil during the last few minutes to prevent overbrowning.
- Brush warm rolls with additional melted butter before serving.
Fans Also Made:

Notes
- Don’t rush the rise: Even though these are quick, give the dough enough time to get noticeably puffy. You’ll get lighter, taller rolls.
- The poke test: Gently press your fingertip into a roll — if it springs back slowly and leaves a slight dent, it’s ready to bake!
- Avoid overbaking: Rolls should be golden brown on top and sound hollow when tapped. Overbaking will dry them out.
- Make-ahead magic: Fully baked rolls can be rewarmed in a 300°F oven for 5–10 minutes — perfect for holiday prep.
- Freezer-friendly: Bake, cool completely, and freeze up to one month. Reheat in a low oven until warm and soft again.
Nutrition
On your phone? Check the web story here.

Leave a Reply