
This post may contain affiliate links. Please read our disclosure policy.
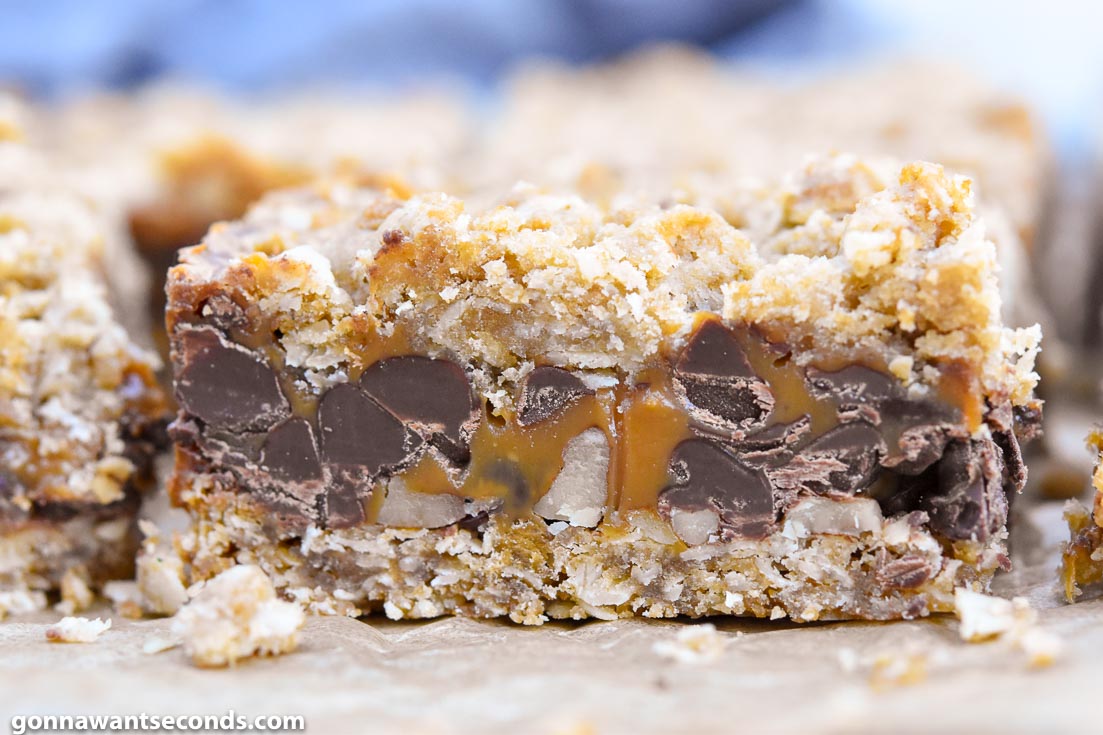
Some Carmelitas lean heavily on caramel, while others are all about the chocolate. My favorite version strikes the perfect balance. These classic Carmelitas combine buttery oatmeal cookie layers, silky caramel, rich semisweet chocolate, and crunchy pecans into bars that are wonderfully chewy, satisfyingly gooey, and easy to slice.
Every ingredient has a purpose. Old-fashioned oats create the perfect chewy cookie layers, a splash of heavy cream keeps the caramel smooth and silky, and semisweet chocolate balances the sweetness so the buttery caramel shines through in every bite. A quick pre-bake gives the crust enough structure to hold the gooey filling while staying tender and chewy.
If you love rich, chewy dessert bars, be sure to try my Cake Mix Cookie Bars or 7 Layer Bars. And if caramel and buttery cookie layers are your thing, my Pecan Pie Bars and Classic Blondies are two more reader favorites you’ll want to add to your baking list.
Let’s get baking—these are the kind of homemade Carmelitas you’ll find yourself making again and again.

✨ Before You Begin
Making these Carmelitas is wonderfully simple, but a few small tips will help you create buttery oatmeal cookie layers, silky caramel, and bars that slice beautifully every time.
✨ Mix the dry ingredients before adding the butter. Whisking together the flour, oats, brown sugar, baking soda, and salt distributes everything evenly so every bite has the same tender, chewy texture.
✨ Preheat the oven completely. Starting with a fully heated 350°F oven helps the cookie layers bake evenly and gives the crust enough structure to support the gooey caramel filling.
✨ Use old-fashioned rolled oats. They give the bars their signature chewy texture and sturdy cookie layers. Quick oats will work, but the finished bars won’t have quite the same bite.
✨ Let the caramel cool for a few minutes before spreading. It should still be smooth and pourable, but slightly thickened. This helps keep the beautiful layers distinct instead of allowing the caramel to seep into the crust.
✨ Cool completely before cutting. For the cleanest, bakery-style squares, refrigerate the bars for 20 to 30 minutes after they’ve cooled to room temperature. Let them sit at room temperature for 10 to 15 minutes before serving so the caramel becomes perfectly soft and chewy again.
Carmelitas Ingredients + Key Notes
These Carmelitas are made with simple pantry staples, but every ingredient has a purpose. Together they create buttery oatmeal cookie layers, silky caramel, rich chocolate, and the perfectly chewy texture that makes these bars so irresistible.
All-Purpose Flour: Gives the oatmeal cookie layers enough structure to hold the gooey caramel filling while staying tender and chewy.
Baking Soda: Adds just enough lift so the cookie layers bake up soft instead of dense. Check that your baking soda is fresh for the best texture.
Salt: Just a small amount balances the sweetness, deepens the buttery caramel flavor, and makes the chocolate taste even richer. Don’t skip it!
Old-Fashioned Rolled Oats: These are the key to the signature chewy texture. They give the bars structure without making them heavy. Quick oats can be substituted, but the texture won’t be quite the same.
Brown Sugar: Light or dark brown sugar both work well. Light brown sugar keeps the flavor classic, while dark brown sugar adds a deeper caramel and molasses note.
Unsalted Butter (Melted): Melted butter creates the soft, chewy cookie layers that make these Carmelitas so satisfying. Using unsalted butter lets you control the seasoning and keeps the flavors perfectly balanced.
Soft Caramel Squares + Heavy Cream: Melting the caramels with heavy cream creates a silky, pourable filling that’s easy to spread and stays soft after baking.
Semisweet Chocolate Chips: Semisweet chocolate balances the sweetness of the caramel instead of overpowering it, so every bite tastes rich without becoming overly sweet.
Chopped Pecans: Pecans add a buttery crunch that complements the soft cookie layers and silky caramel. If you prefer, you can leave them out, but I think they make these bars even better.
🥣 How to Make Carmelitas
Make the oatmeal cookie layers: Stir together the flour, baking soda, oats, brown sugar, and salt, then mix in the melted butter and vanilla until a crumbly dough forms. Press half of the mixture firmly into a parchment-lined 8×8-inch pan and bake for 10 minutes. This quick pre-bake gives the crust enough structure to hold the gooey caramel filling while staying soft and chewy.
Prepare the caramel: Melt the caramel squares and heavy cream together at 50% power in the microwave, stirring until completely smooth. Let the caramel cool for a few minutes until it’s still pourable but slightly thickened.
Layer the filling: Sprinkle the semisweet chocolate chips and chopped pecans evenly over the warm crust, then slowly pour the caramel over the top, spreading it gently into an even layer.
Finish the topping: Crumble the remaining oatmeal mixture evenly over the caramel. Don’t press it down—the loose topping bakes into a beautifully tender cookie layer.
Bake until golden: Bake for 15–18 minutes, or until the top is lightly golden and the caramel is bubbling gently around the edges. Let the bars cool completely before cutting. For the cleanest bakery-style squares, refrigerate them for 20–30 minutes, then let them sit at room temperature for a few minutes before serving.
⭐ Pro Tips
⭐ Press the crust firmly—but don’t pack it down. Press the oatmeal mixture into an even layer so it holds together without becoming compacted. I like to use the flat bottom of a measuring cup to gently press it into the pan. The goal is a sturdy cookie layer that still bakes up tender and chewy. Don’t forget to reserve about half of the mixture for the topping.
⭐ Watch the bars, not just the timer. Every oven bakes a little differently, so use the timer as a guide and rely on visual cues for the best results. The Carmelitas are ready when the top is lightly golden and the caramel is bubbling gently around the edges. If the center still looks pale or very wet, give them another minute or two.
⭐ Handle the caramel gently. Melt the caramel squares and heavy cream at 50% power, stirring until smooth after each interval. Let the caramel cool for a few minutes until it’s still pourable but slightly thickened. This helps create beautiful, distinct layers instead of allowing the caramel to seep into the crust.
⭐ Cool completely before slicing. I know it’s tempting to dive in while they’re still warm and gooey, but patience pays off. Let the bars cool completely, then refrigerate them for 20 to 30 minutes if you’d like perfectly clean, bakery-style squares. Before serving, let them sit at room temperature for 10 to 15 minutes so the caramel softens back to its perfectly chewy texture.
⭐ They’re even better the next day. These bars are delicious the day you bake them, but the buttery oatmeal cookie layers become even more tender and the caramel settles into the perfect chewy-gooey texture after a day of rest. If you’re baking for a party or cookie tray, make them a day ahead, store them tightly covered, and slice just before serving for the prettiest bars.
Troubleshooting Guide
My Carmelitas seem too gooey and won’t set. Let the bars cool completely at room temperature, then refrigerate them for 30 to 60 minutes before slicing. If they’re still very soft, they may simply need more cooling time. If the caramel remains runny even after chilling, the bars probably needed another minute or two in the oven. The top should be lightly golden, and the caramel should be bubbling gently around the edges.
The cookie layers are crumbly and fall apart. Make sure you’re measuring the flour and oats correctly and press the bottom layer firmly into the pan before baking. It should be compact enough to support the gooey filling while still baking up tender and chewy.
My caramel turned hard and chewy. Caramel becomes tough when it’s overheated. Melt the caramels and heavy cream gently at 50% power in the microwave, stirring until smooth after each interval. If the baked bars feel too firm straight from the refrigerator, let them sit at room temperature for 10 to 15 minutes before serving so the caramel softens again.
The edges are done, but the center still looks soft. That’s perfectly normal. The center will continue to set as the bars cool. If the edges are browning too quickly, loosely tent the pan with foil for the last few minutes of baking.
Why did my chocolate sink into the caramel? Those feel more specific to Carmelitas and more likely to help readers.
Storing + Freezing + Make-Ahead Tips
Storing: Store the Carmelitas in an airtight container at room temperature for up to 3 days or refrigerate for up to 1 week. If refrigerated, let them sit at room temperature for 10 to 15 minutes before serving so the caramel softens back to its perfectly chewy texture.
Freezing: Once completely cooled, wrap the bars tightly in plastic wrap, then aluminum foil, or place them in a freezer-safe container with parchment paper between the layers. Freeze for up to 3 months. Thaw overnight in the refrigerator, then bring them to room temperature before serving for the best texture.
Make-Ahead: Carmelitas are one of those desserts that taste even better the next day. Bake them 1 to 2 days in advance, cool completely, then store them tightly covered until you’re ready to serve. Slice just before serving for the cleanest, bakery-style bars.
Frequently Asked Questions
✦ Can I use quick oats instead of old-fashioned rolled oats?
You can, but I recommend sticking with old-fashioned rolled oats whenever possible. They give these Carmelitas their signature chewy texture and sturdy cookie layers. Quick oats will work in a pinch, but the finished bars will be softer and less chewy.
✦ Can I leave out the pecans?
Absolutely! The pecans add a buttery crunch that pairs beautifully with the caramel, but the bars are still delicious without them. You can also substitute chopped walnuts if you prefer.
✦ Can I use caramel bits instead of wrapped caramels?
I recommend soft wrapped caramel squares for the smoothest, silkiest filling. Caramel bits can work, but they don’t always melt quite as smoothly and may require a little extra heavy cream.
✦ Can I double this recipe?
Yes! Double the ingredients and bake the bars in a 9×13-inch baking dish. Start checking for doneness about 5 minutes before the recommended baking time, then bake until the top is lightly golden and the caramel is bubbling gently around the edges.
✦ Do Carmelitas need to be refrigerated?
Not necessarily. They’ll keep well at room temperature for a few days in an airtight container. If you refrigerate them, let the bars sit at room temperature for 10 to 15 minutes before serving so the caramel softens back to its perfectly chewy texture.
Still have questions? Drop them in the comments — I love helping you bake with confidence! 💗
More Dessert Bars to Love
S’more Bars — Everything you love about classic s’mores—gooey marshmallows, melted chocolate, and graham crackers—baked into easy-to-share dessert bars.
Peach Crumb Bars — A buttery crust layered with sweet, juicy peaches and topped with a tender crumb topping for the perfect summer dessert.
Strawberry Bars — Fresh strawberries and a buttery crumble come together in these soft, fruity bars that are perfect for spring and summer gatherings.
Almond Joy Bars — Rich coconut, chocolate, and crunchy almonds combine in this homemade version of the classic candy bar.
Rice Krispie Treats — Soft, gooey, marshmallow-packed treats that are always a hit with kids and adults alike.
Tried This Recipe?
💌 And while you’re here, don’t miss the next cozy recipe — subscribe to my totally FREE newsletter so you’ll always have comfort food favorites at your fingertips. 💌
If you enjoyed this recipe, please take a moment to leave ⭐️⭐️⭐️⭐️⭐️ star rating and a quick comment — I love hearing from you and it helps our community of bakers and cooks!
📸 And if you Gram… don’t forget to share your photo on Instagram — tag me @gonnawantseconds so I can cheer you on and share your creations!
Thanks for stopping by my kitchen today — happy cooking, friends! 💗 Kathleen
Carmelitas
Ingredients
- 1 cup all-purpose flour
- 1/2 teaspoon baking soda
- 1 cup old fashioned rolled oats
- 3/4 cup brown sugar, packed
- 1/4 teaspoon salt
- 1 teaspoon vanilla extract
- 3/4 cup unsalted butter, melted
- 1 (10-ounce) bag soft caramel squares, unwrapped
- 1/3 cup heavy whipping cream
- 1 1/4 cups semisweet chocolate chips
- 1/2 cup pecans, chopped
Instructions
- Preheat oven to 350ºF (177ºC). Line an 8X8-inch baking dish with parchment paper or aluminum with a 2-inch overhang on both sides.
- In a large mixing bowl, add flour (1 cup), baking soda (1/2 teaspoon), oats (1 cup), brown sugar (3/4 cup), salt (1/4 teaspoon), vanilla (1 teaspoon), and melted butter (3/4 cup) to the bowl. Stir until combined. The dough will be crumbly.
- Divide the dough in half, pressing one half of the dough into prepared 8" x 8" pan.
- Bake for 10 minutes in the preheated oven, set aside to cool for 10 minutes.
- While crust is baking, melt the caramel squares (10 ounces) and heavy cream (1/3 cup) in the microwave for 2 minutes on 50% power. Stir caramels and cream until smooth and completely melted. Return to microwave at 30-second intervals at 50% power until completely melted and caramel is smooth when stirred. Set aside to let cool and thicken.
- Sprinkle chocolate chips (1 1/4 cups) and pecans (1/2 cup) over slightly cooled crust.
- Spread cooled, melted caramel sauce over chocolate chips and pecans.
- Break the remaining dough into small pieces then lay the pieces in a single layer over the caramel, chocolate chips, and pecans.
- Bake in the preheated oven for 15-18 minutes, or until golden brown on the top. Let Caramelitas cool before cutting.
Fans Also Made:

Notes
- Press the crust firmly—but don’t smash it.
When you press the oat mixture into the pan, you want a solid, even base so the bars hold together, but still a little bit of that crumbly, cookie texture. Use your fingertips or the flat bottom of a measuring cup to press it in firmly, then stop before it looks compacted and rock-hard. And don’t forget to reserve about half of the mixture for the topping! - Watch the visual cues, not just the timer.
Ovens all run a little differently, so rely on how the Carmelitas look and smell. The bars are ready when the edges are deeply golden brown and the center is bubbling gently around the edges but not sloshing in the middle. If they still look pale and sleepy, give them a few more minutes. - Handle the caramel with care.
Warm the caramels and cream low and slow, stirring until just smooth and pourable. If you cook the mixture at a full boil, it can turn tough once cooled. Pour the caramel in an even layer over the crust, nudging it toward the edges but not all the way to the pan sides so it doesn’t weld to the metal. - Let cool completely for neat slices.
I know it’s tempting to dive in while they’re warm and gooey, but cooling is where the magic happens. Let the pan cool to room temperature, then chill it for an hour or so if you want perfectly tidy squares. Use the parchment overhang to lift the whole slab out onto a cutting board before slicing. - Plan ahead—Carmelitas are even better the next day.
These bars are wonderful the day you bake them, but the flavors deepen and the texture settles into that perfect chewy–gooey balance after they rest. If you’re serving them for a party, bake them the day before, let them cool completely, and store them tightly covered. Slice just before serving for the prettiest bars.
Nutrition



This is a great recipe for the family or a special occasion. I first found this in a Pillbury pamphlet that used to be found for free at grocery store checkouts. Instead of caramels and cream it called for ice cream topping. I would mix it up with some butterscotch topping if I really wanted to bake a fabulous tummy bomb. I think the substitution of caramels sounds wonderful. I highly recommend for a potluck or buffet but bring the napkins!
Hi, Kathy! That sounds perfect <3