
This post may contain affiliate links. Please read our disclosure policy.
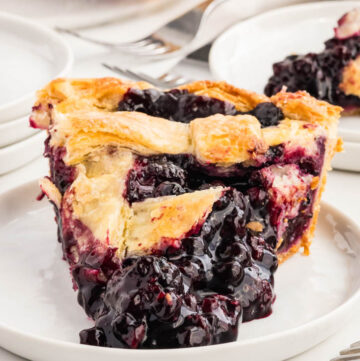
This Razzleberry Pie is as easy as it is stunning — made with frozen raspberries, blackberries, and blueberries, nestled inside a golden, buttery crust with a sparkling lattice top. The filling comes together in just minutes with Cornaby’s E-Z Gel, so there’s no stovetop cooking or waiting for fruit to cool.
Why this recipe is so delicious: the all-butter laminated crust is impossibly flaky, the filling stays bright and juicy, and it bakes into the kind of pie that tastes like a special occasion but feels totally doable on a weeknight.
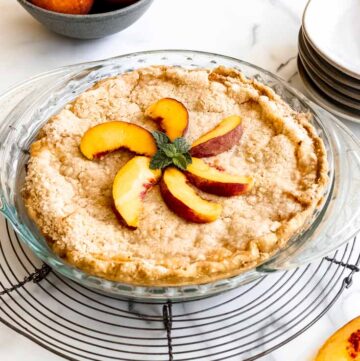
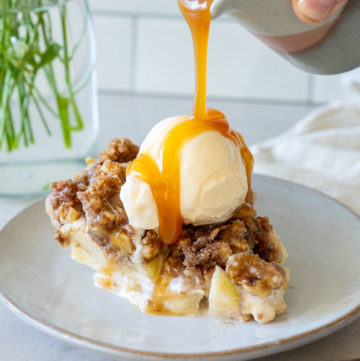
If you love cozy, fruit-filled desserts like my blackberry pie, pear pie, and apple pie with crumb topping, you’ll fall head over heels for this easy razzleberry pie. And when you’re craving something just as homey but a little different, my peach cobbler is always a family favorite.
💗 It’s a beautiful centerpiece for the holidays or a sweet treat for any day you’re craving something cozy and classic.

✨ Before You Begin
✨ Keep it cold! Every component of your crust should stay as cold as possible — that’s what creates flaky layers.
✨ Use frozen berries straight from the bag. No thawing, no cooking, no mess.
✨ Make the dough ahead. Pie crust needs at least an hour to hydrate and chill — up to 5 days in the fridge or 6 months in the freezer.
✨ Prep a foil pie shield. It keeps your crust edges from over-browning before the filling is fully set.
✨ Let it rest after baking. The pie needs time to set up — if you slice it too soon, it’ll taste amazing, but it may spill a little (still worth it).
🥧 Razzleberry Pie Ingredients + Key Notes
This is just a quick glance at what you’ll need. For exact measurements and the full ingredient list, head down to the recipe card below.
All-Butter Pie Crust
- All-Purpose Flour: Provides structure and just enough protein to hold buttery layers without toughness.
- Salt: Enhances flavor — essential in balancing the sweetness of the filling.
- Unsalted Butter: The backbone of flavor and flakiness. Cold butter releases steam during baking, creating crisp layers. Using a mix of cubed and grated butter ensures even lamination and perfect texture.
- Granulated Sugar: A touch of sugar helps tenderize the crust and promotes beautiful browning.
- Apple Cider Vinegar: The acid weakens gluten formation, making the dough softer and easier to roll without cracking.
- Ice-Cold Water: Moisture binds the dough — but only just enough. Too much water toughens; too little leads to cracks.
Berry Filling
- Frozen Berry Mix: Raspberries, blackberries, and blueberries mimic the “razzleberry” blend made famous by Marie Callender’s pies. Frozen fruit retains its structure better than fresh during baking.
- Granulated Sugar: Draws out juices and balances tart berries without muting their natural flavor.
- Cornaby’s E-Z Gel: The game-changer! It thickens instantly, eliminating the need to pre-cook your filling. It’s gluten-free, shelf-stable, and never clumps.
Egg Wash + Topping
- Egg + Water: The classic glossy finish. Whisked water thins the egg just enough to brush on smoothly.
- Turbinado Sugar: Adds sparkle, crunch, and a bakery-style finish.
The Baking Science
Flaky pie crust is all about fat and temperature. Butter’s water content (around 16–18%) turns to steam as it melts, pushing apart the dough layers and creating those perfect, crisp flakes. When the butter gets too warm before baking, it melts into the flour instead — leaving you with a tougher, greasier crust. That’s why every chill step matters.
Laminating the dough (those letter folds!) mimics puff pastry, redistributing butter layers evenly. Each fold strengthens the structure while locking butter into thin sheets that puff dramatically in the oven.
Cornaby’s E-Z Gel works differently from cornstarch — it’s an instant starch, meaning it thickens without heat. In the oven, it keeps the filling stable, preventing soggy crust and runny slices.
And finally, resting your baked pie allows the filling to gel properly as it cools, so the fruit juices thicken into luscious layers rather than spilling when sliced.

⭐ Pro Tips
⭐ Don’t skip the vinegar. It tenderizes gluten, especially useful with all-butter crusts that can otherwise turn tough.
⭐ Laminate lightly. Those letter folds don’t just look fancy — they trap thin layers of butter for superior flakiness.
⭐ Bake on a sheet pan. It catches any bubbling overflow and ensures even bottom browning.
⭐ Shield smartly. Butter crusts brown faster than shortening crusts, so use a foil or silicone pie shield after the first 40 minutes.
⭐ Wait for the bubbles. Fruit pies are done when the filling is visibly bubbling — that’s your cue the starch has activated and thickened.
How to Make Razzleberry Pie

Here’s a quick look at how to make this beautiful razzleberry pie — full instructions are in the recipe card below!
Start by making the all-butter crust, keeping everything cold for those flaky layers.
Mix up your frozen berries, sugar, and E-Z Gel — no cooking needed! Roll out the bottom crust, pile in that gorgeous berry filling, then weave the lattice top. Brush with egg wash, sprinkle with sugar, and bake until golden and bubbly. Let it cool completely so the filling sets (the hardest part!) — then slice, serve, and enjoy every sweet, buttery bite.
✦ FAQs
✦ Why is my pie crust tough?
Over-mixing develops gluten. Handle the dough gently and stop adding water as soon as it forms a shaggy ball. The vinegar also helps keep it tender.
✦ Can I use cornstarch instead of E-Z Gel?
No — cornstarch requires heat to activate and won’t work properly in this no-cook filling. E-Z Gel thickens instantly at room temperature.
✦ Can I freeze the pie before baking?
Yes! Assemble and crimp the pie (skip the egg wash), then freeze for up to 3 months. Thaw overnight in the fridge before brushing with egg wash and baking.
✦ How do I know when the pie is done?
Look for bubbling fruit through the lattice and golden crust edges. That’s your signal the filling has thickened and the bottom crust is baked through.
✦ Why shouldn’t I refrigerate the pie after baking?
Cold air makes the filling contract and pull away from the crust. Room temperature keeps the structure intact and the texture tender.
Still have questions? Drop them in the comments — I love helping you bake with confidence! 💗

Storing + Reheating + Make-Ahead Tips
Storing
- Keep covered at room temperature up to 2 days.
Reheating
- Warm slices in a 325°F oven for 10–15 minutes to re-crisp the crust. Avoid the microwave — it softens the pastry.
Freezing
- Freeze unbaked pies up to 3 months, or baked pies up to 1 month. Wrap well in plastic and foil.
Make-Ahead
- The crust can be made and chilled for up to 5 days before use. You can also prep the filling a few hours in advance and refrigerate it until ready to assemble.
Food Safety
- If you’d like more info on food safety, check out this link.

What to Serve With Razzleberry Pie
Mains This Pie Pairs Well With
- Roast Turkey or Chicken Tetrazzini – both make a cozy, comforting pairing for any celebration.
- Crockpot Pork Tenderloin – juicy and savory, the perfect contrast to those sweet-tart berries.
- Million Dollar Chicken – rich, creamy, and absolutely delicious with this fruity pie for dessert.
Sweet Finishes (for a Dessert Spread)
- Heaven on Earth Cake – light, creamy, and layered with berries for a beautiful contrast.
- Million Dollar Pie – cool and creamy with tropical flavor that complements the razzleberry filling.
- Sweet Potato Pie with Condensed Milk – warm and spiced, perfect for fall gatherings.
- Butterscotch Pie – smooth, buttery, and nostalgic — the sweetest way to round out your dessert table.
More Fruit Pie Recipes
Tried This Recipe?
💌 And while you’re here, don’t miss the next cozy recipe — subscribe to my totally FREE newsletter so you’ll always have comfort food favorites at your fingertips. 💌
If you enjoyed this recipe, please take a moment to leave ⭐️⭐️⭐️⭐️⭐️ star rating and a quick comment — I love hearing from you and it helps our community of bakers and cooks!
📸 And if you Gram…don’t forget to share your stroganoff on Instagram — tag me @gonnawantseconds so I can cheer you on and share your creations!
Thanks for stopping by my kitchen today — happy cooking, friends! 💗 Kathleen
Razzleberry Pie
Ingredients
All-Butter Pie Crust (can be made ahead)
- 1 cup + 2 tablespoons (2 sticks) unsalted butter
- 2 1/2 cups (300g) all-purpose flour
- 1 tablespoon (15g) granulated sugar
- 1 teaspoon kosher salt
- 8-10 tablespoons ice-cold water
- 1 teaspoon apple cider vinegar
Berry Filling
- 5 cups frozen berry mix raspberries, blackberries, blueberries
- 1/2 cup granulated sugar
- 1/4 cup Cornaby’s E-Z Gel
Egg Wash and Sugar Topping
- 1 egg
- 1/2 teaspoon water
- 1-2 tablespoons Turbinado sugar or granulated sugar
Instructions
All-Butter Pie Crust
- Cut 1 cup of cold butter into small cubes and return to the refrigerator. Shred 2 tablespoons of cold butter onto wax paper or parchment and place in the freezer.
- In a medium-sized bowl, whisk together flour (2 1/2 cups), sugar (1 tablespoon), and salt (1 teaspoon). Toss cubed butter into the flour mixture. Press butter cubes into the flour with fingers until all the butter is approximately the size of half a pecan.
- Place the flour and butter mixture in the refrigerator while you prepare the ice-cold water. Place 4-5 ice cubes in a 1-cup measuring cup and fill with cold water. Stir around.
- Sprinkle vinegar (1 teaspoon) and 2 tablespoons ice-cold water over the flour and butter mixture. Use a fork to fold the mixture together gently. Repeat with another 2 tablespoons of ice-cold water. Repeat a third time. At this point, you have added 6 tablespoons of water, and the mixture should be starting to come together, but still, a lot of flour is left dry. Add 1 tablespoon of ice-cold water at a time, up to a maximum of 10 tablespoons total. (Less water is better since the flour will absorb moisture as it chills in the refrigerator. However, too little water and your crust will want to crack as you roll it out.) Continue to fold after each tablespoon of water is added, until the dough forms a scraggly ball when pressed together. It will not look pretty at this point. It should not be sticky at all. It will look very dry, but it forms a ball. Do not add more water.
- Place the dough and the few flour pieces in plastic wrap, covering tightly, and place the wrapped dough in the refrigerator to chill for 30 minutes.
- Unwrap the dough and place it on a lightly floured surface. Flour the rolling pin as well. If the pie dough is a little sticky, try sprinkling a little flour on top. This is a laminated dough pie crust. You are going to perform at least two letter folds. Roll the dough into a rectangle shape. The dough will still look scraggly. Create a letter fold by folding the bottom third of the rectangle onto the center third of the rectangle. Then fold the top third of the rectangle down onto the center third of the rectangle, overlapping in the center.
- Turn the dough 90 degrees. Roll it out into a rectangle again. Repeat the letter fold. If the dough is not smooth yet, repeat the 90-degree turn, roll it into a rectangle, and then perform the letter fold for the last time. Wrap the dough tightly in a double layer of plastic wrap. Let it chill for at least 1 hour, but 2 hours is preferable to chill thoroughly and allow the flour to hydrate completely. This is a double pie crust. You can separate the dough into two disks now, or wait until you are ready to roll out the crust. The pie dough could be frozen at this point.
Berry Filling
- Add all ingredients to a medium-sized bowl. Stir, cover, and set aside.
Pie Assembly and Baking Instructions
- Preheat oven to 375°F (190ºC). Prepare to use a pie shield or prepare a foil shield by cutting a square sheet of aluminum foil and lightly folding it into fourths. Cut a quarter-circle out of the center and open it to form a complete circle within the square of foil, so that the edges of the pie crust are covered with foil and the center of the pie remains uncovered. Set aside for baking.
- Lightly flour your work surface and the rolling pin. Cut the dough in half with a bench scraper. Roll out one pie crust from the center until it is round, 1/8 to 1/4-inch thick, and 2 ½- inches wider in diameter than your pie plate.
- Fold the pie crust in half or quarters to move it easily and fit it into the pie plate, centering it on the plate. Gently ease the crust into the bottom and sides of the pie plate, ensuring it fits snugly against the entire plate. Do not trim the overhang along the rim.
- Stir the filling again. Fill the uncooked bottom crust with the berry mixture until heaping. Add all the sugar and gel granules from the bowl as well. Be careful to keep the top rim (outside edge) of the pie crust clean from the berry mixture so that the top pie crust adheres properly. Place the pie in the fridge to chill while you make the lattice top.
- Lightly flour your work surface again. Roll out the second pie dough disk until it is round and 1/8 to 1/4-inch thick. Use a pizza cutter or knife to cut ten (9” plate) or twelve (10” plate) strips that are 1 to 1 ½-inches wide for the lattice top.
- Remove the pie from the refrigerator. Place the 5-6 vertical strips evenly spaced on top of the berry filling. Longer strips work best in the center, and shorter strips fit on the ends. Fold every other strip up toward the top of the pie and onto the counter—almost off the pie. Place the top-most horizontal strip. Fold all the strips back onto the berry filling.
- Now fold the other vertical strips up toward the top of the pie and onto the counter. Place the next horizontal strip. Fold all the strips back onto the berry filling. Continue folding vertical strips and placing horizontal strips until the berry filling is covered and the lattice has been woven on top of the pie.
- Cut away the overhanging pie crust (top lattice and bottom crust) so that ½ to 1-inch remains around the entire edge. Fold the bottom crust overhang up and on top of the lattice crust. Press together and use a fork or fingers to crimp.
- Prepare egg wash by whisking the egg (1) and water (1/2 teaspoon) together. Using a pastry brush, brush the top pie crust with egg wash. Avoid pooling egg wash in the indentations. Immediately sprinkle with sugar (1-2 tablespoons) before the egg wash dries.
- Put the prepared pie on a baking sheet. All-butter pie crusts sometimes weep butter while they bake, depending on how fast the butter melts. Plus, the bubbly filling can bubble over. Bake at 375°F (190ºC) for 40 minutes. Without removing the pie from the oven, place the foil shield on the pie. Continue baking the pie for an additional 30 minutes, or until the berry filling is bubbly. If the crust begins to brown too much, lightly cover the entire pie with foil.
- Remove the pie from the oven and cool completely at room temperature.

Notes
- Don’t skip the vinegar. It tenderizes gluten, especially useful with all-butter crusts that can otherwise turn tough.
- Laminate lightly. Those letter folds don’t just look fancy — they trap thin layers of butter for superior flakiness.
- Bake on a sheet pan. It catches any bubbling overflow and ensures even bottom browning.
- Shield smartly. Butter crusts brown faster than shortening crusts, so use a foil or silicone pie shield after the first 40 minutes.
- Wait for the bubbles. Fruit pies are done when the filling is visibly bubbling — that’s your cue the starch has activated and thickened.

So easy. So good. And I love the way to make this crust!
Thanks so much Kim! We adore this yummy pie and, yes, the crust is amazing! <3