This post may contain affiliate links. Please read our disclosure policy.
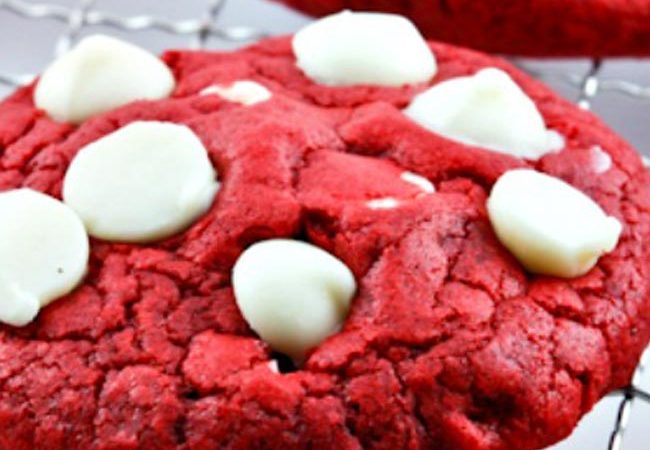
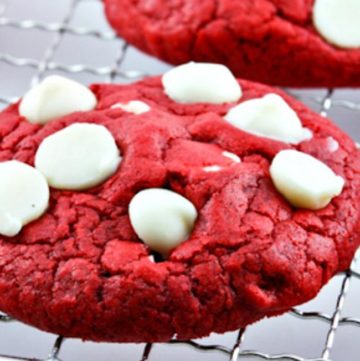
If you’re looking for soft red velvet cookies with bright color, a hint of cocoa, and creamy white chocolate in every bite, this is the batch to make. They’re tender, moist, and pretty enough for holidays… but easy enough for a random Tuesday cookie craving.
You’ll love how these bake up pillowy in the center with just-set edges, thanks to the butter + sugar creaming, a touch of cornstarch for tenderness, and vinegar for that classic red velvet “something-something” that keeps the flavor from tasting flat. If you’re on a red velvet kick, don’t miss my Red Velvet Poke Cake, and for more cookie favorites, you’ll also love Rockstar Cookie, Kitchen Sink Cookies, and Chocolate Crinkle Cookies. And hey—if your kitchen smells like a fancy bakery afterward, don’t say I didn’t warn you. 😉
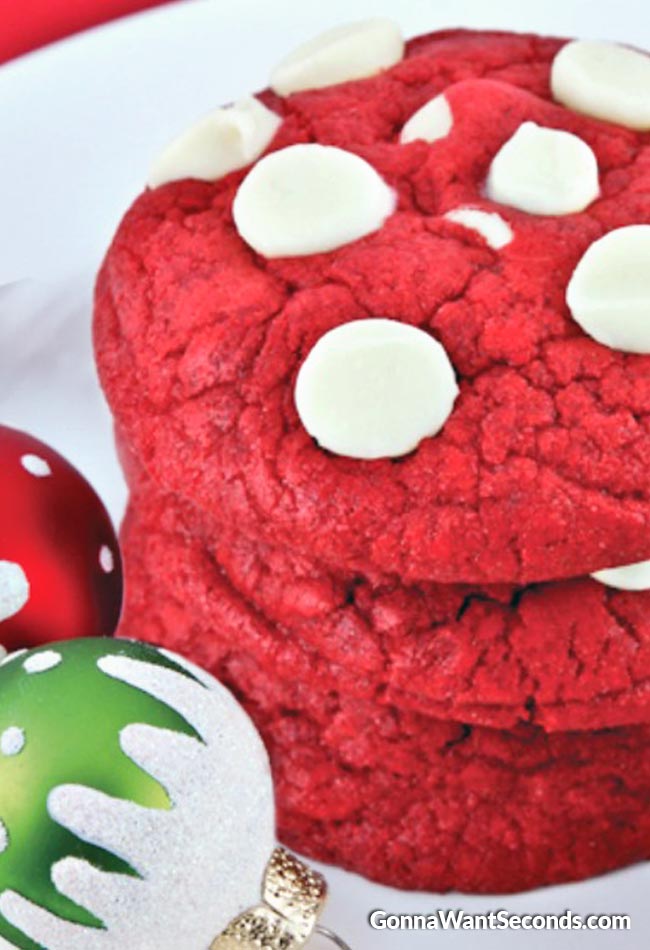
Soft, sweet, and dressed up in their best red velvet glow, these cookies are the kind that disappear fast — so don’t be surprised if you’re sneaking one straight off the cooling rack.❤️🍪
✨ Before You Start
✨ Bring the butter to room temp. This is what helps the cookies cream up light and fluffy (aka, soft texture and better lift).
✨ Don’t over-measure flour. Spoon and level if you can—too much flour makes these dry fast.
✨ Keep the mixing gentle once flour goes in. Overmixing = tougher cookies (and we want plush, tender ones).
✨ Have extra white chips ready. Pressing a few into the tops right out of the oven makes them look bakery-pretty.
Ingredients + Key Notes
This is just a quick glance at what you’ll need. For exact measurements and the full ingredient list, head down to the recipe card below.
Unsalted butter (room temperature) — The base for that soft, rich texture. Room temp matters because it traps air when creamed with sugar, which helps the cookies bake up tender instead of dense.
Sugar — Sweetness + structure. Sugar also helps the cookies spread slightly and gives that soft bite.
Distilled white vinegar — Classic red velvet flavor booster. It adds subtle tang and helps the overall flavor taste “brighter,” not just sweet cocoa.
Egg — Binds everything and adds moisture. One egg keeps the cookies soft without making them cakey.
Vanilla extract — Rounds out the cocoa and makes the white chocolate taste even creamier.
Red food coloring — Purely for that signature look. Gel coloring tends to give the boldest color with less liquid, but liquid works fine (as written).
All-purpose flour — Structure. Measure carefully so the cookies stay moist and tender.
Cocoa powder — Red velvet isn’t “chocolate” chocolate—this small amount gives a gentle cocoa flavor and that classic red velvet vibe.
Cornstarch — The secret softness helper. It reduces “toughness” and gives a more tender, bakery-style crumb.
Baking powder — Lift without excessive spread. Helps them stay thicker and soft.
Salt — Tiny amount, big impact. It keeps the cookies from tasting one-note sweet.
White chocolate chips — Creamy, sweet pops in every bite. Save a few for the top so they look extra irresistible.
⭐ Pro Tips
⭐ Creaming isn’t optional here. Give it the full 3–4 minutes—when the mixture turns pale and fluffy, you’re building the soft, tender texture before the flour even shows up.
⭐ Scrape deeper than you think. Cookie dough loves to hide butter and sugar at the bottom of the bowl. If you notice streaks, take the paddle off and “dig” once—your dough will bake more evenly.
⭐ Don’t chase “brown.” Red velvet cookies won’t look golden the way chocolate chip cookies do—judge doneness by the edges looking set and the centers looking softly puffed.
⭐ Bake one test tray first. Every oven runs a little spicy at 375°F. A quick test bake tells you whether your sweet spot is closer to 9 minutes or 11.
🥣 How to Make Red Velvet White Chocolate Chip Cookies
Cream the butter and sugar until pale and fluffy, then mix in the vinegar, egg, vanilla, and red food coloring just until smooth, scraping the bowl so everything blends evenly. Add the dry ingredients in two additions, mixing on low and stopping as soon as the flour disappears—this keeps the cookies soft and tender instead of tough.
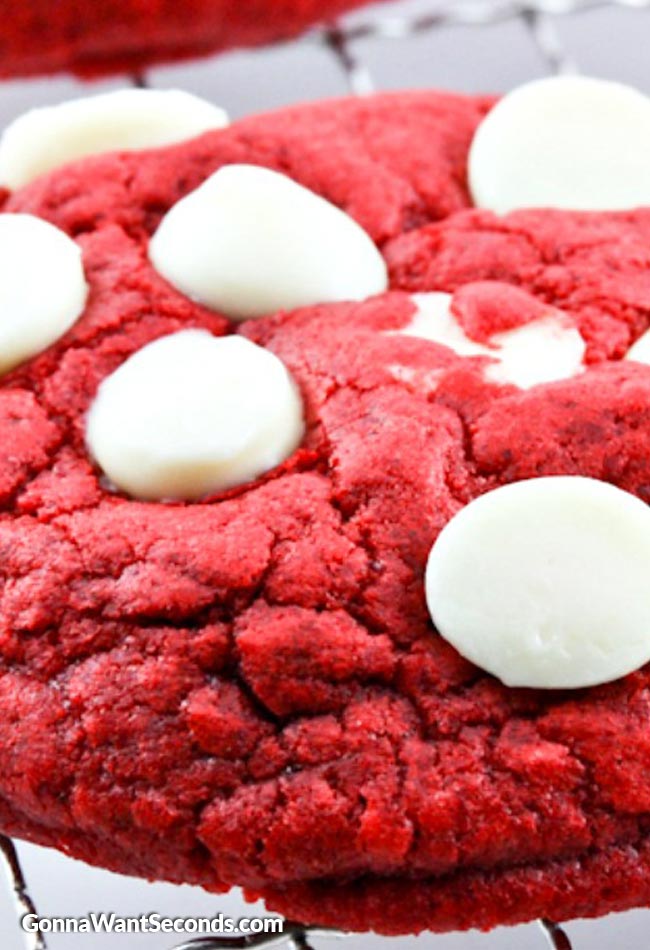
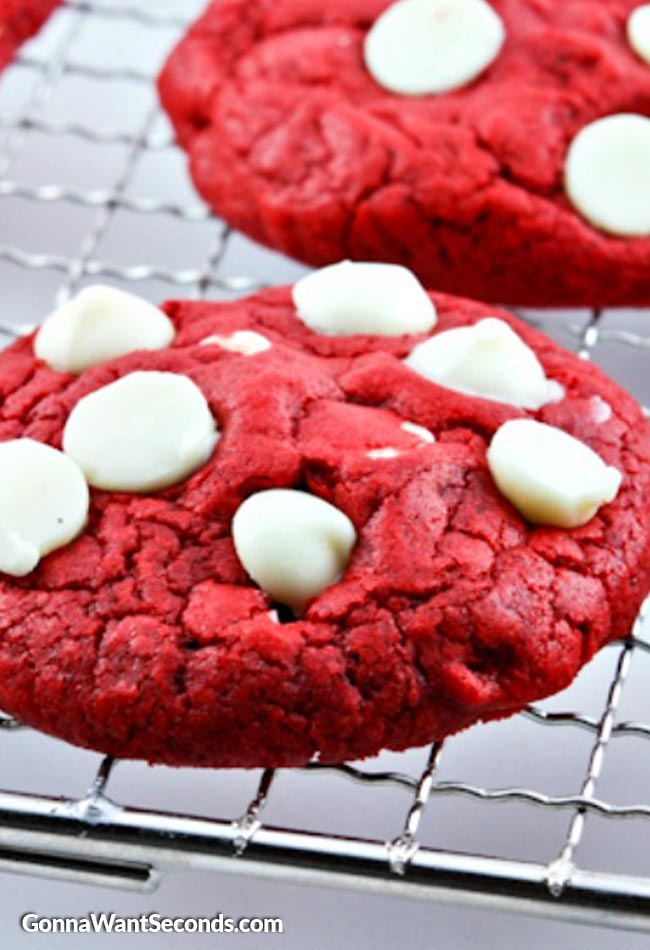
Roll the dough into balls and bake just until the edges are set and the centers are still very soft. As soon as the cookies come out of the oven, gently press the white chocolate chips into the hot, pillowy tops. The heat softens the chips without browning them, so they stay creamy, bright, and picture-perfect instead of toasted and ugly brown.
🔬 Baking Science Moment
Red velvet is all about balance: a little cocoa for flavor, vinegar for tang, and a mixing method that keeps the texture tender. The cornstarch softens the flour’s protein structure (less toughness), and creaming the butter + sugar traps tiny air pockets so the cookies bake up lighter and softer, not dense.
Storing + Reheating + Freezing + Make-Ahead Tips
Storing
Store cookies in an airtight container at room temperature for up to 4 days. For maximum softness, tuck a small piece of bread in the container—cookie magic, I swear.
Reheating
Warm one cookie in the microwave for 6–10 seconds for that fresh-baked softness (especially good once day 2 hits).
Freezing
Freeze baked cookies in a freezer bag or container for up to 2 months. Thaw at room temp, or microwave from frozen for 10–15 seconds.
Make-Ahead
Roll the dough into balls and refrigerate for up to 24 hours before baking. You can also freeze dough balls (solid first on a sheet pan), then bake from frozen—just add 1–2 minutes to the bake time.
Food Safety
If you’d like more info on food safety, check out this link.
Frequently Asked Questions
♦ Why do you add the white chocolate chips after baking instead of mixing them into the dough?
White chocolate browns really fast in the oven. Pressing the chips into the cookies right after baking keeps them creamy and bright white, and they melt just enough to stick without turning tan.
♦ How do I know these cookies are done if they don’t brown much?
Look for set edges and a soft, slightly puffed center. They’ll finish setting as they cool on the pan, so don’t overbake them trying to get a golden look.
♦ Do I have to use a stand mixer?
A stand mixer makes creaming easier, but a hand mixer works too. The key is beating the butter and sugar until it looks pale and fluffy, not just “mixed.”
♦ Can I use gel food coloring?
Yes. Gel typically gives a more vibrant red with less product. Add a little at a time until you love the shade.
♦ Why is there vinegar in the dough? Will it taste sour?
Not at all. It’s a classic red velvet trick that adds subtle tang and depth so the cookies don’t taste flat or overly sweet.
♦ Can I chill the dough?
You can, but you don’t have to. Chilling will usually make the cookies bake a bit thicker; if the dough is very firm, let it sit out for a few minutes so it scoops more easily.
Still have questions? Drop them in the comments — I love helping you bake + cook with confidence! 💗
More Cookie Recipes to Bake Next
- Haystack Cookies: Sweet, chewy, no-bake perfection with that addictive “grab one more” factor — an easy win when you want something fast and festive
- Chocolate Crinkle Cookies: Crackly tops, soft centers, and big cocoa flavor — a classic “pretty cookie” that red velvet lovers always click next.
- Rockstar Cookie: Thick, chewy, and loaded with mix-ins — these are the bold, bakery-style cookies your readers make on repeat.
- Kitchen Sink Cookies: Brown butter, pretzels, coconut, and melty chips all in one cookie — salty-sweet perfection for anyone who loves a “loaded” treat.
- No Chill Sugar Cookies: Soft, simple, and totally dependable — the go-to cookie when you want something easy that still tastes homemade.
- Brown Butter Brownies: Deep, toasty, ultra-fudgy bars that hit the same rich dessert craving as red velvet (just in brownie form).
- Italian Christmas Cookies: Tender, nostalgic, and always a holiday-table favorite — a perfect next stop if your reader is in festive baking mode.
Tried This Recipe?
💌 And while you’re here, don’t miss the next cozy recipe — subscribe to my totally FREE newsletter so you’ll always have comfort food favorites at your fingertips. 💌
If you enjoyed this recipe, please take a moment to leave ⭐️⭐️⭐️⭐️⭐️ star rating and a quick comment — I love hearing from you and it helps our community of bakers and cooks!
📸 And if you Gram… don’t forget to share your photo on Instagram — tag me @gonnawantseconds so I can cheer you on and share your creations!
Thanks for stopping by my kitchen today — happy cooking, friends! 💗 Kathleen
Red Velvet White Chocolate Chips Cookies
Ingredients
- 1/2 Cup Unsalted Butter at Room Temperature
- 1 Cup Sugar
- 1 Teaspoon Distilled White Vinegar
- 1 Large Egg
- 1 Teaspoon Vanilla Extract
- 1 1/2 Teaspoons Red Food Coloring
- 1 1/2 Cups All-Purpose Flour
- 2 1/2 Tablespoons Cocoa
- 1 Teaspoon Cornstarch
- 3/4 Teaspoon Baking Powder
- 1/4 Teaspoon Salt
- 3/4 Cup Plus More for Garnish White Chocolate Chips
Instructions
- Preheat oven to 375 degrees.
- In a stand-up mixer fitted with a paddle attachment, mix butter and sugar on medium speed for 3-4 minutes or until pale and fluffy.
- Add vinegar and mix just until combined. Add the egg just until combined. Scrape down sides of mixing bowl. Add vanilla and red food coloring and combine.
- To the butter mixture, add half the flour, cocoa, cornstarch, baking powder, and salt. Mix on low until just combined. Scrape down the sides and the bottom of the mixing bowl. I took the paddle off to really dig down to the bottom. Add the rest of the flour and mix until everything is incorporated. Mix in the White Chocolate Chips.
- Line cookie sheets with parchment or Silpat mats.
- Roll dough into ping pong ball sized balls and place on prepared cookie sheets 2 inches apart. I did not flatten them.
- Bake for 9-11 minutes. While the cookies are just out of the oven, gently push a few white chocolate chips into hot tops of cookies in a random pattern to garnish. Tip down is easiest.
Fans Also Made:

Nutrition
Reader Interactions
Comments
Trackbacks
-
[…] adapted recipe is based on Red Velvet White Chocolate Chips Cookies on Gonna Want […]
-
[…] Red Velvet White Chocolate Chip Cookies made by uwagatavo. Inspired by Gonna Want Seconds. […]
-
[…] Recipe from: Gonna Want Seconds […]

this looks so delish! i cant wait to try, i was looking for red velvet variety and stumble upon this oh thank goodness
oh i really want to know how long will this cookies of yumm lasts? 2weeks? thank you!!
I just happened to stumble upon your blog (I love food bloggers) Yours has become one of my favorites. I am an avid baker specializing in cookies. Being born and bred in the south I LOVE anything red velvet so I just had to thank you for your red velvet cookie and brownie recipes. The are a wonderful addition to my collection. I only made one change….browned butter….it make the buttery flavor so much more intense. Keep up the great work!!! 🙂
Really good recipe! Thank You!
So I just went for it with caster sugar- I just didn’t have the will power to wait!
I’ve had two fresh out of the oven, although with the amount of mix I ate between batches it’s probably more like four 😉 These have to be the tastiest things I have ever eaten!! All gooey and wonderful with the chocolate still melting: you’re lucky I don’t know you in person, as I would have to hug you and hug you and never let go XD Absolute heaven. Thank you
Emmy so glad you liked the! Sorry I was away from my computer for a bit.
These look GORGEOUS! I’m going on a boat with a few mates, and as we’re teens nommy bakes are always well recieved 😉
My one question, fearing looking very stupid indeed: what type of sugar do you use? I’m just wondering, as I don’t want to use gran instead of caster, or the other way round or whatever and screw up the entire bake (especially knowing how I tend to react to baking disastors… not good 😉 )
Thanks so much- I’m itching to get going with these!!
I just wanted to tell you that your recipe is absolutely amazing! I tried it today and the cookies turned out perfectly! Thank you very much for sharing this amazing cookie recipe with us!
Yay! So glad you liked them 🙂
I made these cookies yesterday and they are so very good!! I put a cup of the chips in the dough and none on top after baking. I thought the amount and size of the chips took away from the red velvet cookie. So…..I decided to try the same recipe with mini chocolate chips instead of the white chocolate chips. They are even better!!! Thanks for sharing the recipe. I do have a question tho, what’s the point of the vinegar?
I like your twist on these and look forward to trying it your way. I’m not sure what the vinegar is for but it’s, I think, in all red velvet recipes.
I made them, but they didn’t spread out a lot. 🙁
HHhhmmm….I wonder what happened:(
I’m guessing now that it probably was too dry or something weird. ‘Cause when I was mixing up the dough I had to use like all of my strength 😛
Otherwise maybe it’s my oven, because it’s pretty old and takes a good 30-40 minutes to preheat.
In my school choir we have a thing where people bake on Fridays, so I could try again and make it wetter. Either way the cookies were *really* good even if they looked a little chunky. :3
I’m definitely going to try more of your red velvet recipes either way! They all look so good~ It’s funny because the store down the street from my house actually sells red velvet whoopie pies, but I want to compare with your version because they don’t taste much different from the normal yellow ones. =\
Do you know if you can use whole wheat flour?
I’m sure you can. I’m sorry, but since I don’t often work with whole wheat flour, I can’t give you much advice. I would guess you need a blend of whole wheat pastry flour and regular whole wheat flour. Let me know how it works if you give it a try.
Just wanted to let you know that my better half made these for the Christmas potluck at the firestation. These are soooooooooo great! Thank you for the recipe. (I guess I should add, hopefully they make it to the firestation, as I can’t stop eating them.)
About how many cookies does this recipe make? I plan to make them for our cookie swap this week!
Hey Kim! You should plan on yielding 18-20 cookies. It will depend on how large you roll them. You can adjust the size as you like 🙂
Hey not sure if it’s just coincidence or not but this is the exact recipe I created and posted on my site {Cooking Classy}. I’d love for you to source it if that’s where you got it =). I love the tip to press the white chocolate chips into the tops of the cookies AFTER baking by the way! That solves the white chips browning problem but still allows them to show through. Happy Holidays to you!
Hey Jaclyn! So nice to hear from you. I LOVE your blog. Everything always looks so yummy. I always try to credit the source of all my recipes. I was given this recipe by a friend so I’ll ask her again where she got it. At the time of my posting she couldn’t remember. I just checked your blog and the red velvet white chocolate chip cookies look like a different recipe from this one.
These are gorgeous and would fit in perfectly on a holiday spread table!
These look so beautiful!!! I love red velvet! 🙂
I love red velvet anything! Your cookies look extra delicious with such a generous amount of white chocolate chips!
Tis the season, for treats that fa la la their way into our hearts and tummies! Beautiful and festive color.
They look almost too pretty to eat! But I would still try one 🙂