

This post may contain affiliate links. Please read our disclosure policy.
These Grinch Cupcakes are an easy Christmas treat made with moist red velvet cupcakes, fluffy bright-green vanilla buttercream, and a little red candy heart on top. They’re festive, fun to decorate, and perfect for Christmas parties, holiday movie nights, or anyone who loves that famously grumpy green guy.
I start with a box of red velvet cake mix and doctor it up with buttermilk, eggs, and vanilla for a softer, richer crumb without a lot of extra work. Then each cupcake gets a tall swirl of Grinch-green frosting and one simple heart sprinkle, so you get a showstopping Christmas cupcake without complicated decorating.
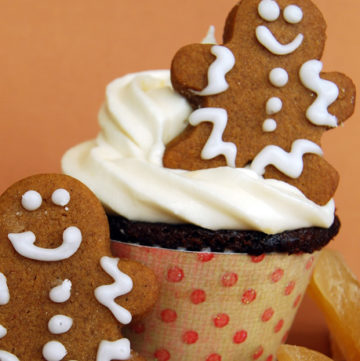
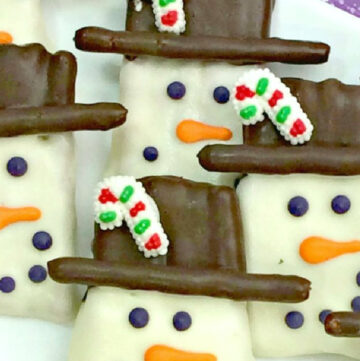
If you’re planning your holiday sweets, browse my Christmas Desserts collection, or try my Gingerbread Cupcakes, Pretzel Snowmen, and Reindeer Noses next.

✨ Before You Begin
✨ The cupcakes are red velvet, not green. The surprise red cupcake underneath the bright green frosting makes these especially festive and gives you that classic red-and-green Christmas combination.
✨ Use gel food coloring. Neon green gel gives you a vivid Grinch-green frosting without thinning the buttercream the way liquid food coloring can.
✨ Cool the cupcakes completely. Even slightly warm cupcakes can soften the buttercream and make those tall frosting swirls slump.
✨ You don’t need elaborate decorating skills. A big frosting swirl and one red heart sprinkle are all it takes to make these instantly recognizable.
Grinch Cupcakes Ingredients + Key Notes
This is just a quick glance at what you’ll need. For exact measurements and the full ingredient list, head down to the recipe card below.
For the Cupcakes
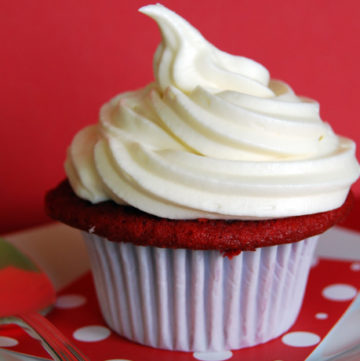
Red velvet cake mix – A 15.25-ounce box keeps these cupcakes simple and reliable during the busy holidays. Prefer baking from scratch? My Red Velvet Cupcakes are a great alternative.
Buttermilk – Use this instead of water for a richer flavor and softer, more tender crumb.
Vegetable oil – Keeps the cupcakes moist and tender, even when you make them ahead.
Eggs – Three large eggs give the cupcakes structure and help them rise.
Vanilla extract – Boosts the flavor of the cake mix and gives the cupcakes a more homemade taste.
For the Buttercream Frosting
Unsalted butter – Make sure it’s softened but not melted so the frosting whips up fluffy and holds its shape for piping.
Powdered sugar – Sweetens and thickens the buttercream to a smooth, pipeable consistency.
Heavy cream – Makes the buttercream creamy and fluffy. You can add a little extra if needed to adjust the consistency.
Vanilla extract – Gives the buttercream its classic vanilla flavor.
Neon green gel food coloring – The key to that bright Grinch-green frosting. Gel provides vivid color without thinning the buttercream.
Red heart sprinkles – The signature finishing touch against the bright green frosting.

🥣 How to Make Grinch Cupcakes
Here’s a quick look at how to make this easy Grinch Cupcakes recipe. You’ll find the complete instructions in the recipe card below.
Mix the batter. Combine the red velvet cake mix, buttermilk, oil, eggs, and vanilla, and beat until smooth and well combined.
Bake the cupcakes. Divide the batter among lined muffin cups, filling each about two-thirds full. Bake until a toothpick inserted in the center comes out clean or with a few moist crumbs. Transfer to a wire rack and cool completely.
Make the Grinch-green frosting. Beat the softened butter until creamy, then gradually beat in the powdered sugar, heavy cream, and vanilla until thick and fluffy. Add neon green gel food coloring a little at a time until you reach a bright Grinch green.
Pipe the frosting. Transfer the buttercream to a piping bag fitted with a large star tip and pipe a generous swirl onto each completely cooled cupcake.
Add the heart. Finish each cupcake with one red heart sprinkle.
This is ready to go. It retains the terms we’re deliberately supporting—easy Grinch cupcakes, make Grinch cupcakes, Grinch-green frosting—but doesn’t make readers wade through the recipe twice.
⭐ Pro Tips for the Best Grinch Cupcakes
⭐ Don’t overmix the batter. Beat just until the batter is smooth and well combined. Overmixing can make the cupcakes less tender.
⭐ Fill the liners evenly. Aim for about two-thirds full so the cupcakes bake evenly and leave plenty of room for those tall frosting swirls.
⭐ Cool completely before decorating. Even slightly warm cupcakes can soften the buttercream and cause the piped swirls to slump.
⭐ Start with properly softened butter. It should give slightly when pressed but shouldn’t look greasy or melted. Butter that’s too cold can leave the frosting lumpy; too warm and it may not hold its shape.
⭐ Go slowly with the green gel color. Gel coloring is concentrated, so start with a small amount, mix thoroughly, and add more as needed until you reach that bright Grinch green.
⭐ Chill the frosting briefly if your kitchen is warm. If the buttercream feels too soft for piping, refrigerate the filled piping bag for about 10 minutes to help it hold those tall swirls.
Recipe Notes
- Yield: This recipe makes about 24 cupcakes, depending on how full you fill the liners.
- For extra-tall frosting swirls: Make 1½ times the buttercream if you want especially generous swirls or want a little extra for decorating.
- For the most even baking: A light-colored metal muffin pan is my preference for even, consistent baking. If using a dark metal pan, begin checking the cupcakes early since they may bake and brown more quickly.

Storing + Freezing + Make-Ahead Tips
Storing: Store frosted Grinch cupcakes in an airtight container at cool room temperature for up to 1 day or in the refrigerator for 2–3 days. Let refrigerated cupcakes sit at room temperature for about 20–30 minutes before serving so the cake and buttercream can soften.
Freezing: Freeze unfrosted cupcakes for up to 2 months. Once completely cool, wrap them individually in plastic wrap and place them in a freezer bag or airtight container. Thaw at room temperature before decorating.
Make-Ahead: Bake the cupcakes 1 day ahead and keep them tightly covered at room temperature. The buttercream can also be made a day ahead and refrigerated; let it soften, then re-whip before coloring and piping. You can also fully decorate the cupcakes a day ahead, refrigerate them, and bring them toward room temperature before serving.
This is ready to go. It’s shorter, retains everything readers are likely to need, and avoids overloading a simple cupcake recipe with unnecessary storage detail.
Grinch Cupcakes FAQs
✦ How do I make Grinch-green frosting?
Use neon green gel food coloring rather than liquid coloring for the brightest Grinch green without thinning the buttercream. Start with a small amount, mix thoroughly, and add more a little at a time until you reach a vivid yellow-green shade.
✦ Can I make mini Grinch cupcakes?
Yes. Divide the batter among lined mini muffin cups, filling each about two-thirds full. Mini cupcakes will bake much faster than standard cupcakes, so begin checking them early and remove them when a toothpick inserted in the center comes out clean or with a few moist crumbs. Cool completely before adding smaller swirls of green frosting and red heart sprinkles.
✦ Can I make Grinch cupcakes ahead of time?
Yes. Bake the cupcakes 1 day ahead and keep them tightly covered at room temperature, then frost and decorate the next day. You can also fully decorate them a day ahead and refrigerate them. Bring refrigerated cupcakes toward room temperature before serving.
✦ Can I use a different cake flavor?
Absolutely. Red velvet gives these cupcakes a fun red-and-green Christmas contrast, but you can use chocolate, vanilla, or white cake mix instead. The bright green frosting and red heart sprinkles will still give them their signature Grinch look.
✦ Do I need a piping bag to decorate Grinch cupcakes?
No. A piping bag fitted with a large star tip makes the tall swirls especially pretty, but it’s not essential. You can spread the green buttercream on with a small offset spatula or use a zip-top bag with one corner snipped off, then finish each cupcake with a red heart.
Still have questions? Drop them in the comments — I love helping you cook with confidence! 💗
More Christmas Desserts to Try
Italian Christmas Cookies – Soft, cake-like vanilla cookies finished with sweet glaze and colorful sprinkles for a classic Christmas treat.
Christmas Sugar Cookies – Buttery cut-out cookies that hold their shape beautifully for decorating with festive icing and sprinkles.
Chocolate Crinkle Cookies – Rich, fudgy chocolate cookies rolled in powdered sugar for their signature snowy, crackled tops.
Easy Fudge – Rich, creamy chocolate fudge made with just a handful of ingredients for an easy holiday treat.
Homemade Crockpot Hot Chocolate – Rich, creamy hot chocolate that stays warm in the slow cooker, perfect for Christmas parties and holiday movie nights.
Tried This Recipe?
💌 While you’re here, don’t miss the next cozy recipe — subscribe to my totally FREE newsletter so you’ll always have comfort food favorites at your fingertips. 💌
If you enjoyed this recipe, please take a moment to leave ⭐️⭐️⭐️⭐️⭐️ star rating and a quick comment — I love hearing from you and it helps our community of bakers and cooks!
📸 And if you Gram… don’t forget to share your photo on Instagram — tag me @gonnawantseconds so I can cheer you on and share your creations!
Thanks for stopping by my kitchen today — happy cooking, friends! 💗 Kathleen

Grinch Cupcakes
Ingredients
For the Cupcakes:
- 1 (15.25-ounce) box red velvet cake mix
- 1 cup buttermilk
- 1/2 cup vegetable oil
- 3 large eggs
- 1 teaspoon pure vanilla extract
For the Buttercream Frosting:
- 1 cup (2 sticks) unsalted butter softened
- 4 cups powdered sugar
- 3 tablespoons heavy cream
- 1 teaspoon pure vanilla extract
- Neon green gel food coloring
- 24 red heart sprinkles
Instructions
- Prep the oven and pans. Preheat your oven to 350°F (177ºC) and line two 12-cup muffin pans with paper liners. For the most even bake, position your oven rack in the center.
- Mix the cupcake batter. In a large mixing bowl, combine the red velvet cake mix (1 box), buttermilk (1 cup), vegetable oil (1/2 cup), eggs (3), and vanilla (1 teaspoon). Beat on medium speed for about 2 minutes, stopping once or twice to scrape down the sides and bottom of the bowl, until the batter is smooth and slightly fluffy. Try not to overmix—once it looks well combined, you’re done.
- Fill and bake the cupcakes. Divide the batter evenly among the liners, filling each about two-thirds full. Bake for 15–20 minutes, starting to check at 15 minutes. The cupcakes are done when a toothpick or cake tester inserted in the center comes out clean or with just a few moist crumbs. If your oven bakes unevenly, rotate the pans front-to-back halfway through. Let the cupcakes cool in the pans for a few minutes, then transfer them to a wire rack to cool completely before frosting.
- Make the green buttercream. In a stand mixer or large bowl with a hand mixer, beat the softened butter (1 cup) on medium speed for 2–3 minutes, until it’s very creamy and a bit lighter in color. Slowly add the powdered sugar (4 cups), about 1 cup at a time, alternating with the heavy cream (3 tablespoons), mixing on low until incorporated after each addition.Once everything is in, increase the speed to medium and beat until the frosting is smooth, thick, and fluffy. Mix in the vanilla (1 teaspoon) and just enough neon green gel food coloring to reach a bright Grinch-y green. If the frosting seems too thick, add a little more cream, 1 teaspoon at a time; if it’s too soft for piping, beat in a bit more powdered sugar until it holds a nice swirl. If you’d like to take the sweetness down a notch, you can also beat in a tiny pinch of salt to balance the flavor.
- Decorate the cupcakes. Spoon the frosting into a piping bag fitted with a large star tip. Pipe generous swirls of frosting onto each completely cooled cupcake. Gently press one red heart sprinkle onto the side or top of each swirl so it really pops against the green. Serve right away, or store the cupcakes covered at cool room temperature for up to a day, or in the fridge for a bit longer—just let them come back toward room temp before serving for the softest texture.

Notes
- Start with truly softened butter. Your butter should give slightly when pressed but not look greasy or melty. Too cold and your frosting will be lumpy; too warm and it can turn soupy and lose its shape when you pipe it.
- Sift the powdered sugar for silky frosting. It’s one little step that makes a big difference in texture, especially with a bright color where any little lump will show. Just sift it into a bowl before adding it to the butter.
- Taste your frosting before you color it. Once you add neon green, it’s harder to “read” the flavor visually. Adjust the vanilla and salt while it’s still white so the sweetness is balanced and the vanilla flavor is just right.
- Go slowly with the gel color. Gel coloring is concentrated. Start with a small dab, mix well, then add more as needed. It’s much easier to deepen the color than to fix frosting that’s gone too dark or unnaturally neon.
- Chill briefly for cleaner swirls. If your kitchen is warm, pop the filled piping bag in the fridge for about 10 minutes before you start decorating. Slightly cooler frosting holds its shape beautifully when you pipe tall swirls.



Leave a Reply