
This post may contain affiliate links. Please read our disclosure policy.
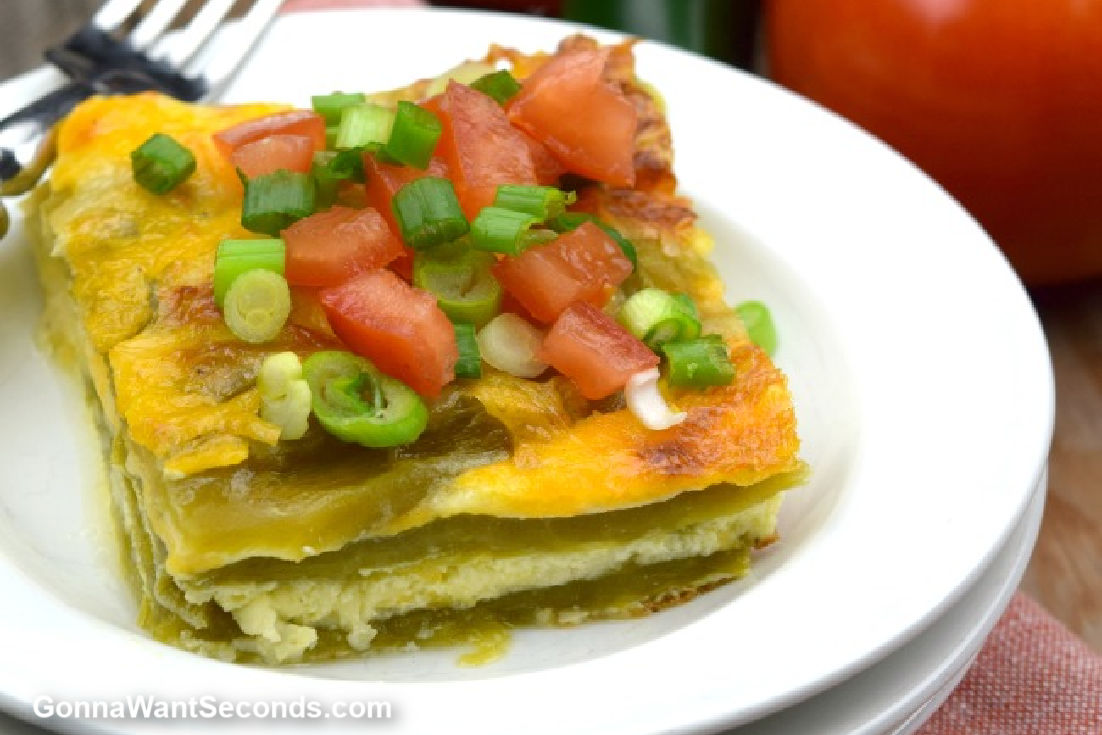
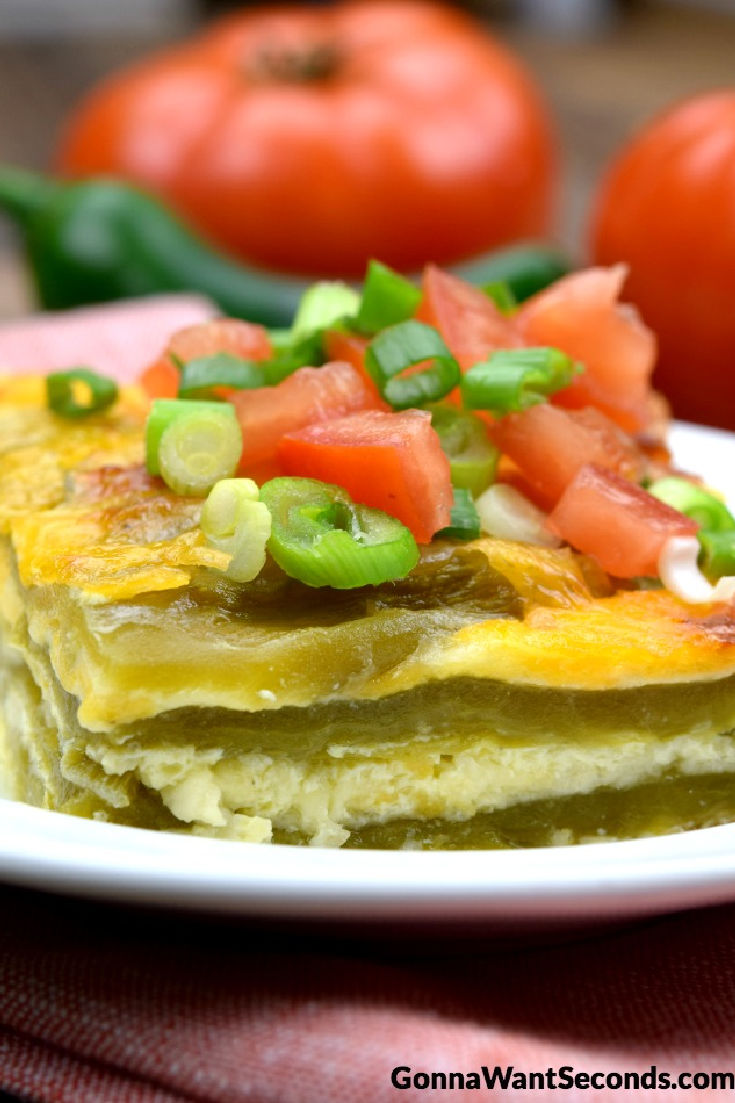
This easy Chile Relleno Casserole Recipe has all the cheesy, comforting flavors of classic chile rellenos without the fuss of roasting, peeling, and stuffing fresh peppers. Layers of tender whole green chiles, Monterey Jack, cheddar cheese, and a simple egg custard bake into a hearty casserole that’s perfect for weeknight dinners, potlucks, or weekend brunch.
My mom used to make this casserole for our family, and it was always one of those recipes everyone looked forward to. Using canned whole green chiles keeps the recipe simple while still delivering the classic flavor we all loved.
If you enjoy easy Mexican-inspired comfort food, be sure to try my White Chicken Enchiladas, Chicken Enchilada Casserole, Shredded Beef Enchiladas, and Mexican Chicken Casserole.
✨ Before You Begin
🥣 How to Make Chile Relleno Casserole
Prepare the pan: Preheat the oven to 350°F and lightly grease a 9×13-inch baking dish.
Prep the chiles: Drain the whole green chiles, remove any remaining seeds if desired, and pat them dry with paper towels.
Mix the custard: Whisk together the eggs, milk, flour, salt, pepper, and baking powder until smooth.
Layer the casserole: Arrange the chiles in the baking dish, sprinkling Monterey Jack and cheddar between the layers. Finish with the remaining cheese on top.
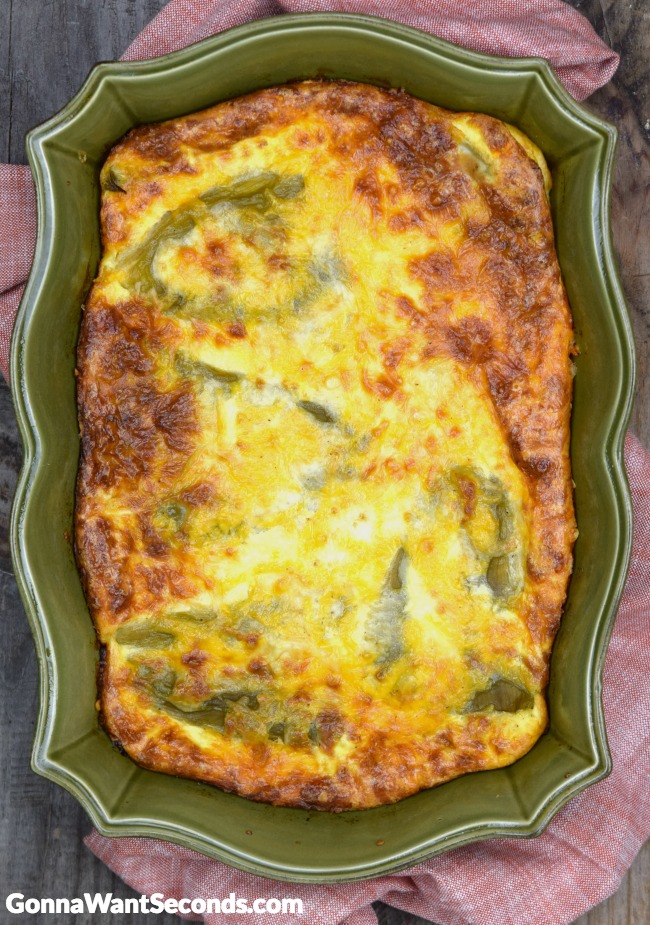
Bake: Pour the egg mixture evenly over the casserole and bake for 30–40 minutes, or until the center is set and the top is lightly golden.
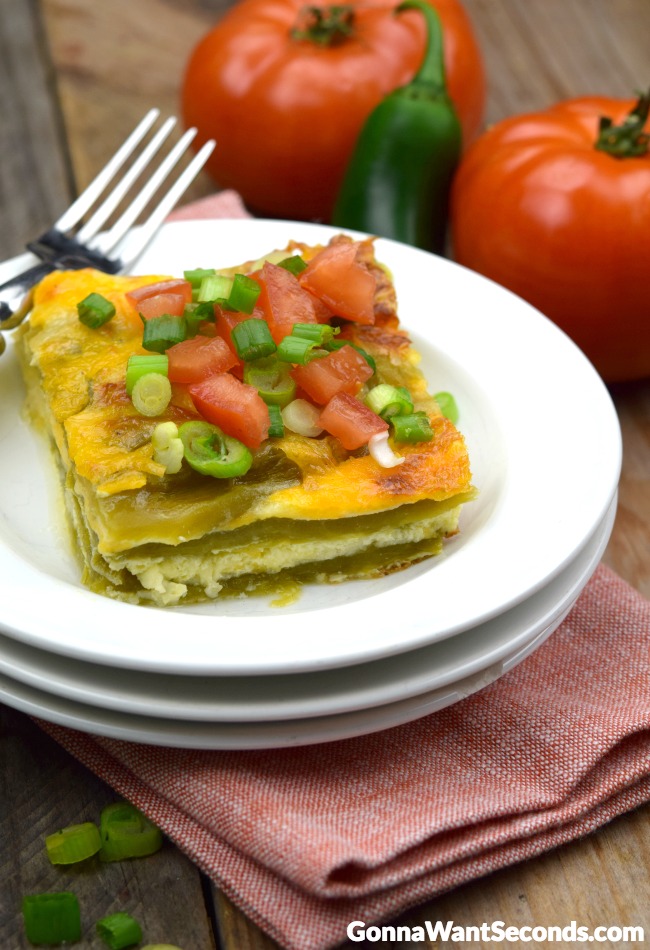
Rest and serve: Let the casserole rest for 15 minutes before slicing. Serve with enchilada sauce, sour cream, cilantro, diced tomatoes, and green onions, if desired.
⭐ Pro Tips
⭐ Dry the chiles well: After draining the canned whole green chiles, pat them thoroughly dry with paper towels. Removing excess moisture helps the casserole bake up firm instead of watery.
⭐ Shred your own cheese: Freshly shredded Monterey Jack and cheddar melt much smoother than pre-shredded cheese, giving the casserole a creamier texture.
⭐ Fresh or canned? Canned whole Anaheim chiles are already roasted, peeled, and ready to use, making this recipe quick and easy. If you prefer fresh Anaheim or poblano peppers, roast, peel, and seed them before layering them into the casserole.
⭐ Let it rest: Resist the urge to cut into the casserole right away. Letting it rest for about 15 minutes allows the custard to set, making it much easier to slice and serve.
⭐ Make it your own: For a spicier casserole, leave some of the chile seeds in, add diced jalapeños between the layers, or serve with your favorite hot sauce.
Storing + Reheating + Freezing + Make-Ahead Tips
Storing: Let the casserole cool completely, then cover tightly or transfer leftovers to an airtight container. Refrigerate for up to 4 days.
Reheating: Reheat individual portions in the microwave until warmed through, or cover the casserole with foil and warm in a 325°F oven for 15–20 minutes. Add your favorite toppings after reheating for the freshest flavor.
Freezing: Wrap the cooled casserole tightly with plastic wrap and foil, or store individual portions in freezer-safe containers. Freeze for up to 3 months. Thaw overnight in the refrigerator before reheating.
Make-Ahead: Assemble the casserole up to 24 hours in advance, cover tightly, and refrigerate. When you’re ready to bake, let it sit at room temperature for about 20–30 minutes while the oven preheats, then bake as directed. Add a few extra minutes to the baking time if needed.
What to Serve With Chile Relleno Casserole
One of my favorite things about this casserole is how versatile it is. My mom always served it for dinner, but the cheesy egg custard also makes it perfect for brunch or a special weekend breakfast. No matter when you serve it, these recipes make delicious pairings.
Mexican Favorites: Round out your meal with Mexican Rice, Charro Beans, or Mexican Street Corn Casserole. for a classic restaurant-style dinner.
Fresh Sides: Balance the rich, cheesy casserole with Southwest Salad, Mexican Corn Salad, or a simple green salad.
Cozy Breads: Serve with Jalapeño Cornbread or warm flour tortillas to soak up every bite.
Sweet Finishes: End the meal with Atlantic Beach Pie, Pineapple Delight, Classic Pineapple Upside Down Cake, or Margarita Cake for a bright, citrusy finish.
Frequently Asked Questions
◆ Can I use fresh poblano peppers instead of canned green chiles?
Absolutely! Fresh roasted poblano or Anaheim peppers make a delicious chile relleno casserole. Simply roast, steam, peel, and remove the seeds before layering them into the casserole. I use canned whole green chiles because they’re already roasted and peeled, making this recipe much quicker without sacrificing flavor.
◆ Is chile relleno casserole spicy?
Not usually. Canned whole Anaheim chiles are mild with a slightly sweet flavor. Removing the seeds keeps the casserole very family-friendly. If you’d like more heat, leave some of the seeds in, add diced jalapeños between the layers, or serve with your favorite hot sauce.
◆ Can I make chile relleno casserole ahead of time?
Yes! You can assemble the casserole up to 24 hours in advance, cover it tightly, and refrigerate until you’re ready to bake. Let it sit at room temperature for about 20–30 minutes while the oven preheats, then bake as directed.
◆ Why is my chile relleno casserole watery?
The most common cause is excess moisture from the canned chiles. Be sure to drain them well and pat them dry with paper towels before assembling the casserole. Letting the casserole rest for about 15 minutes after baking also helps it set properly.
◆ Can I serve chile relleno casserole for breakfast?
Absolutely! Since it’s made with eggs, cheese, and green chiles, this casserole is just as delicious for breakfast or brunch as it is for dinner. Pair it with fresh fruit, breakfast potatoes, or a simple salad for an easy meal any time of day.
◆ Can I freeze chile relleno casserole?
Yes. Let the casserole cool completely, then wrap it tightly or store individual portions in freezer-safe containers for up to 3 months. Thaw overnight in the refrigerator before reheating.
Still have questions? Leave a comment below, and I’ll be happy to help!
More Easy Mexican Dinner Recipes
Chicken Tamale Casserole – Everything you love about homemade tamales in an easy, cheesy casserole that’s perfect for busy weeknights.
Mexican Casserole – Layers of seasoned ground beef, tortillas, cheese, and bold Mexican flavors make this hearty casserole a family favorite.
Taco Lasagna – Flour tortillas replace pasta in this cheesy, flavor-packed casserole that’s always a hit for dinner.
Carne Picada – Tender bites of beef simmered in a rich tomato and pepper sauce that’s delicious served with warm tortillas or rice.
Shrimp Enchiladas – Tender shrimp wrapped in tortillas and baked in a creamy sauce for an easy restaurant-style dinner at home.
Tried This Recipe?
I’d love to hear what you think! ⭐⭐⭐⭐⭐ If you made this Chile Relleno Casserole, please leave a star rating and a comment below. Your reviews help other readers and make my day!
💌 Want more comfort food inspiration? Join my FREE newsletter and get delicious new recipes sent straight to your inbox.
Be sure to share your creation on Instagram and tag @gonna_want seconds so I can see it. Thanks for stopping by my kitchen today—happy cooking, friends! ❤️ Kathleen
Thanks for stopping by my kitchen today — happy cooking, friends! ❤️ Kathleen
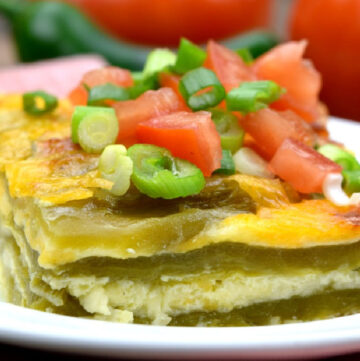
Chile Relleno Casserole
Ingredients
- 4 (7 ounce) cans whole green chiles, drained
- 8 ounces Monterey jack cheese, shredded
- 8 ounces cheddar cheese, shredded
- 5 large eggs
- 1 1/4 cups whole milk
- 1/4 cup all-purpose flour
- 1/4 teaspoon salt
- 1/4 teaspoon black pepper
- 1/2 teaspoon baking powder
Toppings:
- 1 cup enchilada sauce, warmed
- 1 cup sour cream
- 1 cup cilantro roughly chopped
- 1/2 cup green onions thinly sliced
- 2 medium tomatoes, diced
Instructions
- Preheat the oven to 350°F. Spray a 9 X 13-inch baking dish with nonstick cooking spray.
- Remove chiles from the can (4 cans), split in half lengthwise, remove seeds, and rinse. Lay on paper towels and pat to dry.
- Add eggs (5), milk (1 1/4 cups), flour (1/4 cup), salt (1/4 teaspoon), pepper (1/4 teaspoon), and baking powder (1/2 teaspoon) to a medium bowl and beat until smooth.
- Arrange a single layer of chiles in the prepared baking dish, cover the bottom completely. Sprinkle 1/3 of each cheese evenly over peppers. Repeat with two more layers. Pour egg mixture over chiles.
- Bake, uncovered, 30-40 minutes, or until center is set. Let stand 15 minutes before cutting.

Notes
- Chiles: Authentic chiles rellenos are made with either Anaheim or Poblano chiles. This recipe uses whole, canned Ortega chilies—those are Anaheim chilies. Conveniently, they come already charred and peeled in a can. Peeling and charring is one of the most time-consuming parts of a chile relleno dish, so having it pre-done is a real-time saver.
- Anaheim chilies are the mildest of the chilies; they have a wonderful, slightly sweet taste. All you need to do is remove them from the can, pat them dry with a paper towel, and split them in half lengthwise to remove the seeds. Then… enjoy!
- If you like things on the spicy side, feel free the leave the seeds in. My family likes sweet chiles without seeds, so that’s what I serve.
- Fresh vs. Canned: If you want to try this recipe with fresh chilies you absolutely can! You’ll just need to do that charring and peeling on your own. Traditionalists will insist on using fresh chilies in this recipe. But I just think using the Ortega chilies from a can yields just as delicious as a casserole as fresh chilies—and the canned chilies are way easier.
- If you want to go for the fresh route, here’s the basic process:
-
- Place the chiles directly on an open flame, like a gas burner or a barbecue. You really need that open flame to correctly charr the chile. Turn the pepper every minute or so, never letting it sit too long on one side. The skin on the chile will begin to blacken and blister—you might occasionally hear a popping sound.
- When most of the skin is covered with black areas or blisters, place the chile in a plastic bag and seal it. As the peppers sit in the bag, the skin will steam and, after a few minutes, you can easily peel them. Using this method, you should generally only need your fingers for the peeling process.
- Once peeled, rinse the peppers under running water and pat them dry.
- Split the chilies in half lengthwise and remove the seeds (or leave them in for a spicier dish!)
Nutrition



Wonderful. I did change it to 10 eggs because I wanted to feed more people.
That sounds perfect, Madeline! Thank you for the positive feedback and 5-star rating! 🙂
I added cooked and crumbled bacon to the egg mixture…..YUM!!
That’s super yummy!! Enjoy 🙂
Loved this easy but wonderful casserole.
Reduced it to four people and turned out great.
Will have leftovers later this week.
Yaaay, thank you! I’m glad it was a hit 🙂
I’ve made this dish 4x and everyone that I’ve made it for loved it including me. They all asked me for the recipe which I passed it on. Making it tomorrow for my vets office. Thank you very much.🥰
Wow, that’s incredible, Frank! Thank you for your positive feedback. I’m glad it was a hit! 🙂
At our house we LOVE hot and spicy food. Your recipe was fabulous but the chilies I purchased were so hot I couldn’t eat anything and that’s very unusual for me. I have looked for cans that say MILD Whole green chilies and in Wichita, Kansas I have only found large cans of extremely hot chilies. I was going to order the Ortega – Mild can from amazon but they wanted $9.00 a can and that’s just insane. I’m going to try the recipe again but with fresh mild peppers. there has just got to be a way to fix this without dying.
Holy Cow, my friend! I have to tell you if you can ever find the Ortega “mild’ chiles, you will find there is very little heat! I hate that Amazon is charging that absurd amount of money. It’s totally ridiculous!!! Have you checked at the online Walmart site???
Can believe what they wanted to charge her either. If any way possible I would be more then happy to mail to her for free,
You’re so right, my fam didn’t look for meat! We all love it!
See?! Hehe, thank you so much, Ivy! 🙂
Thanks so much! Very low-carb friendly, to me. Great dish, and a very user-friendly way to enjoy a full Chile relleno “bite.” P.S. I saw helpful subs on search, yet can’t find here.
Thank you, Lorraine! Glad you like this casserole 🙂
Can this be made ahead?
Yes, it can!
Loved them. We did spice them up a bit by adding chopped jalapenos to the garnish topping. Please add diced tomatoes to your ingredient list, as shown in the pictures of the topping.
So glad you love the recipe, Dave!
Wow. I will admit to being somewhat of a purist or food snob when it comes to cooking but this stuff is pretty good. I love a good chile relleno and I always use fresh poblanos, char them and peel, stuff, dip in the beaten egg and fry. That traditional way is so good but with the frying usually also comes some cussing. This is a no-cuss recipe for sure! I have now made it with both the Ortega canned chiles and with fresh poblanos, chared and peeled. With fresh it is best but with canned it becomes slap together easy. Thanks.
Hi Jim! 😀 So glad to hear you enjoyed the casserole.
I made this dish last night. Not only did it turn out beautiful it tasted great!! Sorry i forgot to take a pic. The only person that got seconds was my boyfriend. The last portion i had i was keeplng fotr myself for today but ended up giving it to a friend. I believe the next time i make it i’m going to have to double the recipe. Thank you very much for sharing this recipe.
You’re welcome, Brenda! ❤️ Glad to hear you liked it!
Made this and followed recipe, was very tasty, I do like Chili Rellenos at restaurants. Then I made this recipe a second time, used two (2) 27oz cans of Ortega Fire Roasted Mild peppers, as I love them. added in browned ground beef, drained well to remove fat/grease, chopped Cilantro, chopped green onions (4 to 6 depending on your preference), and chopped black olives. As I increased the recipe, I also used more of the cheeses, too. Baked at 350 in 9×13 casserole dish for maybe 45 min, checking to be sure egg and flour mixture had properly set. After cooling, I found the taste and texture to be extremely good.
Wow, Bill! Yours sound amazing! I can’t wait to make this your way. I’m happy that the basic recipe worked well for you and supported your incredible additions! 🙂
Bill did you increase the eggs and milk as well as the cheeses?
Hi Kathleen,
Your recipe looks amazing and I am so looking forward to trying it, however I have not been able to find the canned Chile’s and was wondering how many of the fresh Poblano Chile’s I would need for this recipe.
Thanks so much!
Gosh, Susan I’m not sure. Strange as it sounds, as often as I’ve made this, I’ve never noticed how many are in a can! I’m so sorry 🙁
I just made it. It seems like there are about 18 in a 27 oz can of o of Ortega Chiles. The store was out of the smaller cans. I find the large can covers each layer perfectly.
Wow! This looks so amazing. I can’t wait to try this tonight for my family! Have you thought to add jalepenos to this recipe? I’m trying to spice it up a bit more!
Hi. I made this tonight and it was great! Thank you! I did add a few shakes of chili powder and cumin to the mixture, but that’s it! I looked at several recipes and your picture of the end product sold me. While cooking it, I made sure to cook it until it looked similarly browned. I like how it cut easily into serving squares too. We didn’t even bother with toppings, it tasted so good. Thanks again.
Hi Len, I am happy that you chose this recipe and that you enjoyed it! Thank you for sharing your thoughts on this Chile Relleno Casserole and I hope you consider trying more of our recipes!
Love the recipe! Just making sure with egg mixture, do you pour over chilies on each layer or just top layer? Tia
Hi Corinne. I add them over the top. 🙂