This post may contain affiliate links. Please read our disclosure policy.
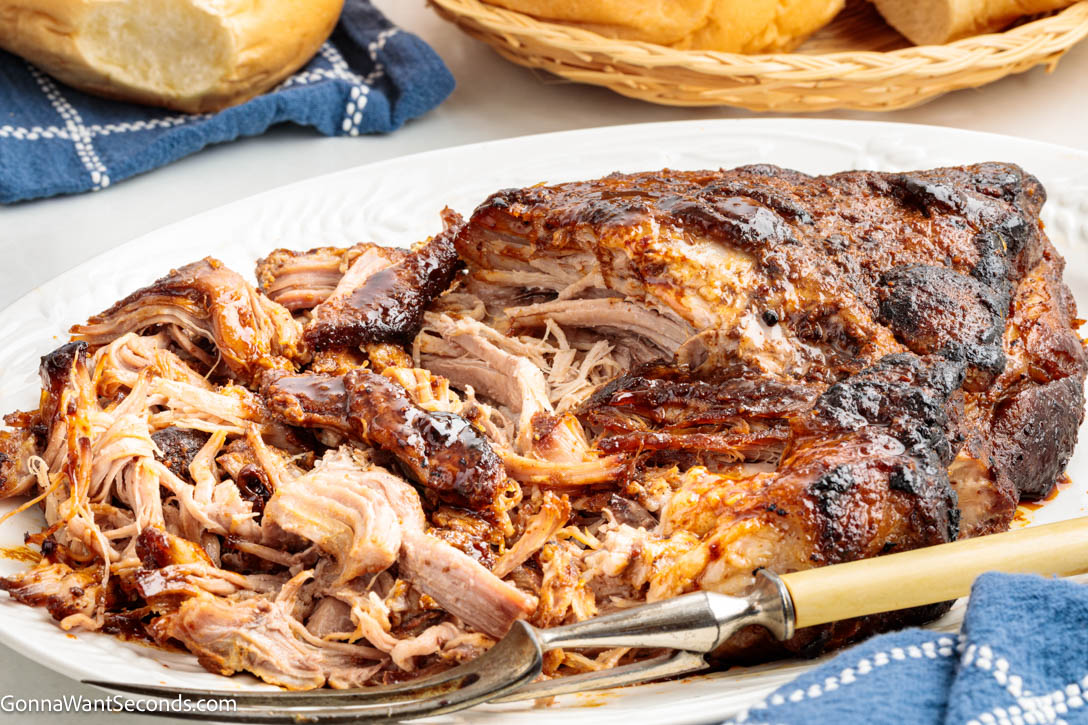
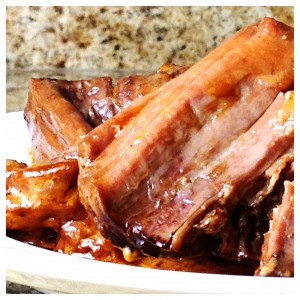
If you’ve ever wondered how to make Dutch oven pork butt that’s juicy, tender, and fall-apart perfect, this is the method you’ll come back to again and again. Also known as pork shoulder, this richly marbled cut is ideal for low-and-slow cooking, transforming into incredibly soft, shreddable meat with deep, savory flavor.
This recipe uses a simple, reliable oven method that gives you full control over seasoning, browning, and moisture, with rich pan juices perfect for spooning over the top. It’s a no-fail dinner you can count on whether you’re feeding a crowd, meal prepping, or craving classic, comforting pulled pork at home.
What makes this recipe especially foolproof is the Dutch oven method: it helps the pork stay moist and tender during the long cook time, then uncovering it at the end gives you that rich, roasted finish. Cooked low and slow at 300°F, this pork butt becomes fall-apart tender with a rich, flavorful crust — no smoker required.
If you love cozy, hearty pork dinners like this, be sure to try my Crockpot Pulled Pork and Honey Garlic Pork Chops.

How to Cook Pork Butt in the Oven
To cook pork butt in the oven, roast it at 300°F for about 60–75 minutes per pound until it reaches an internal temperature of 195–205°F. This allows the connective tissue to break down, resulting in tender, pull-apart meat.
At a Glance:
✔ Oven method (no smoker needed)
✔ Low and slow at 300°F
✔ Fall-apart tender at 195–205°F
✔ Great for pulled pork, meal prep, or feeding a crowd
✨ Before You Begin
✨ This is a low-and-slow roast. Pork butt needs time to break down and become tender, so plan for several hours of cook time depending on the size.
✨ Cook to temperature, not just time. The real magic happens when the internal temperature reaches the point where the meat becomes fork-tender—not just “done.”
✨ Bone-in vs. boneless both work. Bone-in pork butt tends to be a little more flavorful and juicy, but either option works beautifully.
✨ This is perfect for leftovers. You’ll likely have plenty, and it reheats beautifully for sandwiches, tacos, rice bowls, and easy second meals.
Should Pork Butt Be Covered in the Oven?
For this recipe, pork butt is cooked covered for most of the time, then finished uncovered.
Covering the pork helps create a moist cooking environment so it becomes tender and juicy, while uncovering it at the end allows the outside to deepen in color and develop that classic roasted finish.
Oven Roasted Pork Butt Ingredients + Key Notes
This is just a quick glance at what you’ll need. For exact measurements and the full ingredient list, head down to the recipe card below.
Pork butt (Boston butt or pork shoulder)
This cut comes from the upper shoulder of the pig and is well-marbled with fat and connective tissue. That’s exactly what makes it perfect for slow roasting—it becomes incredibly tender as it cooks.
Oil
Helps the seasoning stick and promotes browning on the outside.
Salt + pepper
Essential for building flavor all the way through the meat.
Garlic + onion powder
Adds a deep, savory base that complements the richness of the pork.
Paprika
Brings warmth, color, and a subtle smoky note.
Brown sugar (optional)
Adds a slight sweetness and helps create a caramelized crust on the outside.
🥣 How to Cook Pork Butt Roast in the Oven
Here’s a quick look at how to make this easy Dutch oven roasted pork butt (full instructions in the recipe card below):

Prep the pork. Pat the pork butt dry with paper towels. This helps the outside brown better during the initial sear and gives the seasoning a better surface to cling to.
Season generously. Rub the pork all over with the dry rub, pressing it in well so every side is well coated with flavor.
Sear for flavor. Brown the pork in a little oil in a large Dutch oven until deeply golden on all sides. This step builds the foundation for the rich pan juices and adds extra depth to the finished pork.
Add the cooking liquid. Pour in the broth and soy sauce, scraping up any browned bits from the bottom of the pot. The liquid should not cover the pork — it’s there to create a moist cooking environment, not to boil the meat.
Cook low and slow. Cover and bake until the pork is very tender, then uncover near the end so the outside can deepen in color and develop that classic roasted finish.
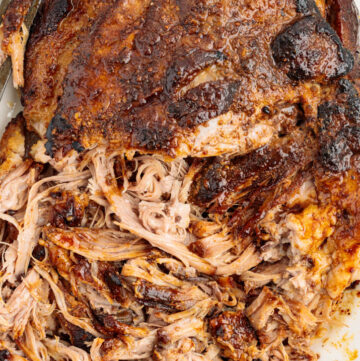
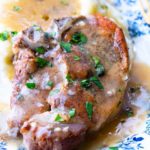
Rest and shred. Let the pork rest before shredding so the juices have time to settle back into the meat.
Check for doneness. The pork is ready when it reaches 195–205°F and feels very tender when pierced or twisted with a fork. A probe should slide in with very little resistance.
It’s easier and more forgiving than traditional oven roasting, with consistently juicy results every time.
Why This Recipe Uses a Dutch Oven
This recipe uses a Dutch oven to create a moist, controlled cooking environment that keeps the pork incredibly tender while still allowing it to develop rich flavor. After an initial covered cook, the lid is removed so the outside can deepen in color and develop that classic roasted finish — giving you the best of both worlds.
⚠️ Common Mistakes to Avoid
- Pulling it out too early
Pork butt isn’t done when it’s “safe” — it’s done when it’s tender. If you stop at 145°F–170°F, it will still be tough. You need to cook it to 195–205°F for that fall-apart texture. - Cooking at too high of a temperature
Trying to speed things up with a hotter oven leads to dry, chewy meat. Low-and-slow heat is what allows the fat and connective tissue to properly break down - Skipping the rest time
Letting the pork rest allows the juices to redistribute. If you shred it too soon, those juices run out instead of staying in the meat. - Not seasoning enough
Pork butt is a large, dense cut and needs a generous amount of seasoning. Under-seasoning leads to bland meat, especially after shredding. - Using a pan that’s too small
Crowding traps steam instead of allowing the pork to roast properly. You want enough space in the pot so the pork can brown properly during the uncovered portion of cooking, helping it develop a rich, flavorful crust.
⏱️ How Long to Roast Pork Butt in the Oven
Quick Answer:
A pork butt usually takes about 60–75 minutes per pound at 300°F, or until it reaches 195–205°F and is tender enough to pull apart easily.
Cook time will vary depending on the size of your pork butt and your oven, but here’s a general guideline:
4–5 pounds: 4–5 hours
6–7 pounds: 5–7 hours
8 pounds or larger: about 7–9 hours
The most important thing is not the clock—it’s when the pork reaches the right level of tenderness.
What Temperature Should Pork Butt Be Cooked To?
Pork is technically safe to eat at a lower temperature, but pork butt is different from lean cuts.
- 145°F: Safe to eat
- 195–205°F: Tender, shreddable, fall-apart texture
👉 For the best results, cook your pork butt until it reaches 195–205°F, when the connective tissue has fully broken down.
What Is Pork Butt? (Boston Butt vs Pork Shoulder)
Despite the name, pork butt doesn’t come from the rear of the pig—it comes from the upper shoulder.
- Pork butt / Boston butt: Higher on the shoulder, more marbling, ideal for roasting and shredding
- Pork shoulder (picnic roast): Lower portion, slightly leaner, often includes skin
Both can be used, but pork butt is generally preferred for this method because it stays extra juicy.
Is Pork Butt a Good Cut for a Roast?
Yes — pork butt is one of the best cuts for slow roasting because it has plenty of fat and connective tissue. As it cooks low and slow, that marbling melts down and the connective tissue softens, giving you tender, juicy meat that shreds beautifully. It’s especially well suited to this Dutch oven method because the covered portion of cooking helps keep the meat moist while it becomes fall-apart tender.

Fat Side Up or Down? Covered or Uncovered?
Fat side up: Helps the fat slowly render over the meat as it cooks, adding flavor and moisture.
Covered first: For this Dutch oven method, the pork cooks covered for most of the time so it stays tender and juicy.
Uncovered finish: The lid is removed near the end so the outside can deepen in color and develop a flavorful crust.
Optional finish: If you want even darker edges, you can increase the heat slightly at the very end of cooking.
Dutch Oven Roasted Pork Butt vs Crockpot Pulled Pork
Both methods are delicious, but they give you different results.
Oven roasted pork butt
- Better browned edges and texture
- Rich, roasted flavor
- Slightly more hands-on
Crockpot pulled pork
- Ultra tender and juicy
- Completely hands-off
- Softer texture throughout
👉 If you want deeper roasted flavor and those crispy edges, go with the oven method. If convenience is the priority, the slow cooker is hard to beat.
⭐ Pro Tips for the Best Dutch Oven Pork Butt
⭐ Use a steady oven temperature (around 300°F): Keeping the temperature consistent helps the collagen slowly melt into gelatin, which gives pork butt its signature tender, juicy texture.
⭐ Use a thermometer for precision: Instead of guessing, check for doneness around 195–205°F. This ensures the pork is fully tender, not just cooked through.
⭐ Build flavor with a generous rub: Because pork butt is so large, a well-seasoned exterior creates layers of flavor that carry through once the meat is shredded.
⭐ Let it rest before shredding: Resting gives the juices time to settle back into the meat, making it noticeably juicier and easier to pull apart.
⭐ Don’t skip the pan juices: Those rich cooking juices at the bottom of the pan are packed with flavor. Spoon them over the shredded pork to keep it extra moist and delicious.
Storing + Reheating + Freezing
Refrigerate
Store leftovers in an airtight container for up to 4 days.
Reheat
Warm gently in the oven or microwave with a splash of broth or water to keep it moist.
Freeze
Freeze in portions for up to 3 months. Thaw overnight in the refrigerator before reheating.
What to Serve With Dutch Oven Pork Butt
Fresh + Crisp Sides
A bright, fresh side helps balance the richness of the pork. Try Cucumber Tomato Salad or 1905 Salad for something light and refreshing.
Comforting Sides
This is where pork butt really shines. Serve it with Mashed Potatoes, Rice Pilaf, or Melting Potatoes for a cozy, satisfying meal.
Cozy Breads
Cheddar Biscuits or Practically No Knead Bread are perfect for soaking up all those flavorful juices.
Sweet Finishes
Finish things off with something comforting like Peach Cobbler, Chess Pie, or Banana Cake with Cream Cheese Frosting.

Frequently Asked Questions
✦ Do I have to use a Dutch oven for pork butt?
For this recipe, yes — a Dutch oven is recommended because it helps trap moisture and creates flavorful pan juices while the pork slowly cooks. If you don’t have one, you can use a heavy, oven-safe pot with a tight-fitting lid.
✦ How long does it take to cook pork butt in the oven at 300ºF?
At 300°F, pork butt typically takes about 60–75 minutes per pound, depending on size and whether it’s bone-in or boneless.
✦ What temperature should pork butt be cooked to?
Pork butt is safe to eat at 145°F, but for tender, shreddable meat, cook it to 195–205°F so the connective tissue fully breaks down.
✦ Should pork butt be covered in the oven?
For this recipe, yes — it’s cooked covered for most of the time to keep it tender and juicy, then uncovered at the end so the outside can brown and develop flavor.
✦ Should I cook pork butt fat side up or down?
Cook pork butt fat side up so the fat slowly renders and bastes the meat as it cooks, helping keep it juicy and flavorful.
✦ Why is my pork butt tough?
It likely hasn’t cooked long enough. Pork butt becomes tender when it reaches a higher internal temperature (around 195–205°F), allowing the connective tissue to fully break down.
✦ Can I cook pork butt faster at a higher temperature?
You can, but it won’t be nearly as tender. Low and slow cooking is what gives pork butt its signature fall-apart texture.
Still have questions? Drop them in the comments — I love helping you cook with confidence! 💗
More Easy Pork Recipes You’ll Love
- Crockpot Pork Tenderloin: Ultra-tender pork with a rich, savory sauce — a set-it-and-forget-it dinner everyone loves.
- Stuffed Pork Tenderloin: Juicy pork filled with a flavorful stuffing and roasted to perfection — impressive but surprisingly easy.
- Honey Garlic Pork Chops: Sweet, savory, and packed with flavor, these pork chops come together quickly for an easy weeknight dinner.
- Shake and Bake Pork Chops: Crispy on the outside, juicy on the inside — a homemade version of the classic everyone grew up loving.
- Grilled Pork Tenderloin: Smoky, juicy, and full of flavor, this is a great go-to when you want something simple and satisfying.
- Oven Baked Ribs: Fall-off-the-bone tender with a rich, caramelized glaze — no grill required.
💗 Tried This Recipe?
If you made this Oven Roasted Pork Butt, I’d love to hear how it turned out!
If you enjoyed this recipe, please take a moment to leave a star rating and a quick comment — I love hearing from you!
Craving more cozy, crave-worthy meals? Subscribe to my FREE email newsletter and be the first to know when a new recipe goes live — plus get seasonal favorites and reader-loved classics too.
Thanks for stopping by my kitchen today — happy cooking, friends! ❤️ Kathleen
Oven Roasted Pork Butt Recipe
Ingredients
For the Pork
- 3 - 4 pounds boneless pork butt
- 2 tablespoons olive oil
- 1/2 cup low-sodium chicken broth
- 2 teaspoons soy sauce
- 1 tablespoon apple cider vinegar, (optional, added at the end)
Dry Rub
- 2 tablespoons kosher salt
- 1 tablespoon black pepper
- 2 tablespoons smoked paprika
- 1 tablespoon brown sugar
- 2 teaspoons garlic powder
- 2 teaspoons onion powder
- 1 teaspoon dry mustard
- 1 teaspoon ground cumin
- 1/2 teaspoon cayenne or to taste
Instructions
- Prep the Pork: Pat the pork butt (3-4 pounds) dry with paper towels. Coat generously with the dry rub, pressing it into all surfaces.
- Rest: For the best flavor, wrap and refrigerate the seasoned meat for 4 to 24 hours. If short on time, let the seasoned pork sit at room temperature for 45–60 minutes before cooking.
- Preheat Oven: Preheat oven to 300°F (149ºC).
- Bring To Temp: Allow the pork to sit at room temperature while the oven heats.
- Sear: Heat the olive oil (2 tablespoons) in a large Dutch oven over medium to medium-high heat. Sear the pork on all sides until deeply browned, about 2–4 minutes per side.Don’t rush this step — the browning creates the foundation for the flavor of your pan juices. If the rub begins to darken too quickly, lower the heat slightly.
- Add Liquid: Pour 1/2 cup of broth into the pot to deglaze, scraping up browned bits. Stir in 2 teaspoons soy sauce, then continue scraping until everything is fully loosened. The liquid should not cover the pork — you’re creating a moist cooking environment, not boiling it.
- Slow Cook: Cover and transfer to the oven. Cook for about 3–4 hours covered, then uncover and continue cooking for 30–60 minutes, until the exterior deepens in color and the pork is fork-tender. It’s ready when the internal temperature reaches 195–205°F, a fork twists easily, and a probe slides in with little resistance.
- Rest & Reduce Pan Juices: Remove the pork and let it rest for 20–30 minutes.Meanwhile, place the pot over medium heat and simmer the pan juices until reduced by about half. Stir in the apple cider vinegar (1 tablespoon), if using. The sauce should become glossy, slightly thickened, and deeply flavorful. Taste and adjust seasoning as needed.
- Shred the pork: Use two forks to shred the roast then toss with some of the cooking juices. Add more juices as needed to keep the pork moist.
Fans Also Made:

Notes
- Use a steady oven temperature (around 300°F): Keeping the temperature consistent helps the collagen slowly melt into gelatin, which gives pork butt its signature tender, juicy texture.
- Use a thermometer for precision: Instead of guessing, check for doneness around 195–205°F. This ensures the pork is fully tender, not just cooked through.
- Build flavor with a generous rub: Because pork butt is so large, a well-seasoned exterior creates layers of flavor that carry through once the meat is shredded.
- Let it rest before shredding: Resting gives the juices time to settle back into the meat, making it noticeably juicier and easier to pull apart.
- Don’t skip the pan juices: Those rich cooking juices at the bottom of the pan are packed with flavor. Spoon them over the shredded pork to keep it extra moist and delicious.
Nutrition

I’m confused. The directions in the post say to put the pork on a rack in a roasting pan. However, the directions in the recipe say to bake ii in a Dutch Oven after browning (covered for the first part of the baking time). Plus, it mentions baking it in the chicken broth/soy sauce mixture, SO, which is it??
Great question Dana — I can see how that would be confusing!
The correct method for this recipe is the **Dutch oven version** you see in the recipe card. That’s the method I recommend and use here: sear the pork first, then cook it covered with a small amount of liquid, and finally uncover it at the end so it develops that rich, roasted finish.
I’ve updated the post so everything matches the recipe now. 😊
The Dutch oven method is actually more forgiving and helps keep the pork extra juicy, while still giving you great flavor and browning at the end.
Thanks so much for pointing that out — I really appreciate it!