This post may contain affiliate links. Please read our disclosure policy.
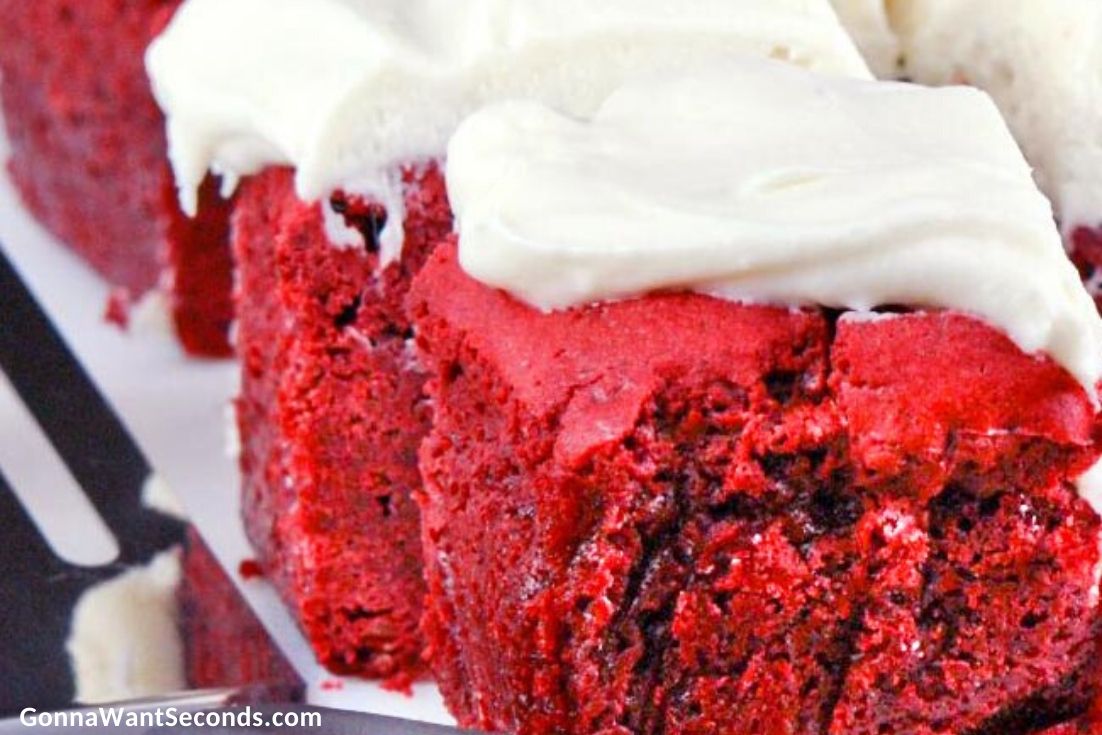
These Red Velvet Brownies are everything you love about classic red velvet cake — but richer, chewier, and even more irresistible. They bake up dense and fudgy with slightly chewy edges, a soft melt-in-your-mouth center, and a gorgeous vibrant red color. Real melted bittersweet chocolate gives them deep flavor, while a thick layer of silky cream cheese frosting adds the perfect tangy-sweet finish.
Unlike cakey red velvet bars, these are true brownies — moist, decadent, and ultra indulgent. The simple mixing method keeps the texture tender and chewy, and the balance of chocolate, vanilla, and that signature red velvet tang makes every bite dreamy. Best of all, they’re made with basic pantry ingredients and come together easily for holidays, potlucks, or anytime you need a standout dessert.
If you’re a red velvet fan, be sure to check out my classic Red Velvet Cupcakes — they have the same signature flavor in fluffy cupcake form. And if you’re on a brownie kick, don’t miss my ultra-fudgy Brown Butter Brownies. For more easy dessert bars, my always-popular Cake Mix Cookie Bars and bright, buttery Lemon Bars are perfect companions to this recipe.

✨ Before You Begin
✨ Line your pan. Use foil or parchment with an overhang so the brownies lift out cleanly for easy slicing.
✨ Melt chocolate gently. Warm, not hot, melted chocolate ensures the eggs incorporate smoothly without scrambling.
✨ Mix lightly. Overmixing develops gluten and makes brownies tough or cakey.
✨ Check doneness carefully. Pull them when the center is set and a toothpick shows moist crumbs — not completely clean.
✨ Cool completely before frosting. Warm brownies + frosting = a melty mess.
🔍 What Kind of Brownies Are These?
So you know exactly what to expect:
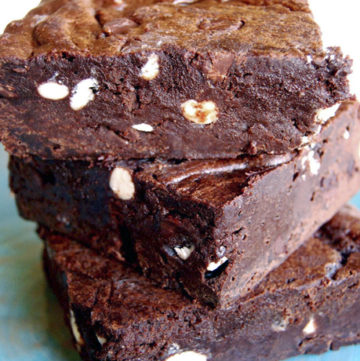
- Thick and fudgy in the center
- Slightly chewy at the edges
- Rich but not overly sweet
- Soft, moist crumb (not cakey!)
- Tangy-sweet cream cheese frosting on top
If you’re looking for a fluffy cake-like red velvet dessert, this isn’t it — these are classic decadent brownies with red velvet flair.
Red Velvet Brownies Ingredients + Key Notes
This is just a quick glance at what you’ll need. For exact measurements and the full ingredient list, head down to the recipe card below.
For the Brownies
- Unsalted Butter – lets you control the salt level.
- Bittersweet Chocolate – adds real chocolate flavor and richness.
- Sugar – creates moisture and that shiny brownie top.
- Eggs – give structure and chew.
- All-Purpose Flour – the base of the batter.
- Red Food Coloring – classic red velvet color (optional but traditional).
- Baking Powder – just a touch for lift.
- Vanilla + Salt – round out and balance the flavor.
For the Cream Cheese Frosting
- Cream Cheese – full-fat gives the best creamy texture.
- Butter – adds richness and spreadability.
- Powdered Sugar – sweetens and thickens.
- Vanilla + Salt – essential for flavor balance.

🥣 How to Make Red Velvet Brownies
Here’s a quick look at how to assemble this easy Red Velvet Brownies recipe (full instructions in the recipe card below).
Start by melting the butter and chopped bittersweet chocolate together until smooth. Stir in the sugar, then add the eggs one at a time, mixing gently after each addition. Fold in the flour, baking powder, salt, vanilla, and red food coloring just until combined — don’t overmix.
Pour the thick batter into a lined 9-inch square pan and bake until the center is just set and a toothpick shows a few moist crumbs. Let the brownies cool completely.
While they cool, beat together softened cream cheese and butter, then mix in powdered sugar, salt, and vanilla until smooth and fluffy. Spread the frosting over the cooled brownies, slice into squares, and try not to eat them all at once!
⭐ Pro Tips for Perfect Red Velvet Brownies
⭐ Mix Gently
Once the flour goes in, stir just until combined. Overmixing is the #1 reason brownies turn out tough or cakey.
⭐ Nail the Doneness
Start checking around 44 minutes. The edges should be set, the center no longer glossy, and a toothpick should show moist crumbs — not raw batter, and not perfectly clean.
⭐ Use Room-Temperature Ingredients
Softened cream cheese and butter blend into silky frosting instead of a lumpy mess.
⭐ Choose Your Coloring
Gel food coloring gives a richer red with less added liquid. Liquid works too — the color will just be a bit softer.
⭐ Cool, Then Frost
Even slightly warm brownies will cause the frosting to melt and slide.
🔬 Cooking Science: Why Overmixing Matters
Brownies rely on a delicate balance. When flour is mixed too aggressively, gluten strands tighten and create a tougher, more cake-like crumb. By stirring gently and stopping as soon as the batter comes together, you preserve that signature soft, chewy, fudgy brownie texture.
🧰 Equipment You’ll Need
- 9-inch square baking pan
- Aluminum foil or parchment paper
- Microwave-safe bowl
- Mixing bowls
- Hand mixer (for frosting)

Troubleshooting Red Velvet Brownies
Why are my brownies dry?
Most likely overbaked. Pull them as soon as the center is set with moist crumbs.
Why are they cakey instead of fudgy?
Overmixing or too much flour can cause this.
Why isn’t the color bright red?
Try gel food coloring instead of liquid for a deeper shade.
Why is my frosting runny?
The cream cheese or butter was too warm, or the frosting was overbeaten.
Fun Variations to Try
- Add ½ cup white chocolate chips to the batter
- Swirl in extra cream cheese before baking
- Top with crushed Oreos
- Skip frosting and dust with powdered sugar
- Use natural food dye for an all-natural version
Storing + Freezing + Make-Ahead Tips
Storing
- Keep frosted brownies in an airtight container in the refrigerator up to 5 days.
Freezing
- Freeze unfrosted brownies tightly wrapped for up to 3 months. Thaw and frost before serving.
Make-Ahead
- Bake the brownies a day ahead and frost the next day for the cleanest slices.
Food Safety
- If you’d like more info on food safety, check out this link.
What to Serve With Red Velvet Brownies
Fresh + Crisp Sides
Serve with fresh berries or a scoop of vanilla ice cream for a bright, creamy contrast.
Cozy Pairings
These are amazing with coffee, hot tea, or homemade Crockpot Hot Chocolate.
Sweet Finishes
Pair with Pecan Pie Bars, S’mores Bars, Blackberry Pie Bars or classic Rice Krispie Treats for a fun dessert spread.
✦ Frequently Asked Questions
✦ Can I skip the red food coloring?
Yes! The food coloring is purely for appearance and doesn’t affect the flavor. Without it, you’ll simply have delicious chocolate brownies instead of red velvet ones.
✦ Can I use gel food coloring instead of liquid?
Absolutely. Gel coloring gives a richer, more vibrant red without adding extra liquid to the batter.
✦ Why did my brownies turn out cakey instead of fudgy?
This usually happens if the batter was overmixed or if too much flour was added. Stir gently and stop as soon as the flour disappears.
✦ Why are my brownies dry?
Most likely they were overbaked. Pull them when the center is set and a toothpick comes out with a few moist crumbs — not totally clean.
✦ Can I double this recipe?
Yes! Bake it in a 9×13-inch pan and adjust the bake time as needed, using the same doneness cues.
✦ Do these brownies need to be refrigerated?
Once frosted, yes. Because of the cream cheese icing, store them in the refrigerator in an airtight container.
✦ Can I make these ahead of time?
Definitely. Bake the brownies a day ahead and frost the next day. They slice even cleaner once chilled.
✦ Why is my frosting runny?
The cream cheese or butter was too warm, or the frosting was overbeaten. Start with room-temperature (not melty) ingredients and beat just until smooth.
✦ Can I freeze Red Velvet Brownies?
Yes — freeze them unfrosted for best results. Wrap tightly and freeze up to 3 months. Thaw completely, then frost before serving.
✦ Can I add mix-ins?
Absolutely! White chocolate chips, mini chocolate chips, or chopped nuts are all great. Fold them in gently at the end.
Still have questions? Drop them in the comments — I love helping you bake + cook with confidence! 💗
More Brownies, Bars + Dessert Favorites
- Cosmic Brownies
- Christmas Tree Brownies
- Caramel Brownies
- Almond Joy Bars
- Cherry Custard Pie Bars
- Butterscotch Bars
Tried This Recipe?
Remember, we have new recipes every week! Have you subscribed to our free, no-strings-attached newsletter? We’d love to have you as part of our baking + cooking community. We deliver it right into your inbox!
If you’ve tried this or any other recipe on my website, please leave a review. I love hearing your feedback! ⭐⭐⭐⭐⭐
Thanks for stopping by my kitchen today — happy cooking, friends! Kathleen 💗

Red Velvet Brownies
Ingredients
Brownies:
- 4 ounces bittersweet chocolate chopped
- 3/4 cup unsalted butter
- 2 cups sugar
- 4 large eggs
- 1 1/2 cups all-purpose flour
- 1 (1-ounce) bottle red liquid food coloring
- 1 1/2 teaspoons baking powder
- 1 teaspoon vanilla extract
- 1/8 teaspoon salt
Cream Cheese Frosting:
- 8 ounces cream cheese at room temperature
- 3 tablespoons unsalted butter softened
- 1 1/2 cups powdered sugar
- 1/8 teaspoon salt
- 1 teaspoon vanilla extract
Instructions
- Preheat oven to 350°F (177ºC). Line a 9-inch square pan with aluminum foil, allowing 2 to 3 inches to extend over sides; spray with nonstick cooking spray.
- Place chocolate (4 ounces) and butter (3/4 cup) in a microwave-safe bowl and melt on high for 1-1 1/2 minutes. Stir until smooth. Stir in sugar (2 cups). Add in eggs (4), 1 at a time, stirring just until incorporated. Stir in flour (1 1/2 cups), food coloring (1 bottle), baking powder (1 1/2 teaspoons), salt (1/8 teaspoon), and vanilla (1 teaspoon). Pour batter into prepared pan.
- Bake in preheated oven until a wooden pick inserted in center comes out with a few moist crumbs, about 44 to 48 minutes. Set the pan on a wire rack and cool completely(about 2 hours).
- When brownies are cool make the frosting. Beat cream cheese (8 ounces) and butter (3 tablespoons) on medium speed with an electric mixer until creamy. Gradually add powdered sugar (1 1/2 cups) and salt (1/8 teaspoon), beating until blended. Stir in vanilla (1 teaspoon).
- Lift brownies from pan, using foil sides as handles; gently remove foil. Spread Cream Cheese Icing on top of brownies, and cut into 16-20 squares. Garnish, if desired.
Fans Also Made:
Notes
- Mix Gently. Once the flour goes in, stir just until combined. Overmixing is the #1 reason brownies turn out tough or cakey.
- Nail the Doneness. Start checking around 44 minutes. The edges should be set, the center no longer glossy, and a toothpick should show moist crumbs — not raw batter, and not perfectly clean.
- Use Room-Temperature Ingredients. Softened cream cheese and butter blend into silky frosting instead of a lumpy mess.
- Choose Your Coloring. Gel food coloring gives a richer red with less added liquid. Liquid works too — the color will just be a bit softer.
- Cool, Then Frost. Even slightly warm brownies will cause the frosting to melt and slide.
Nutrition
Reader Interactions
Comments
Trackbacks
-
[…] more About Red Velvet Brownies-Fudgy, Chocolaty With The Perfect Amount of Wonderful Cream Cheese Frosting!R… […]
-
[…] Go to full Instructions […]
-
[…] Please look preparation method at :gonnawantseconds […]

Hi
These look yummy and I’d like to try making them. Do they have to be refrigerated since they have cream cheese frosting?
Thanks
Hi Lyn. Yes they do need to be refrigerated 🙂
Could this be made for a keto version using almond flour instead of regular flour?
Hey Tameeka! Keto baking is a real specialty. I’m sorry I don’t have any experience making this recipe keto 🙁
I need to use carob instead of real chocolate due to allergies. Your recipe calls for 4 oz chopped chocolate so how much carob powder would I use? Red velvet is my son’s favorite and unfortunately he is allergic to chocolate and he tries to stay away from chocolate.
Thank you, Gwen
Hi Gwen. I’m sorry but I haven’t made this recipe with carob powder so I cant advise. Sorry about that and best of luck!
The recipe was written using a 9″ square pan; if Abby used a 9″x13″ pan that would explain why her brownies weren’t as thick. It also would explain why they were done in less time… I haven’t tried them yet, but they sound delicious!
Hey Amy! I’ve done stuff like that too many times to count!
Just pulled these out of the oven, taking them to a friend’s party tomorrow. They came out perfectly. I used an 8×8 and baked for 45 minutes. Very thick. They are cooling now and I am preparing the frosting. I have never baked anything from scratch before and did not have any trouble. Thank you!
Thanks so much for sharing Cassidy. So glad you liked the recipe 😉 Enjoy them!
Baked these tonight. Was a bit disappointed on how thin they were considering those in the picture look nice and thick. Possibly would double next time if using 9 X 13 pan. Also, 40-45 minutes was entirely too long. Would probably be fine if recipe was doubled but certainly will over cook based on the original recipe above.
Hi Abby. Hmmm. I’ve made these a lot and the recipe always seems to work really well. I wonder if you might be experiencing an oven temperature variance? Regarding the photo, I definitely took a close up so do you think that made them seem super thick? I’m not sure. I wonder if anyone else has had that experience and if so if I should change the photo. They seem to me to be standard brownie thickness.
Baked these this afternoon, sooooo good!
Oh wow, those look like perfection to me!! GREAT job!
Wow, this brownies look amazing!! I’m definitely baking these tomorrow.
oh wow, they are just gorgeous and look so moist. delicious!
this is red velvet heaven!!
Mary x
we included the red velvet cookies in our holiday cookie plates and they were a huge hit…now i need an excuse to make these brownies! they look delicious!!!!!!