This post may contain affiliate links. Please read our disclosure policy.
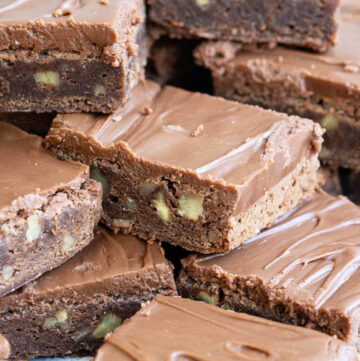
Lunch Lady Brownies are the classic school cafeteria frosted brownies — soft, rich squares topped with that smooth, glossy chocolate icing that sets just slightly crackly on top. They bake in a simple 9×13 pan, slice cleanly, and stay soft for days. And a little personal note — of all the brownies I make, these are my daughter’s absolute favorite.
What makes this version stand out is how the flavor is built from the start. The cocoa is melted directly into butter (blooming), which deepens the chocolate before the sugar and eggs are added. Then the icing is spread over warm — not hot — brownies so the sugar melts slightly and recrystallizes as it cools, creating that shiny lunchroom finish. The texture lands right between fudgy and cakey: moist and tender with a dense chocolate bite, but sturdy enough to hold that frosting.
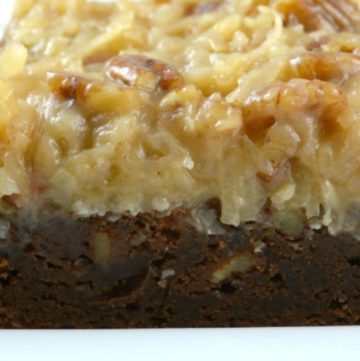
If you love chocolate comfort classics like my Brown Butter Brownies or Frosted Brownies, this old-school favorite belongs in your rotation.

✨ Before You Begin
✨ Use a metal 9×13 pan if possible. Glass holds heat longer and can over-brown the edges before the center is set.
✨ Bloom the cocoa. Melting cocoa directly in butter unlocks deeper, richer chocolate flavor.
✨ Let the mixture cool slightly. Warm is perfect. Hot will scramble the eggs.
✨ Don’t overbake. A toothpick with a few moist crumbs is ideal — they’ll finish setting as they cool.
✨ Frost when warm (not steaming). Warm brownies help the icing spread smoothly and set glossy. Too hot and it can separate.
Lunch Lady Brownies Ingredients + Key Notes
This is just a quick glance at what you’ll need. For exact measurements and the full ingredient list, head down to the recipe card below. This recipe is written for cocoa powder (not melted chocolate) and white sugar for that classic lunchroom texture.
Brownies
- Butter – Provides richness and moisture while carrying chocolate flavor.
- Unsweetened cocoa powder – Natural cocoa (like Hershey’s) gives the most classic cafeteria flavor. Dutch-process works too, but the flavor will be smoother and less “cafeteria classic.”
- Decaf coffee crystals – Optional but recommended. You won’t taste coffee — it simply enhances the chocolate.
- Sugar – Creates structure and helps create that classic lunchroom bite and slight sheen.
- Eggs – Bind and give lift. Beating them slightly helps the brownies bake up tender and sturdy (without turning cakey).
- All-purpose flour – Just enough to hold structure for clean slices while keeping the texture soft.
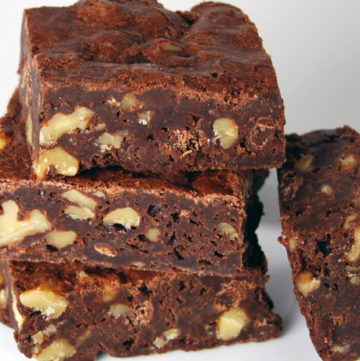
- Chopped nuts (optional) – Traditional in many school versions. Leave them out if you prefer a smooth brownie.
Icing
- Melted butter – Keeps the frosting smooth and creamy.
- Milk – Helps create a spreadable, pourable consistency.
- Cocoa powder – Reinforces bold chocolate flavor.
- Powdered sugar – Sets into that soft, slightly crackly finish.
- Vanilla + salt – Balance sweetness and deepen flavor.
- 🥣 How to Make Lunch Lady Brownies
🥣 How to Make Lunch Lady Brownies

Melt the chocolate base. In a saucepan over medium-low heat, melt the butter, cocoa powder, and decaf coffee crystals until smooth and glossy. Let cool 5–10 minutes so it’s warm, not hot.
Mix the batter. Transfer to a bowl and beat in the sugar, eggs, and vanilla on medium speed for 2–3 minutes until slightly thickened and lighter in color.
Add dry ingredients. Mix in the flour on low speed just until combined. Fold in nuts, if using.
Bake. Spread into a parchment-lined 9×13 pan (metal if possible) and bake at 350°F for 20–22 minutes, until a toothpick shows a few moist crumbs and the center looks set but still slightly soft — don’t wait for a clean toothpick.
Prepare the icing. Whisk together the melted butter, milk, cocoa, powdered sugar, vanilla, and salt until smooth. If it feels too thick to spread easily, whisk in milk 1 teaspoon at a time.
Frost. Pour icing over brownies while they’re warm (not steaming hot) and spread evenly. Cool completely before slicing.
⭐ Pro Tips
⭐ Getting that glossy, crackly frosting
For that classic lunchroom shine, spread the icing over brownies that are warm but not steaming hot. The warmth melts the sugar slightly, and as the brownies cool, the sugar recrystallizes, creating that smooth, glossy finish with a soft little crackle on top.
⭐ Don’t chase a clean toothpick
A clean toothpick usually means overbaked brownies. Instead, look for a few moist crumbs, a slightly matte surface, and tiny bubbles across the top. The center should have a gentle spring when pressed. That’s your signal they’ll stay fudgy instead of drying out.
⭐ Use a metal pan for the most even bake
Metal 9×13 pans bake more evenly and prevent overdone edges. Glass pans hold heat longer, which can cause the sides to overbake before the center is set — especially with thick brownies like these.
⭐ Want thin cafeteria-style brownies?
If you remember thinner school lunch brownies, bake this batter in a 10×15-inch jelly roll pan instead. Start checking around 15–18 minutes, since thinner brownies cook faster and can dry out quickly.
⭐ Choose your cocoa wisely
Natural unsweetened cocoa (like Hershey’s) delivers that classic, nostalgic cafeteria flavor. Dutch-process cocoa works too, but it produces a smoother, slightly darker, less “lunchroom” taste. Both are good — they’re just different.
⭐ Keep them fudgy, not cakey
Once you add the flour, mix just until it disappears. Overmixing develops gluten and shifts the texture toward cake instead of that dense, moist brownie bite.
⭐ A richer frosting option
For an extra silky icing, swap the milk for heavy cream. It creates a slightly richer, smoother frosting that still sets beautifully.
⭐ Easy mix-in variations
Want to change it up without losing the nostalgic vibe? Replace the nuts with mini chocolate chips, add peanut butter chips, or swirl a few spoonfuls of peanut butter into the batter before baking.
⭐ Room temperature keeps them softer
Store these airtight at room temperature if possible. Refrigeration firms them up and can dry them slightly. If you do chill them, let them come back to room temp before serving for the best texture.
⭐ For perfectly clean squares
After the icing sets, chill the pan for 10–15 minutes. Slice with a warm knife (run it under hot water and wipe dry), and wipe between cuts for bakery-clean edges.

Storing + Reheating + Freezing + Make-Ahead Tips
Storing
- Store tightly covered at room temperature for 3–4 days for best texture.
Reheating
- If you prefer them slightly warm, microwave individual squares for 8–10 seconds.
Freezing
- Freeze unfrosted brownies tightly wrapped for up to 2 months. Thaw at room temperature and frost before serving.
Make-Ahead
- Bake a day ahead — these actually taste even better once the icing fully sets.
What to Serve With Lunch Lady Brownies
Fresh + Crisp Sides
Creamy Fruit Salad or Strawberry Salad with Blue Cheese balance the richness beautifully and keep the table feeling bright and fresh.
Cozy Mains
These brownies shine after cozy, crowd-pleasing dinners like Chicken Spaghetti with Rotel, Creamy Chicken and Potato Casserole, or Chicken Broccoli Rice Casserole. They’re the kind of dessert you slice into squares and pass around the table.
Sweet Finishes
Building a dessert table? Add Sugar Cream Pie, Peach Cobbler, or Oreo Delight for a nostalgic, crowd-friendly lineup that everyone gravitates toward.
✦ Frequently Asked Questions
✦ Are Lunch Lady Brownies fudgy or cakey?
They sit right between the two. These brownies are moist and rich like a fudgy brownie, but sturdy enough to slice cleanly and hold that thick layer of chocolate icing. They’re not fluffy cake-like and not ultra-gooey fudge — they’re that classic lunchroom middle ground.
✦ Why didn’t my frosting turn glossy?
The timing is usually the issue. For that shiny finish, spread the icing over brownies that are warm but not steaming hot. If the brownies are too cool, the sugar won’t melt enough to create that gloss. If they’re too hot, the icing can separate and lose its smooth texture.
✦ Why did my brownies turn dry?
Most often, they were overbaked. Pull them when a toothpick shows a few moist crumbs, not when it comes out clean. Overbaking dries brownies quickly, especially in metal pans.
✦ Why did my brownies turn cakey instead of dense?
This usually happens from overmixing after the flour is added or baking too long. Mix the flour just until it disappears and watch the bake time closely for that soft, dense texture.
✦ Can I bake these in a jelly roll pan for thinner brownies?
Yes. Use a 10×15-inch jelly roll pan for thinner, more traditional cafeteria-style brownies. Start checking around 15–18 minutes since they’ll bake faster.
✦ Can I use Dutch-process cocoa instead of natural cocoa?
You can. Natural cocoa gives the most classic lunchroom flavor, while Dutch-process cocoa produces a smoother, slightly darker chocolate taste. Both work — the flavor profile just shifts slightly.
✦ Should I refrigerate Lunch Lady Brownies?
It’s best not to if you can avoid it. Refrigeration firms them up and can dry them slightly. Store airtight at room temperature for 3–4 days for the softest texture. If you do refrigerate them, let them come back to room temperature before serving.
✦ Can I make these ahead of time?
Yes — they’re actually even better the next day once the icing fully sets. Bake, cool, and store tightly covered at room temperature until ready to serve.
Still have questions? Drop them in the comments — I love helping you bake + cook with confidence! 💗

More Brownie Recipes You’ll Love
- Espresso Brownies
- Caramel Brownies
- Cosmic Brownies
- Buckeye Brownies
- Triple Chocolate Brownies
- Brownie Bites
Tried This Recipe?
💗If you make these yummy Lunch Lady Brownies, please leave a ⭐️⭐️⭐️⭐️⭐️ star rating and comment below — it helps others and means so much!
Tip for mobile readers: scroll just a bit to tap the stars — thank you!
💌 Hungry for more cozy recipes? Subscribe to my FREE newsletter so you never miss a new family favorite. 💌
Thanks for stopping by my kitchen today — happy cooking, friends! Kathleen 💗
Lunch Lady Brownies
Ingredients
- 1 cup butter
- 1/2 cup cocoa
- 1/2 teaspoon decaf coffee crystals
- 2 cups sugar
- 4 eggs
- 1 tablespoon vanilla
- 1 1/2 cups all-purpose flour
- 1 cup chopped nuts
Icing
- 1/4 cup melted butter
- 1/4 cup can milk, regular milk is fine
- 1/4 cup cocoa
- 1 teaspoon vanilla extract
- 3 cups powdered sugar
- dash salt
Instructions
Make Brownies
- Arrange an oven rack in the center position. Preheat oven to 350ºF (177ºC). Line a 9X13-inch baking dish with parchment paper.
- In a saucepan, melt the butter (1 cup), cocoa powder (1/2 cup), and decaf coffee crystals (1/2 teaspoon) over medium-low heat, until smooth and shiny. Remove from heat.
- Let the mixture cool for 5–10 minutes, or until it's warm but no longer hot to the touch (this prevents the eggs from cooking when added).
- Transfer the cooled mixture to a large mixing bowl. Add sugar (2 cups), eggs (4), and vanilla (1 tablespoon). Beat with an electric mixer on medium speed for 2–3 minutes, until lightened in color and slightly thickened.
- Add the flour (1 1/2 cups) and mix on low speed just until combined. Fold in chopped nuts (1 cup), if using.
- Pour the batter into the prepared baking dish and spread evenly. Bake for 20–22 minutes, or until a toothpick inserted in the center comes out with a few moist crumbs. Do not overbake.
Make Icing
- While the brownies bake, combine the softened butter (1/4 cup), milk (1/4 cup), cocoa powder (1/4 cup), vanilla extract (1 teaspoon), powdered sugar (3 cups), and salt (dash) in a mixing bowl. Whisk until smooth, or use an electric mixer on low speed.
- Pour the icing over the warm (not hot) brownies and spread evenly to cover.


Notes
- Getting that glossy, crackly frosting. For that classic lunchroom shine, spread the icing over brownies that are warm but not steaming hot. The warmth melts the sugar slightly, and as the brownies cool, the sugar recrystallizes, creating that smooth, glossy finish with a soft little crackle on top.
- Don’t chase a clean toothpick. A clean toothpick usually means overbaked brownies. Instead, look for a few moist crumbs, a slightly matte surface, and tiny bubbles across the top. The center should have a gentle spring when pressed. That’s your signal they’ll stay fudgy instead of drying out.
- Use a metal pan for the most even bake. Metal 9×13 pans bake more evenly and prevent overdone edges. Glass pans hold heat longer, which can cause the sides to overbake before the center is set — especially with thick brownies like these.
- Want thin cafeteria-style brownies? If you remember thinner school lunch brownies, bake this batter in a 10×15-inch jelly roll pan instead. Start checking around 15–18 minutes, since thinner brownies cook faster and can dry out quickly.
- Choose your cocoa wisely. Natural unsweetened cocoa (like Hershey’s) delivers that classic, nostalgic cafeteria flavor. Dutch-process cocoa works too, but it produces a smoother, slightly darker, less “lunchroom” taste. Both are good — they’re just different.
- Keep them fudgy, not cakey. Once you add the flour, mix just until it disappears. Overmixing develops gluten and shifts the texture toward cake instead of that dense, moist brownie bite.

Leave a Reply